
Tools
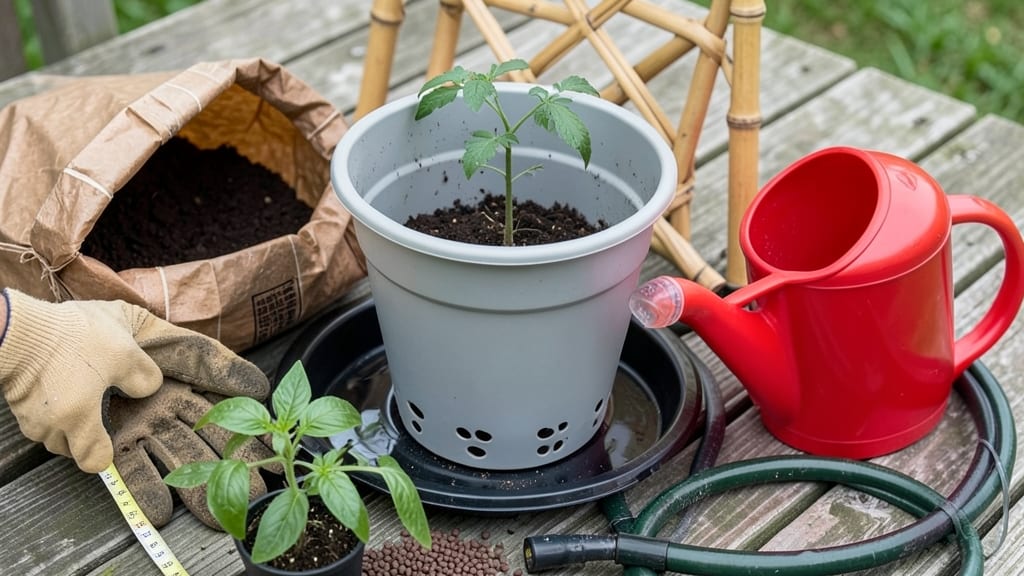
Building a bucket garden turns a single 5-gallon container into a thriving mini-farm. 🌱 I’ve turned my balcony into a productive green space using nothing but buckets, soil, and a few simple tools—no fancy setups required.
This isn’t just about saving space; it’s about growing fresh herbs, veggies, or flowers without the hassle of a full garden bed.
The beauty of bucket gardens is their simplicity. You’ll need 5-gallon buckets (cleaned and with drainage holes), potting mix, a few plants (herbs like basil or lettuce work perfectly), and basic supplies like gloves and a watering can.
No digging, no weeding—just fill, plant, and watch it grow. My first bucket garden produced enough basil for months in just 30 days.
You’ll end up with a low-maintenance, high-reward growing system that fits anywhere. The right plants thrive in buckets—think cherry tomatoes, peppers, or even strawberries—while keeping pests and weeds at bay. Plus, you can move the buckets around to chase sunlight or protect from rain.
Perfect for renters, small spaces, or anyone tired of struggling with traditional gardens. Whether you’re growing for flavor, beauty, or just the joy of watching plants grow, this method delivers fast results with minimal effort. Let’s get those buckets planted!
📚 In This Guide
- What you need
- Instructions
- Tips and common mistakes
- Wrapping up and next steps
What you need
- ● 5-gallon buckets (3–5 buckets, depending on plants) Choose food-grade buckets (e.g., plastic food storage bins) with drainage holes or drill your own (1/4" diameter, spaced 2–3" apart).
- ● Pro tip: 💡 Label them! Use a permanent marker or sticker to track plant types and planting dates.
- ● Potting mix (1–2 bags, 2–3 cubic feet total) Use a lightweight, well-draining mix (e.g., 60% peat moss/coir, 30% perlite, 10% compost). Avoid garden soil—it compacts and suffocates roots!
- ● Budget hack: 🔥 Mix 50% coconut coir + 50% compost for a DIY blend.
- ● Drainage solution Plastic mesh (e.g., blank">landscape fabric or blank">hardware cloth) to cover holes.
- ● OR gravel/rocks (1–2" layer at the bucket’s base).
- ● Seeds or seedlings Pick compact varieties (e.g., cherry tomatoes, lettuce, basil, or dwarf peppers). Check seed packets for "container-friendly" labels!
- ● Drill (with 1/4" bit) – for making drainage holes (if your bucket lacks them).
- ● Measuring tape – to ensure holes are evenly spaced.
- ● Scissors or utility knife – for cutting drainage mesh or labels.
- ● Spray bottle – for gentle watering (especially for seedlings).
- ● Gloves – to keep hands clean while handling soil.
- ● Bucket handles or hooks – for easy hanging (if space is ultra-limited).
- ● Self-watering kit (e.g., blank">wick system) – reduces maintenance.
- ● Grow lights (LED, 12–15W) – for indoor setups or low-light areas.
- ● Saucer trays – to catch runoff and prevent messes.
- ● Fertilizer (e.g., blank">fish emulsion or slow-release pellets) – for nutrient boosts.
Step-by-step instructions for building a bucket garden
Here's how to create a thriving mini-garden in record time—no fancy tools required.
🪴 Step 1: Gather and Prepare Your Buckets
Start with four clean, 5-gallon buckets (I use food-grade plastic because they're lightweight and durable). Poke four to six drainage holes in the bottom of each with a nail or drill—this prevents root rot by letting excess water escape. If your buckets have handles, cut them off or drill extra holes to avoid water pooling.
Wash the buckets thoroughly with soapy water to remove any factory residue or debris. Rinse well and let them dry completely before proceeding. I like to sand the edges slightly to prevent sharp corners from scratching hands during watering.
🌱 Step 2: Add Drainage and Fill With Soil
Place a 1-inch layer of gravel or broken pottery at the bottom of each bucket. This creates a drainage layer that keeps roots from sitting in soggy soil. Next, fill each bucket ¾ full with a high-quality potting mix—avoid garden soil, which compacts and suffocates roots.
Tap the buckets gently on the table to settle the soil without compacting it. The mix should feel light and airy, like a fluffy cake batter. Press down just enough to create a firm base for planting, but don't pack it tight. Leave about 1 inch of space at the top for watering.
☀️ Step 3: Plant Your Choices
Select plants that thrive in containers, like herbs (basil, parsley), leafy greens (lettuce, spinach), or compact vegetables (bush beans, cherry tomatoes). Dig a hole in the soil twice as wide as the root ball but only as deep as the plant's container. Gently remove your plant from its nursery pot and place it in the hole.
Fill the hole with soil and press lightly around the base to eliminate air pockets. Water immediately after planting to help settle the roots. I like to add a slow-release fertilizer mixed into the top inch of soil for an extra nutrient boost—this ensures your plants have food for the first few weeks.
💧 Step 4: Position and Water Regularly
Place your buckets in a spot with at least 6 hours of sunlight daily. A south-facing window, balcony, or patio works perfectly. If you're using herbs like basil, rotate the buckets a quarter turn every few days to prevent leaning toward the light. Water when the top inch of soil feels dry—usually every 2-3 days, but adjust based on your climate.
Water deeply until it runs out the drainage holes, then empty any excess from the saucer. Overwatering is the biggest mistake—buckets dry out faster than garden beds, so check soil moisture daily during hot weather. A moisture meter helps, but I rely on the finger test: stick your finger in the soil and feel for dryness.
✂️ Step 5: Maintain and Harvest
Fertilize every 4-6 weeks with a balanced liquid fertilizer to keep plants producing. Prune regularly to encourage bushier growth—pinch off the tips of herbs like basil to promote more leaves, and harvest outer leaves of greens to stimulate new growth.
Watch for pests like aphids or spider mites, which love container gardens. Spray with neem oil or a soapy water solution at the first sign of trouble. With consistent care, your bucket garden will yield fresh herbs and veggies in as little as 4-6 weeks—perfect for small spaces or urban balconies!
Tips & tricks for perfect bucket garden setups
These simple strategies will help your container garden thrive without the guesswork—no green thumb required.
Bucket Selection Wisdom: Food-grade plastic buckets are my go-to because they're lightweight and won't crack under seasonal temperature swings. Avoid metal buckets—they can heat up too much in sunlight and stress your plants. If you're using fabric grow bags instead, make sure they have built-in drainage. I've seen people reuse old paint buckets with holes drilled in the bottom, but always give them a thorough cleaning first to remove any toxic residue.
Drainage Layer Details: That 1-inch layer of gravel or broken pottery isn't just for show—it's your first line of defense against root rot. I like to use clean river rocks because they're easier to find than pottery shards. Pro tip: Rinse the gravel first to remove any dust or debris that could clog your drainage holes. If you're using large rocks, you might need 1.5 inches instead of 1 inch to maintain proper drainage.
Soil Preparation Secret: The "fluffy cake batter" texture test is spot-on—your potting mix should crumble easily between your fingers when lightly squeezed. If it feels compacted, add more perlite or vermiculite (about 10% of the soil volume) to improve aeration. I always mix in a handful of worm castings at this stage for an instant nutrient boost that your plants will love. Avoid garden soil completely—it's too dense and will suffocate your container plants.
Light Rotation Hack: For herbs like basil that grow toward the light, I use a simple quarter-turn rotation method every few days. You can even set a phone reminder for this—it takes less than 30 seconds per bucket. If you notice leaves turning yellow or plants leaning dramatically, that's your cue to move them to a sunnier spot immediately. Remember, those 6 hours of sunlight are non-negotiable for most edible plants.
Pro Tips for Build A Bucket Garden
- These simple strategies will help your container garden thrive without the guesswork—no green thumb required.
- Bucket Selection Wisdom: Food-grade plastic buckets are my go-to because they're lightweight and won't crack under se...
- Drainage Layer Details: That 1-inch layer of gravel or broken pottery isn't just for show—it's your first line of def...
Frequently asked questions
Got questions about bucket gardening? You’re not alone! Here are answers to the most common ones to help you grow with confidence.
What’s the best material for a bucket garden?
Use food-grade 5-gallon buckets (like those for paint or water) or fabric grow bags. Avoid treated wood or plastic with harmful chemicals. Drill drainage holes yourself if they’re missing—safety first!
Can I grow anything in a bucket garden?
Yes! Try herbs (basil, mint), greens (lettuce, spinach), tomatoes, peppers, or strawberries. Avoid heavy feeders like corn or squash—they need more space. Stick to compact, fast-growing plants for best results.
How often should I water a bucket garden?
Check soil moisture daily—buckets dry out faster than ground soil. Water when the top inch feels dry, usually every 1–2 days in hot weather. A self-watering system (like a drip line) saves time and effort!
What do I do if bugs or mold appear?
Start with neem oil or insecticidal soap for pests. For mold, improve airflow by spacing buckets apart and avoiding overhead watering. Prevention is key: Use fresh potting mix and sterilize buckets before reuse.
Can I move my bucket garden indoors?
Yes! Place buckets near a sunny window (south-facing) or under grow lights for 6–8 hours of light daily. Herbs and leafy greens adapt best. Just monitor humidity—indoor air can dry out soil faster.
Pro Tip:
Label your buckets! Use masking tape and markers to track plant types, watering schedules, and harvest dates. Trust us—you’ll thank yourself later.
Wrapping up and next steps
Building a bucket garden is your ticket to a thriving, space-saving harvest—no green thumb required! 🌱 With just a few supplies and 15 minutes of effort, you’ve unlocked fresh produce for balconies, patios, or even your kitchen counter. Remember: consistency is key, but the rewards—crisp greens, juicy tomatoes, or fragrant herbs—are worth every drop of water and dash of love.
Ready to grow beyond the bucket? Start small, celebrate your first harvest, and then expand! Try swapping out containers, experimenting with companion plants, or even gifting your newfound skills to a friend. Your garden’s potential is as limitless as your creativity—happy planting! 🌿✨