
Orchid Care
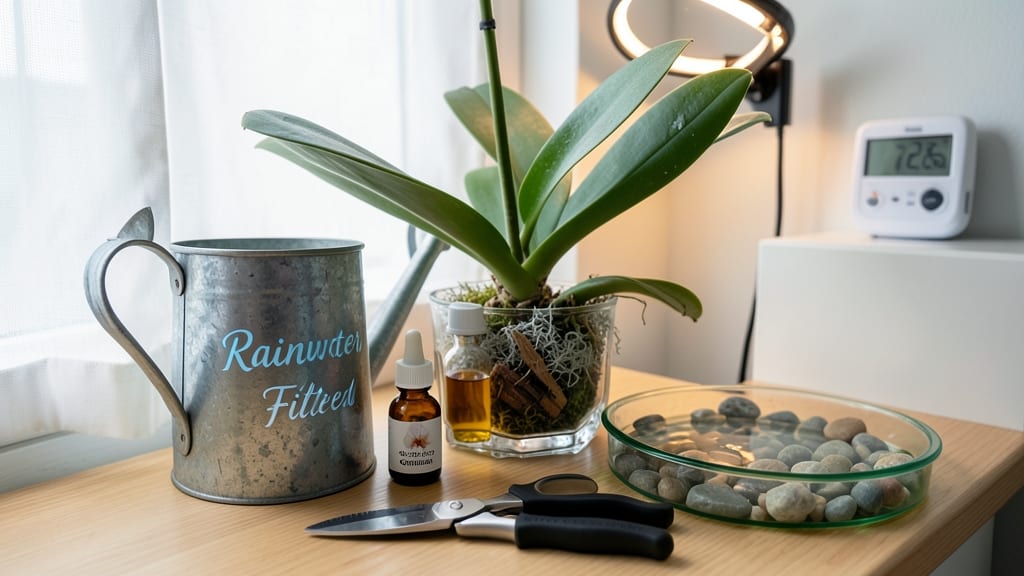
Now that your orchid has dropped its last bloom, here’s how to care for indoor orchids after flowering—because the right steps now will determine next season’s glory. ✨ The moment you prune that spent flower spike wrong, you risk losing next season’s blooms.
I’ve learned the hard way that proper post-flowering care turns a one-time showstopper into a reblooming powerhouse.
Start with the flower spike: cut it back to a node (for Phalaenopsis) or remove it entirely (for Cattleya). Reduce watering by half—orchids hate soggy roots after blooming—and move them to bright, indirect light. Fertilize lightly every 4-6 weeks with a balanced orchid mix to encourage new growth.
You’ll notice fresh green leaves and potential new flower spikes in 8-12 weeks. The key is patience—yellowing leaves mean overwatering, while no new growth often signals low light. Repot every 2-3 years to refresh the medium, but only when roots outgrow the pot.
This routine works for Phalaenopsis, Cattleya, and Dendrobium—just adjust pruning based on the variety. With consistent care, your orchid will reward you with another stunning bloom cycle in no time.
📚 In This Guide
- What you need
- Instructions
- Tips and common mistakes
- Wrapping up and next steps
What you need
- ● Pruning shears or sterilized scissors – Sharp, clean tools to avoid damaging the plant. (1 pair)
- ● Alcohol (70% isopropyl) or bleach – For sterilizing tools before and after use. (Small bottle or spray)
- ● Potting mix for orchids – Well-draining, bark-based mix (e.g., coconut husk chips, sphagnum moss, or fir bark). (1 bag, ~2-3 lbs)
- ○ New orchid pot (optional but recommended) – Choose a slotted plastic or terracotta pot (1-2 inches larger than the current one).
- ● Balanced orchid fertilizer – Look for a 20-20-20 or 10-10-10 NPK ratio (diluted to half-strength). (Small bottle, ~8 oz)
- ● Watering can or spray bottle – With a fine rose attachment to avoid overwatering. (1)
- ○ Cinnamon powder (optional) – Natural antifungal agent for pruning cuts. (Small jar)
- ○ Gloves (optional) – To protect hands from sharp tools or fertilizer residue. (1 pair)
- ● Bright, indirect light – Place near an east or north-facing window (avoid direct sun).
- ● Humidity (50-70%) – Use a humidifier or pebble tray if your home is dry.
- ● Temperature range – Keep between 60-80°F (15-27°C) during the day, 50-60°F (10-15°C) at night.
- ● Good airflow – A small fan on low (1-2 hours/day) prevents rot.
Step-by-Step instructions for orchid post-flowering care
Here's the precise routine I follow to revive my orchids and set them up for their next stunning bloom cycle.
✂️ Step 1: Prune Spent Flower Stems Correctly
Wait until the blooms have fully faded and the stem turns yellow or brown before pruning. Using sharp, sterilized scissors, cut the stem 1 inch above a visible node—this is where new growth can emerge. I always check for dormant buds along the stem first; if you see any, leave them attached for potential new blooms.
Never cut the stem at the base unless it's completely dried up. This ensures the plant can redirect energy to new growth rather than wasting it on a dead stem. After pruning, wipe down the cut area with a diluted alcohol solution to prevent bacterial infections.
💧 Step 2: Adjust Watering to Encourage Rest Period
Reduce watering frequency to every 10-14 days once the blooms fade. Let the roots dry out slightly between waterings—you'll know it's time when the potting mix feels dry to touch about an inch below the surface. Overwatering now stresses the plant and prevents it from entering its natural rest phase.
Use room-temperature water and avoid getting water on the leaves or crown. I like to water by placing the pot in a shallow tray of water for 10 minutes, then letting it drain completely. This mimics natural rainfall and prevents root rot, which is especially critical after flowering.
☀️ Step 3: Provide Bright, Indirect Light and Moderate Temperatures
Move your orchid to a spot with bright, indirect light—east or west-facing windows work best. Direct sunlight can scorch the leaves, while too little light weakens the plant. You'll see healthy leaves as a sign it's getting the right light; they should stay a vibrant green without yellowing or browning.
Keep temperatures between 65-75°F during the day and 55-65°F at night to encourage blooming. A slight temperature drop at night mimics natural conditions and signals the plant to prepare for its next flower spike. Avoid drafts, including air conditioning vents or heating ducts.
🌿 Step 4: Fertilize Lightly to Support New Growth
Resume feeding with a balanced orchid fertilizer diluted to half-strength every 4-6 weeks during the growing season. I switch to a fertilizer with slightly higher phosphorus content (like 10-30-20) to encourage root and flower development. Always water the plant first to avoid fertilizer burn.
Stop fertilizing completely in late fall or early winter when the plant enters dormancy. You'll notice new growth emerging from the nodes after a few weeks of proper care—this is your cue that the plant is actively preparing for its next bloom cycle.
⏰ Step 5: Monitor for New Growth and Adjust Care
Watch for new shoots or spikes emerging from the base of the plant, which typically happens 4-8 weeks after pruning. These indicate the plant is ready to resume regular care. Increase watering slightly if you see new growth, but avoid overwatering—soggy roots will halt progress.
Rotate the pot a quarter turn weekly to ensure even light exposure and prevent the plant from leaning. If you notice any yellowing leaves, reduce light intensity slightly. By late winter, your orchid should be showing signs of new flower spikes, signaling it's time to ramp up care for the next bloom cycle.
Tips & tricks for reviving indoor orchids after blooming
Here's what nobody tells you about keeping your orchids thriving after those stunning blooms fade.
Pruning Precision: When pruning in Step 1, use a magnifying glass to check for those tiny dormant buds along the stem. I've missed potential blooms by cutting too close to the base—always leave that 1-inch buffer above the node. Sterilize your scissors with rubbing alcohol between cuts to prevent cross-contamination that can lead to bacterial infections.
Watering Wisdom: The 10-minute soak method in Step 2 works wonders, but don't let the pot sit in standing water afterward. Orchid roots need oxygen too! I place my pots on a wire rack in a shallow tray to ensure complete drainage. During the 10-14 day watering cycle, stick your finger about an inch into the mix—if it feels damp, wait another day.
Lighting Strategy: East-facing windows provide perfect morning light without the harsh afternoon sun, but if that's not an option, use sheer curtains to diffuse light from west-facing windows. I've seen orchids develop sunburn spots when placed too close to south-facing windows—watch for pale or crispy leaf edges as warning signs.
Temperature Transition: The nighttime temperature drop between 55-65°F is crucial for signaling blooming, but don't create drafts. I place my orchids near windows at night where cooler air naturally sinks, while keeping them away from air conditioning vents during the day. This mimics their natural tropical forest environment where they experience these daily temperature fluctuations.
Pro Tips for Care For Indoor Orchids After Flowering
- Here's what nobody tells you about keeping your orchids thriving after those stunning blooms fade.
- Pruning Precision: When pruning in Step 1, use a magnifying glass to check for those tiny dormant buds along the stem...
- Watering Wisdom: The 10-minute soak method in Step 2 works wonders, but don't let the pot sit in standing water after...
Frequently asked questions
Got questions about post-flowering orchid care?
Here are some of the most common concerns—and straightforward answers—to keep your orchids thriving for their next spectacular bloom!
How do I know when my orchid is done flowering?
Watch for drooping or yellowing flower spikes and no new buds forming—this signals the end of the blooming cycle. Some orchids (like Phalaenopsis) may rebloom from the same spike, but most need pruning after 2–3 months of dormancy. Cut the spike 1 inch above a node if it’s brown or dead, or just above a sleeping bud if it’s green.
Should I cut the flower spike after blooming?
Yes! Pruning encourages new growth. For dead or brown spikes, trim them off at the base. If the spike is green and healthy, cut it above a node (a small bump where buds may form). Avoid cutting too close to the base—this can stress the plant. Pro tip: Sterilize scissors with rubbing alcohol to prevent infection!
Can I fertilize my orchid right after cutting the spike?
Wait 4–6 weeks before fertilizing again to avoid burning the plant. Once you resume, use a balanced orchid fertilizer (20-20-20) at half-strength every 2–4 weeks during active growth (spring/summer). Reduce frequency in winter when growth slows. Bonus: Flush the soil with water monthly to prevent salt buildup!
Why aren’t new leaves or spikes growing after flowering?
Common causes include low light, overwatering, or nutrient deficiency. Check these:
- Light: Move to bright, indirect light (east/west windowsill).
- Water: Let the roots dry slightly between waterings—soggy pots = root rot.
- Food: Switch to a higher nitrogen fertilizer (e.g., 30-10-10) to boost leaf growth.
How can I encourage my orchid to rebloom faster?
Reblooming takes patience, but these tricks help:
- Temperature shift: Drop night temps by 10–15°F for 2–3 weeks (e.g., 55–60°F) to mimic seasonal changes.
- Phosphorus boost: Use a high-phosphorus fertilizer (10-30-20) to promote flowering.
- Repot if needed: Orchids rebloom better in fresh, well-draining media every 1–2 years.
Wrapping up and next steps
Caring for your orchids after flowering is all about patience, consistency, and a little love—and you’ve got this! 🌱 With the right pruning, feeding, and light adjustments, your plants will thrive and reward you with stunning blooms next season. Remember, every expert was once a beginner, so don’t hesitate to experiment and learn from each cycle.
Your next step? Observe your orchid closely—notice how it responds to your care. Adjust as needed, and soon, you’ll be a pro at coaxing those gorgeous flowers back to life. Happy growing! 🌸