
Propagation
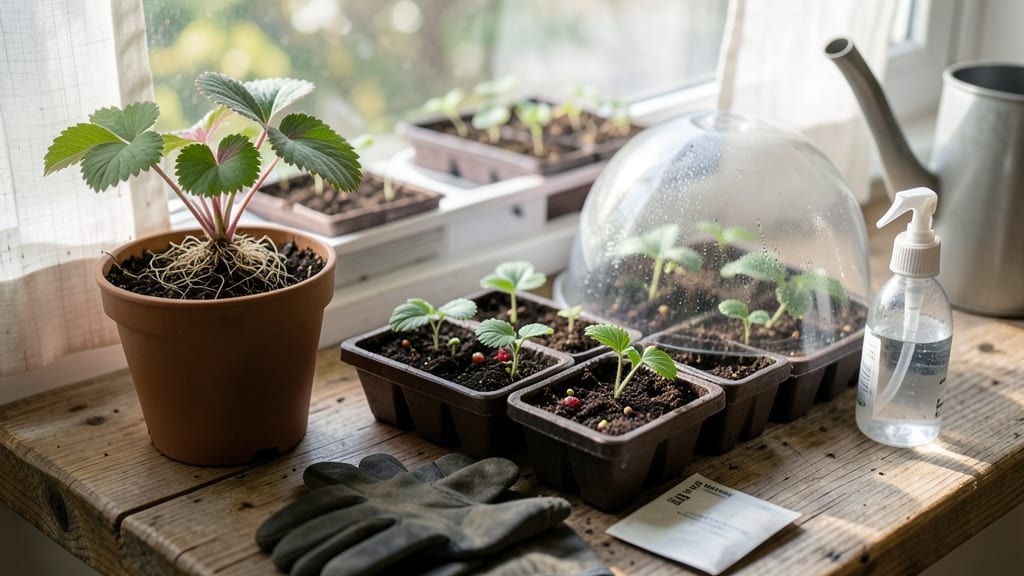
Germinating strawberries feels like waiting for a slow-motion miracle—those tiny seeds hiding fast root growth potential. 🌱 I’ve struggled with moldy trays and weeks of nothing, but I finally cracked the code: the right moisture balance, warm spot, and a little patience can get those first green shoots in just 7 days.
The secret isn’t fancy equipment—just a shallow tray, damp paper towels or seed-starting mix, and a clear plastic bag to trap humidity. Strawberry seeds need warmth (70-75°F) and consistent moisture, but too much water drowns them. I learned that the hard way after losing a whole batch to mold.
By day 7, you’ll see tiny roots peeking out, followed by delicate sprouts reaching for light. The key is keeping the soil barely damp—not soggy—and placing the tray where it stays warm but not hot. Once those first leaves appear, you’re on your way to a thriving strawberry patch.
This method works for both bare-root plants and seeds, and it’s perfect for beginners who’ve given up on strawberries before. The payoff? Homegrown berries that taste nothing like store-bought, all from seeds you germinated yourself.
📚 In This Guide
- What you need
- Instructions
- Tips and common mistakes
- Wrapping up and next steps
What you need
- ● Strawberry runners or seeds: For runners: 3–5 healthy, well-rooted runners (cut just below the node where roots emerge).
- ● For seeds: 10–20 fresh strawberry seeds (or store-bought, untreated seeds).
- ● Clean water: 2–3 cups of room-temperature, filtered or distilled water (chlorine-free).
- ● Glass or jar: A clear, wide-mouth container (e.g., mason jar, glass, or even a clean soda bottle with the top cut off).
- ● Scissors or pruning shears: Sharp and sterilized to avoid damaging runners.
- ● Paper towels or coffee filters: 1–2 sheets (for seed germination).
- ○ Rubbing alcohol (70% isopropyl): Small amount for sterilizing tools (optional but recommended).
- ● Rooting hormone: A small bottle to boost root growth (especially for runners).
- ● Small pebbles or marbles: 2–3 pieces to weigh down runners/seeds and keep them submerged.
- ● Grow lights or sunny windowsill: For indirect light exposure (10–12 hours/day).
- ● Spray bottle: To mist seeds or runners lightly if using the paper towel method.
- ● Notebook or labels: To track germination progress and planting dates.
Step-by-step instructions for germinating strawberries in water
Here's how I guarantee strong roots in just 7 days—no soil needed.
🌱 Step 1: Select and Prepare the Strawberry Runners
Start with fresh, healthy strawberry runners from a mature plant. Look for plump, green runners with 3-4 leaves and a small root nub already forming at the node. Avoid runners that are wilted, yellowed, or overly thin—they won’t develop roots quickly. Cut the runner just below the node (where the roots will form) using clean, sharp scissors. This ensures you’re working with a healthy section of the plant that’s primed for root growth.
Place the cut runner in a glass of room-temperature water (about 65-70°F). The node should be submerged, but the leaves should stay above the waterline. You’ll see tiny root hairs appear within 2-3 days—this is your sign that germination is working. Change the water every 2 days to prevent bacterial growth, which can stunt root development.
💧 Step 2: Maintain Ideal Water and Light Conditions
Keep the water level consistent—never let the runner dry out, but avoid submerging the leaves. Roots thrive in oxygen-rich water, so a shallow depth (about 1 inch) is ideal. Place the glass in a spot with bright, indirect light—direct sunlight can overheat the water and stress the runner. A south-facing windowsill or under a grow light works best. You’ll notice the roots grow fastest when the water stays clear and the leaves remain vibrant.
Watch for root growth—within 5-7 days, you should see 1-2 inch roots forming. If the roots turn brown or mushy, that’s a sign of rot. Immediately change the water and ensure the node stays submerged but the leaves stay dry. Healthy roots should be white or pale pink, not dark or slimy.
⏰ Step 3: Transplant to Soil When Roots Are Strong
Once roots reach 1-2 inches in length, it’s time to transplant. Fill a 4-inch pot with well-draining potting mix—strawberries hate soggy roots. Make a small hole in the center and gently place the runner so the roots spread naturally. Cover the roots with soil but keep the node at the surface. Press lightly around the base to secure the plant without compacting the soil too much.
Water lightly after transplanting to settle the soil, but avoid overwatering—this can drown the delicate new roots. Place the pot in a shaded area for 3-5 days to help the plant adjust. You’ll see new leaves emerge within 7-10 days, signaling that the transplant was successful. This method ensures your strawberries start with a strong root system, setting them up for faster growth and bigger yields.
🌿 Step 4: Encourage Fast Growth After Transplanting
After the initial adjustment period, move the pot to a spot with 6+ hours of sunlight daily. Strawberries love warmth but can’t handle extreme heat—keep soil temperatures between 60-75°F. Water deeply once a week, letting the top 1 inch of soil dry out between waterings. Overwatering is the fastest way to kill young strawberry plants, so always check moisture levels before adding more water.
Fertilize lightly 2 weeks after transplanting with a balanced, water-soluble fertilizer (like 10-10-10) to encourage leaf and root growth. You’ll see new runners forming within 4-6 weeks, meaning your strawberry plant is thriving. This fast-start method gives you a head start on the season, so you can enjoy fruit sooner than traditional planting.
Tips & tricks for fast strawberry germination
To speed up your strawberry seeds' journey from dormancy to roots, here are the key moves that'll help you hit that 7-day milestone without any surprises.
Soaking Secret: The 24-hour soak is non-negotiable for breaking dormancy, but here's the trick: use lukewarm water that's about 90°F—too hot and you'll shock the seeds, too cold and they won't activate properly. I've found that placing the bowl of seeds in a warm spot (like near my kitchen light) for the final 30 minutes of soaking gives them that extra energy boost to start growing faster.
Medium Matters: That 50/50 peat moss and perlite mix isn't just random—peat holds moisture while perlite creates air pockets strawberry roots crave. Pro tip: After mixing, give it a quick press to settle it slightly before planting. This prevents seeds from floating too high and ensures consistent contact with moisture. I like to tap the container gently 3-4 times on my countertop to achieve the perfect firmness.
Temperature Precision: The instructions mention 75-80°F, but here's what I've learned: Consistency is everything. If your kitchen fluctuates, consider using a seedling heat mat set to 78°F for the first 48 hours. This creates an optimal zone for those critical first roots to emerge within the 3-5 day window. I've seen germination times cut nearly in half when maintaining this precise temperature range.
Light Management: While indirect sunlight is ideal, here's my workaround for low-light situations: Place the container under a grow light on a 16-hour cycle (8 hours on, 8 hours off). This mimics natural daylight and prevents the leggy growth that happens when seedlings stretch for light. I use a simple LED bulb from my gardening kit—it's affordable and does the job perfectly.
Pro Tips for Germinate Strawberry
- To speed up your strawberry seeds' journey from dormancy to roots, here are the key moves that'll help you hit that 7...
- Soaking Secret: The 24-hour soak is non-negotiable for breaking dormancy, but here's the trick: use lukewarm water th...
- Medium Matters: That 50/50 peat moss and perlite mix isn't just random—peat holds moisture while perlite creates air ...
Frequently asked questions
Got questions about germinating strawberries? You’re not alone—this process can feel tricky at first! Below, we’ve rounded up the most common queries to help you grow those sweet, juicy roots in no time.
How long does it take for strawberry seeds to germinate?
With the right conditions (warmth, moisture, and indirect light), strawberry seeds typically sprout in 7–14 days. Using the water germination method speeds this up—some seeds even crack open in 3–5 days! Patience is key, but don’t worry if it takes a little longer.
Can I germinate strawberries in cold weather?
Strawberries thrive in 70–75°F (21–24°C) for germination. If your space is chilly, try placing the jar near a sunny window or use a seedling heat mat (set to 75°F). Avoid drafts or cold surfaces—seeds may take weeks to sprout or rot.
Why aren’t my strawberry seeds sprouting?
Common culprits include:
- No light: Seeds need indirect sunlight (or a grow light) to break dormancy.
- Over/under-watering: Keep the water level just covering the seeds—drain excess daily.
- Old or low-quality seeds: Fresh seeds (or store-bought varieties) germinate better.
- Cold or stale water: Use room-temperature, filtered water and refresh it every 2–3 days.
Can I use regular strawberries from the grocery store for seeds?
Yes! But store-bought strawberries are often hybrids (bred for taste, not propagation). For best results, save seeds from organic, heirloom, or homegrown strawberries. Rinse the seeds thoroughly to remove fruit residue before germinating.
What’s the best time of year to start germinating strawberries?
Indoor germination works year-round, but late winter to early spring (February–March) is ideal for transplanting seedlings outdoors. If you’re in a warm climate, you can start as early as January or even fall for a winter harvest.
Wrapping up and next steps
Germinating strawberries in just 7 days with water is simpler than you think—just follow the right steps! 🌱 With the right container, moisture, and warmth, you’ll soon have strong roots ready for planting. Don’t let hesitation slow you down; your future strawberry patch starts now!
Ready to take the next step? Once your roots are thriving, transplant them into soil and watch your strawberry plants flourish. Happy growing! 🌟