
Propagation
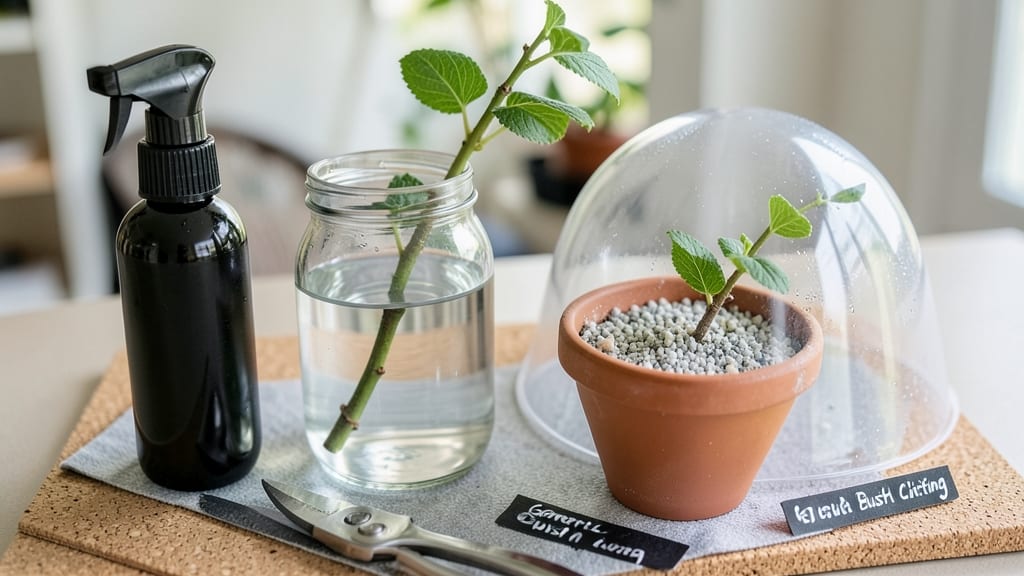
How to grow a bush from a cutting feels like magic—one snip turns into a whole new plant. 🌿 I’ve propagated everything from hydrangeas to roses, and the secret isn’t complicated: timing, the right tools, and a little patience. The best time to take cuttings is late spring or early summer, when plants are actively growing but not yet flowering. That’s when they’re most eager to root and thrive.
You’ll need just a few things: sharp pruners (clean cuts mean better survival rates), rooting hormone (optional but helpful), small pots with drainage holes, and a mix of perlite and peat moss for lightweight, airy soil.
Avoid overwatering—this is where most beginners go wrong. The goal is to keep the cutting moist but not soggy, so a spray bottle works better than a watering can.
By following the right steps—dipping the cut end in hormone, planting at the perfect depth, and keeping humidity high with a plastic bag—you’ll see roots forming in just a few weeks.
The payoff? A bush that’s genetically identical to the parent, ready to fill your garden with vibrant blooms or lush foliage without breaking the bank.
Whether you’re multiplying your favorite hydrangea or reviving a dying rose, this method works for almost any woody plant. The key is consistency: check moisture, avoid drafts, and resist the urge to move the cutting too soon.
Before you know it, you’ll have a thriving new plant—proof that even the simplest snip can grow into something extraordinary.
📚 In This Guide
- What you need
- Instructions
- Tips and common mistakes
- Wrapping up and next steps
What you need
- ● Healthy parent plant: A mature, disease-free bush with strong stems (choose non-flowering or semi-hardwood cuttings for best results).
- ● Sharp pruning shears or knife: Clean, sterilized tools to make precise cuts (avoid jagged edges!).
- ○ Rooting hormone (optional but recommended): A powder or gel to boost root growth (e.g., Clonex or Rootone).
- ● Well-draining potting mix: A blend of perlite, vermiculite, or sand with peat moss or coconut coir (avoid garden soil—it compacts!).
- ● Small pots or trays: 3–4 inch pots with drainage holes (or a propagation tray with cells).
- ● Clear plastic bag or humidity dome: To retain moisture (yogurt cups with plastic wrap work too!).
- ● Watering can or spray bottle: For gentle hydration (avoid soaking the cutting).
- ● Label markers & sticks: To track plant types and dates (trust us, you’ll forget!).
- ● Heat mat: Keeps cuttings warm (70–75°F is ideal for rooting).
- ● Grow lights: If propagating indoors with low natural light.
- ● Fungicide: Like Mycorrhizal inoculant to prevent rot.
- ● Twine or rubber bands: For securing humidity domes snugly.
- ● Journal or app: To log progress (e.g., Gardenate or a simple notebook).
Step-by-Step instructions for growing a bush from a cutting
Here's how to turn a simple cutting into a thriving bush—no fancy tools or green thumb required.
🪴 Step 1: Select and Prepare the Cutting
Choose a healthy stem from your parent plant, ideally 4-6 inches long with 3-5 sets of leaves. Use clean, sharp scissors or pruners to make a 45-degree angle cut just below a leaf node—this increases surface area for root growth. Remove the lower leaves, leaving only the top 2-3 sets to reduce moisture loss.
Real talk: Avoid woody stems or flowers—they drain energy from root development. If your cutting has blooms, snip them off immediately. Dip the cut end in rooting hormone (optional but helpful) to encourage faster root formation. I like to do this step in the morning when plants are perky and ready to grow.
💧 Step 2: Set Up the Rooting Environment
Fill a small container with well-draining potting mix (or a 50/50 mix of perlite and peat moss). Moisten it until damp but not soggy—you want it to hold moisture without feeling waterlogged. Stick your prepared cutting 1-2 inches deep into the mix, pressing gently to secure it. Use a toothpick to prop up floppy cuttings if needed.
Place the container in a bright, indirect light spot—think 50-70% shade (like under a sheer curtain). A clear plastic bag or humidity dome helps retain moisture while the roots establish. Check daily and mist the cutting if the mix feels dry to the touch. This step is all about patience—roots take 2-4 weeks to form, depending on the plant type.
☀️ Step 3: Monitor and Encourage Root Growth
After 10-14 days, gently tug on the cutting. If it resists slightly, roots are forming! Keep the soil consistently moist but never waterlogged—overwatering drowns cuttings before they root. If leaves start yellowing, you're overwatering. If they wilt but perk up when watered, you're on track.
Gradually introduce more light after 2 weeks. Start with 2-3 hours of morning sun daily, then increase exposure over 7-10 days. You'll know it's working when new leaves appear—those are your signal that the cutting has successfully rooted. This is the moment that matters: new growth means the plant is now self-sustaining.
🌱 Step 4: Transplant and Care for Your New Bush
Once roots are 2-3 inches long (test by gently pulling the cutting), transplant into a 4-6 inch pot with fresh potting mix. Water deeply to settle the soil, then reduce watering slightly—overwatering is the #1 killer of new transplants. Place in bright, indirect light for another week to help it adjust.
After 2-3 weeks, you can fertilize lightly with a balanced, water-soluble fertilizer (half-strength). Watch for new growth—this confirms your bush is thriving. Don't skip this step: gradual adjustments prevent shock. Within 8-12 weeks, your cutting will be a sturdy, bushy plant ready for its permanent home.
Tips & tricks for growing bushes from cuttings
Took me a while to figure these out, so here goes—these little details make all the difference when growing new plants from cuttings.
Cutting Selection: In Step 1, focus on stems that are pencil-thick (about 1/8-inch diameter) with fresh, vibrant leaves. These are the best candidates for rooting. I've found that morning cuttings work best because the plant's natural sugars are highest after a night's rest. Avoid using stems from overgrown or flowering plants—they're less likely to root successfully.
Rooting Hormone Hack: When you dip your cuttings in rooting hormone during Step 1, give it a gentle shake to distribute the powder evenly. This ensures every part of the cut end gets the growth boost. For extra insurance, I like to dip the cutting again after about 10 minutes if I'm working with particularly stubborn plants like lavender or rosemary.
Light Management: In Step 2, that bright indirect light is crucial—think of it as the Goldilocks zone for your cutting. Too much direct sun can scorch delicate leaves while they're establishing roots. I place mine near an east-facing window where they get gentle morning light. If you notice leaves turning pale or yellow, it's a sign they're getting too much light.
Transplant Timing: In Step 4, don't rush the transplanting. Wait until you see roots at least 2-3 inches long when you gently tug on the cutting. I've learned the hard way that transplanting too soon can shock the plant and stunt its growth. Once you do transplant, give it a week of gentle care before introducing any fertilizer—this helps it adjust to its new home without extra stress.
Pro Tips for Grow A Bush From A Cutting
- Took me a while to figure these out, so here goes—these little details make all the difference when growing new plant...
- Cutting Selection: In Step 1, focus on stems that are pencil-thick (about 1/8-inch diameter) with fresh, vibrant leav...
- Rooting Hormone Hack: When you dip your cuttings in rooting hormone during Step 1, give it a gentle shake to distribu...
Frequently asked questions
Got questions about growing a bush from a cutting? You’re not alone! Here are some of the most common concerns—and their simple solutions—to help you propagate like a pro.
What’s the best time of year to take cuttings?
The ideal time depends on your plant, but spring to early summer is usually best for most bushes. This is when new growth is active, giving your cutting the energy it needs to root. Avoid winter—plants are dormant, and cuttings struggle to take. For tropical plants, you can propagate year-round!
How long does it take for a cutting to root?
Patience is key! Most cuttings take 4–8 weeks to root, though some fast growers (like mint or coleus) may root in just 2–3 weeks. Keep an eye on the base—new growth or tiny roots peeking out mean success. If nothing happens after 10 weeks, try adjusting humidity or light.
Why is my cutting wilting or turning yellow?
Wilting or yellowing usually means too much water, not enough light, or stress. Check your setup: Ensure the cutting isn’t sitting in water (rooting hormone + moist soil is better), and move it to bright, indirect light. Trim any yellow leaves and reduce watering until you see improvement.
Can I grow a bush from a cutting in water first?
Water propagation is a great way to test roots before planting in soil. Use a clean jar with 2–3 inches of water, changing it every 3–5 days to prevent bacteria. Once roots hit 2–3 inches, transfer to soil. Just remember: Not all plants thrive long-term in water (e.g., succulents rot easily).
What if my cutting doesn’t root at all?
Don’t give up! Try these fixes:
- Check the cutting: Ensure it’s healthy, with at least 2–3 sets of leaves and a clean cut (not crushed).
- Adjust conditions: Increase humidity (use a plastic bag or propagator) or move to warmer temps (70–75°F is ideal).
- Try rooting hormone: Dip the cut end in powder or gel to boost success rates.
- Start over: Some plants (like lavender) are finicky—research their specific needs!
Can I reuse old cuttings from last year?
Old cuttings can work, but they’re less likely to root successfully. Woodier stems (from last year’s growth) may need a heating mat or longer time to encourage roots. For best results, stick to current season’s growth—it’s fresher and more responsive!
Wrapping up and next steps
Growing a bush from a cutting is a rewarding journey that combines patience, care, and a little green thumb magic! 🌱 With the right tools, timing, and techniques—like choosing healthy cuttings, rooting hormones, and proper moisture control—you’ll soon be watching new life sprout. Don’t let setbacks discourage you: even experienced gardeners face challenges, but persistence pays off.
Now that you’re armed with knowledge, take the next step—grab those shears and start propagating! Whether you’re reviving a favorite plant or expanding your garden, every cutting is a chance to grow something beautiful. Happy gardening! 🌿