
How To
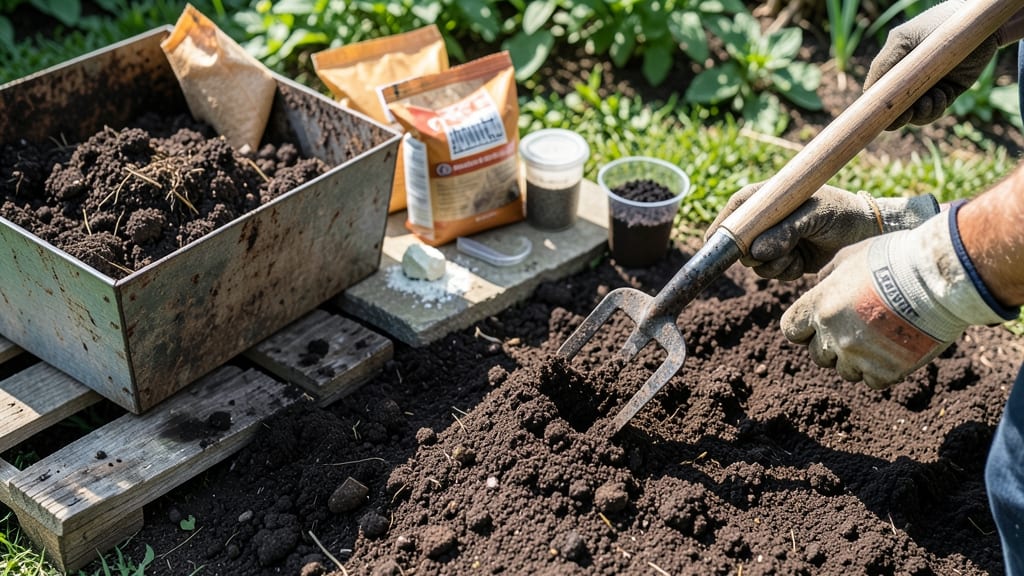
Amending soil isn't just digging—it's creating the perfect foundation for your plants to thrive. 🌱 After years of struggling with compacted, nutrient-poor soil, I finally cracked the code to growing lush vegetables and vibrant flowers without fighting the earth every season.
The right amendments transform your garden from a struggle to a showstopper, and the science behind it is simpler than you think.
Start with a basic soil test to know what your earth is missing—most gardens need more organic matter, better drainage, or adjusted pH. My go-to amendments include compost for nutrients, perlite for drainage, and a touch of lime or sulfur to tweak acidity.
The key is matching your amendments to what your plants actually need, not just throwing everything in at once. For example, blueberries demand acidic soil while tomatoes prefer slightly alkaline conditions.
You'll end up with soil that crumbles like cake batter—not hard clay or sandy wasteland—and plants that grow with shocking speed. Roots spread easily, water drains properly, and nutrients stay available exactly when your plants need them.
The transformation happens in just a few weeks of proper prep, and once you see your first healthy seedlings push through amended soil, you'll never go back.
This method works for raised beds, in-ground gardens, and even container mixes, making it perfect for any space or climate. Let's get your soil ready for planting—your future harvest depends on it.
📚 In This Guide
- What you need
- Instructions
- Tips and common mistakes
- Wrapping up and next steps
What you need
- ● Compost: 2–3 inches (5–7.5 cm) spread evenly over the planting area. Look for dark, crumbly, earthy-smelling compost (avoid fresh manure!).
- ● Organic Matter: Leaf mold or well-rotted leaves: 1–2 inches (2.5–5 cm)
- ○ Peat moss or coconut coir: 1–2 cups per sq. ft. (optional for sandy soils)
- ● Soil Amendments (pick 1–2 based on your soil type): Sandy soil: 1 part clay or silt (e.g., topsoil) per 2 parts sand
- ● Clay soil: 1 part organic matter (compost/peat) per 3 parts clay
- ● Acidic soil: 1 cup crushed limestone per 10 sq. ft. (for veggies/berries)
- ● Slow-release fertilizer: 1 lb. per 100 sq. ft. (e.g., 10-10-10 or organic options like bone meal)
- ● Garden fork or tiller (for deep mixing, rent if you lack space)
- ● Garden rake (bowl or leaf rake)
- ● Garden gloves (heavy-duty for compost/soil)
- ● Wheelbarrow or bucket (5–10 gallon capacity)
- ● pH test kit (digital or liquid test strips, $10–$20)
- ● Measuring tape or string (to mark soil depth)
- ● Biochar: 1 cup per sq. ft. (boosts water retention)
- ● Worm castings: ½ cup per sq. ft. (for micronutrients)
- ● Mulch (straw, wood chips): 2–3 inches (5–7.5 cm) post-planting
- ● Soil probe (for checking depth/compaction)
- ● Rain gauge (to track moisture after amending)
Step-by-Step guide to amending soil for planting
Healthy soil is the foundation of a thriving garden—here's how to transform your plot into fertile ground.
🌱 Step 1: Test Your Soil's Current Condition
Before adding anything, grab a handful of moist soil and squeeze it. If it crumbles easily, you have good structure, but if it forms a tight ball that won't break apart, it's too compacted. I also check the color—dark brown or black means organic matter is present, while pale or grayish soil needs serious help.
For a more accurate read, use a simple soil test kit (available at garden centers) to measure pH and nutrient levels. Most vegetables prefer a slightly acidic to neutral range of 6.0-7.0. If your soil tests high in clay or sand, you'll need to adjust its texture and fertility accordingly.
💧 Step 2: Loosen Compacted Soil
Use a garden fork or tiller to break up the top 6-12 inches of soil. Work in sections about 2 feet square to avoid compacting fresh soil with heavy equipment. I like to score the soil in a grid pattern—this prevents large clumps and encourages root penetration.
If you're working with heavy clay, mix in 2-3 inches of coarse sand or perlite to improve drainage. For sandy soil, add 2-3 inches of compost to help retain moisture. The goal is to create a loose, crumbly texture that holds air pockets while still retaining water.
☀️ Step 3: Add Organic Matter
Spread a 2-3 inch layer of compost evenly over the loosened soil. I use a combination of finished compost and well-aged manure for a balanced boost. Work it into the top 6 inches using a broadfork or your hands—this incorporates nutrients without disturbing deeper soil layers.
For nutrient-dense soil, add a 1-2 inch layer of worm castings or aged leaf mold. These materials improve soil structure while providing slow-release nutrients. Avoid fresh manure or wood chips, as they can rob nitrogen or tie up soil chemistry for months.
✂️ Step 4: Balance pH and Nutrients
If your soil test shows a pH below 6.0, sprinkle dolomitic lime at the rate of 10-20 pounds per 100 square feet and work it into the top 4 inches. For acidic soil (above 7.0), use elemental sulfur at 5-10 pounds per 100 square feet. Always follow package instructions for precise measurements.
To boost fertility, mix in a slow-release fertilizer like bone meal (for phosphorus) or kelp meal (for potassium). I like to add a handful of mycorrhizal fungi to help roots absorb nutrients more efficiently. Water the amended soil thoroughly after adding these amendments to activate their benefits.
🪴 Step 5: Protect and Maintain
Cover the amended soil with a 2-3 inch layer of mulch (straw, shredded leaves, or wood chips) to preserve moisture and prevent erosion. This layer also keeps soil temperature stable and encourages beneficial microbial activity. Replenish mulch every 3-6 months, especially after harvesting or heavy rains.
After planting, monitor soil moisture by sticking your finger 1 inch deep—water when it feels dry. Over time, your soil will develop better structure and fertility. I recommend retesting soil after 3-6 months to track improvements and adjust as needed.
Tips & tricks for perfect soil amendments
Transforming your soil into a thriving garden bed takes more than just throwing down compost—here's how to get the most out of every step.
Soil Test Accuracy: Don't rely solely on the squeeze test! Take your soil test results seriously—they reveal hidden issues like micronutrient deficiencies or salinity problems. I've seen gardeners add compost to soil that was actually too alkaline for their plants, which locked out essential nutrients. Always double-check your pH and nutrient levels before amending.
Layering for Deep Impact: When working in the 2-3 inch layers of compost and worm castings (Step 3), think vertically. The top 2 inches should be fine, nutrient-rich compost, while the next inch can contain slightly coarser materials like leaf mold. This creates a gradual nutrient gradient that benefits both shallow-rooted plants and deep taproots.
Equipment Alternatives: No garden fork? Use a sturdy shovel or even a heavy-duty fork from your kitchen to break up compacted soil in Step 2. For small areas, a digging bar works wonders. The key is to create those vertical slices in a grid pattern—this prevents soil from becoming compacted again when you walk on it.
Timing Your Amendments: The best time to amend soil is in the off-season, 4-6 weeks before planting. This gives microbes time to break down organic matter and establish themselves. If you must amend in growing season, focus on top-dressing with compost and mulch rather than deep tilling, which can disturb roots.
Pro Tips for Amend Soil For Planting
- Transforming your soil into a thriving garden bed takes more than just throwing down compost—here's how to get the mo...
- Soil Test Accuracy: Don't rely solely on the squeeze test! Take your soil test results seriously—they reveal hidden i...
- Layering for Deep Impact: When working in the 2-3 inch layers of compost and worm castings (Step 3), think vertically...
Frequently asked questions
How often should I amend my soil?
For most gardens, amend soil once per year before planting (spring or fall). Heavy clay or sandy soils may need bi-annual adjustments. Test your soil every 2–3 years to track changes—organic matter breaks down over time! Pro tip: Top-dress with compost annually to maintain fertility without full rework.
Can I amend soil too much?
Yes! Over-amending can disrupt soil structure, wash away nutrients, or create imbalances (e.g., too much nitrogen). Stick to a 10–20% amendment ratio (e.g., 2–3 inches of compost per 12-inch-deep bed). If your soil feels grainy or plants wilt despite amendments, you may have overdone it.
What’s a quick fix for poor soil if I don’t have compost?
No compost? No problem! Use these fast alternatives:
- Leaf mold: Shredded leaves (aged 6+ months) mimic compost’s texture.
- Peat moss: Improves drainage but use sparingly (not sustainable long-term).
- Manure (well-aged!): Cow or horse manure (composted 6+ months) adds nutrients fast.
- Worm castings: A nutrient-packed shortcut for containers or small beds.
For a zero-waste hack, chop up grass clippings or kitchen scraps (like veggie peels) into the top inch of soil.
Does soil amendment work in extreme heat or cold?
Timing matters! Amend soil when temps are 50–85°F—ideal for microbial activity. In heat, work in early morning/evening to prevent moisture loss. In cold, focus on fall (6–8 weeks before frost) so amendments break down over winter. Avoid amending frozen or waterlogged soil.
My plants look healthy, but soil still feels “off.” What’s wrong?
Healthy plants don’t always mean perfect soil. Check for:
- pH issues: Test with a kit (aim for 6.0–7.0 for most veggies). Adjust with lime (raise pH) or sulfur (lower pH).
- Compaction: Dig a hole—if soil doesn’t crumble, add sand or perlite (10–20%) to improve aeration.
- Hidden pests: Gnarled roots? Amendments can’t fix this—treat with neem oil or rotate crops.
Try this: Plant a test crop (like radishes) to see how your soil performs before investing in big amendments.
Wrapping up and next steps
Amending your soil doesn’t have to be a daunting task—just a few simple, science-backed tweaks can transform your garden into a thriving haven! 🌱 Whether you’re adjusting pH, boosting nutrients, or improving drainage, the key is patience and consistency.
Start small, test your progress, and watch your plants reward you with vibrant growth.
Ready to roll up your sleeves? Grab your tools, pick your amendments, and get planting! For even better results, keep a gardening journal to track what works best in your unique soil. Happy growing!