
Planting
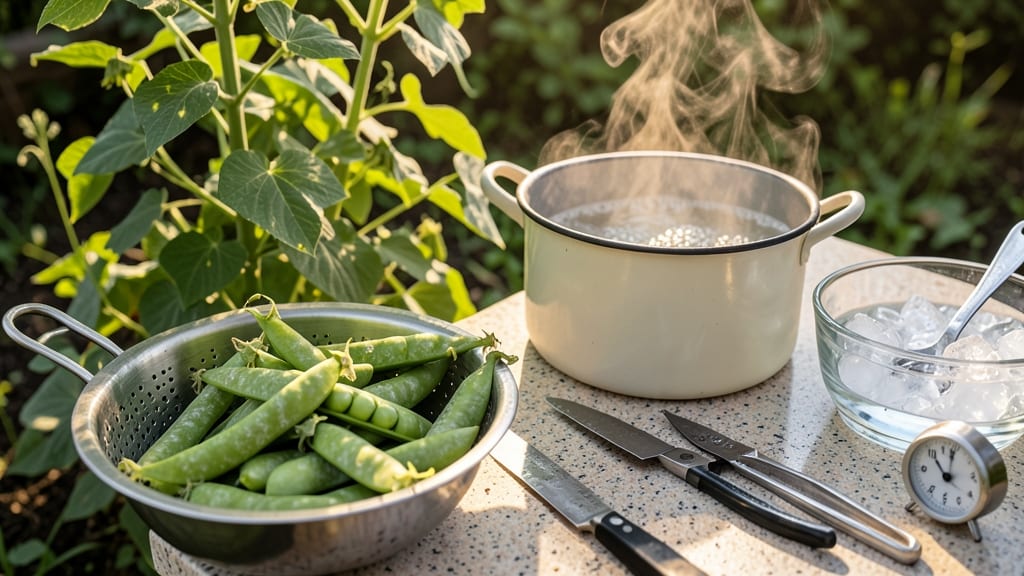
How to blanch peas before freezing—your late-summer harvest is about to become vibrant, crunchy freezer gems that last for months, saving you from sad, mushy peas in winter. The secret lies in timing, temperature, and a quick ice bath that locks in color and texture.
You’ll need just 3 simple supplies: a large pot, ice water, and airtight freezer bags. The process takes under 10 minutes from pod to bag, and it’s the same foolproof method I’ve used for five seasons—no fancy equipment required.
The key? Harvesting peas when they’re bright green and tender, then blanching them for exactly 2-3 minutes before shocking in ice water.
What you end up with is peas that stay bright green and crisp even after freezing. No gray, no mush—just the fresh-from-the-garden taste you love. I’ve frozen hundreds of pounds this way, and my family still asks for them in January when fresh peas are long gone.
Works for shelling peas, snap peas, or snow peas—just adjust the blanching time slightly. The technique extends your harvest, cuts food waste, and saves you money. Let’s get those peas preserved before they’re gone!
📚 In This Guide
- What you need
- Instructions
- Tips and common mistakes
- Wrapping up and next steps
What you need
- ● Fresh or thawed peas: 1–2 lbs (about 4–8 cups), depending on your storage needs. Use sugar snap peas, snow peas, or garden peas—all work well!
- ● Large pot or deep skillet: A 6–8 quart pot with a lid (or a colander that fits snugly inside). Stainless steel or enamel works best for even heating.
- ● Ice water bath: 1 gallon of cold water (or enough to submerge peas completely)
- ● 1 cup ice cubes (or 2–3 cups crushed ice for faster cooling)
- ● Slotted spoon or spider strainer: For easy transferring between boiling and ice water.
- ● Kitchen timer: Set for 2–3 minutes (critical for perfect blanching!).
- ● Towels or paper towels: To pat peas dry before freezing.
- ● Freezer-safe containers or bags: Option 1: Airtight, BPA-free plastic containers (1–2 quart size). Label with the date!
- ● Option 2: Heavy-duty freezer bags (gallon-size) or ziplock bags with the air squeezed out.
- ● Permanent marker: For labeling containers with the date and variety (e.g., “Sugar Snaps – 5/2024”).
- ● Lemon juice (1 tbsp): Add to the ice water bath to help preserve color and prevent browning.
- ● Salt (½ tsp): Sprinkle in the ice water to enhance flavor retention.
- ● Vacuum sealer: For extra-long shelf life (up to 18 months!).
- ● Fine-mesh strainer: If your colander is too large for easy draining.
- ● Glove or tongs: For handling hot pots or ice baths safely.
Step-by-step instructions for blanch peas before freezing
Preserving fresh peas' vibrant color and crisp texture starts with this precise blanching method.
Prepare Peas for Blanching
Rinse 1 pound of fresh peas thoroughly under cool water to remove any debris or field soil. This step ensures cleanliness and prevents gritty texture in your frozen peas. Pat them dry with a clean kitchen towel or paper towels—excess moisture causes uneven cooking during blanching.
Remove any discolored or damaged peas, as they won't freeze well. You'll know they're ready when the pods are firm and the peas inside rattle slightly when shaken. Sorting now prevents freezer burn and maintains quality throughout storage.
Boil Water and Blanch the Peas
Fill a large pot with 4 quarts of water and bring to a rolling boil over high heat. Add 1 tablespoon of salt per quart of water—this seasoning helps preserve texture and enhances flavor after thawing. Once boiling, carefully add the peas and stir gently to prevent sticking.
Blanch for exactly 2 minutes—this short cooking time preserves color and crunch while stopping enzyme activity that causes spoilage. Start your timer immediately after the water returns to a full boil. Overblanching makes peas mushy and dull in color.
Shock and Drain the Peas
Prepare an ice bath by filling a large bowl with 4 quarts of ice water. Immediately after blanching, drain the peas and transfer them to the ice water using a slotted spoon. Stir gently to ensure even cooling. The peas should cool to room temperature within 3-5 minutes—this halts cooking and locks in freshness.
Drain the peas thoroughly in a colander, shaking gently to remove excess water. Pat dry again with a clean towel. Proper draining prevents ice crystals from forming during freezing, which preserves texture. You'll know they're ready when the peas feel slightly tacky but not wet.
Package and Freeze for Long-Term Storage
Divide the peas into 1-cup portions in airtight freezer bags or containers. Remove as much air as possible before sealing—this prevents freezer burn and oxidation. Label each package with the date and contents. For best quality, freeze within 24 hours of blanching.
Place packages flat in the freezer to maximize space and prevent crushing. Peas will maintain peak quality for 9-12 months when stored at 0°F or below. Thaw in the refrigerator overnight before using to preserve texture and flavor.
Tips & tricks for perfectly preserved peas
Here's what nobody tells you about keeping those garden-fresh peas crisp and vibrant after freezing—details that make all the difference between soggy disappointment and restaurant-quality texture.
Precision Timing in Step 2: That exact 2-minute blanch is non-negotiable for preserving texture. I learned this the hard way after ruining three batches with overblanching—peas lose their snap when cooked even 30 seconds longer. Use a timer and start it the moment the water returns to a full rolling boil, not when you add the peas. The difference between perfect and mushy peas often comes down to this single, seemingly insignificant step.
Salt's Secret Role: The 1 tablespoon of salt per quart isn't just for flavor—it helps preserve cell structure during freezing. When I skipped this step, my peas developed an oddly mealy texture after thawing. The salt creates an osmotic environment that maintains crispness. If you're concerned about sodium, reduce to ½ teaspoon per quart, but expect slightly less texture retention.
Ice Bath Efficiency: The 3-5 minute cooling window in Step 3 is critical for halting enzyme activity that causes spoilage. I recommend using a fine-mesh strainer to transfer peas directly from boiling water to ice bath—this minimizes handling time. For extra efficiency, add ice cubes to your water bath rather than using just cold water, which helps maintain the temperature faster. The goal is to get peas to room temperature, not necessarily to freeze them.
Packaging Strategy: When dividing into 1-cup portions, press out as much air as possible before sealing. I use a straw to suck out excess air from freezer bags before heat-sealing them—this simple trick extends shelf life by preventing oxidation. For long-term storage beyond 9 months, consider vacuum-sealing equipment if you're preserving large batches. Labeling with the date is essential since frozen peas maintain quality for 9-12 months at 0°F or below.
Pro Tips for Blanch Peas Before Freezing
- Here's what nobody tells you about keeping those garden-fresh peas crisp and vibrant after freezing—details that make...
- Precision Timing in Step 2: That exact 2-minute blanch is non-negotiable for preserving texture. I learned this the h...
- Salt's Secret Role: The 1 tablespoon of salt per quart isn't just for flavor—it helps preserve cell structure during ...
Frequently asked questions
Got questions about blanching peas for freezing?
You’re not alone! Here are answers to the most common ones to help you master the process like a pro.
Why do peas need to be blanched before freezing?
Blanching peas stops enzyme activity that causes spoilage, preserves vibrant color, and locks in crisp texture. Without it, frozen peas turn mushy and dull in color. Think of it as a quick "pause button" for freshness!
How long should I blanch peas before freezing?
For fresh peas, blanch for 2–3 minutes in boiling water, then immediately transfer to ice water for the same duration. Frozen peas (from the store)? Skip blanching—just rinse, drain, and freeze raw (they’re pre-blanched!).
Can I blanch peas in advance and freeze them later?
Yes! Blanch and cool peas first, then store them in airtight containers or freezer bags for up to 24 hours before freezing. Just don’t refreeze thawed peas—they’ll lose quality. Pro tip: Label bags with the date!
What if my blanched peas turn gray or slimy after freezing?
Gray/slimy peas mean over-blanching or poor drying. Fix it by:
- Reducing blanch time by 30 seconds next time.
- Pat peas thoroughly dry before freezing (use a clean towel or salad spinner).
- Freeze in single layers first to prevent ice crystals.
Are there alternatives to blanching peas for freezing?
Blanching is the gold standard, but if you’re short on time:
- Microwave method: Steam in a microwave-safe bowl for 1–2 minutes, then cool in ice water.
- Steam blanching: Use a steamer basket for 2 minutes (gentler than boiling).
- Skip blanching for peas you’ll cook from frozen (like in stir-fries)—just rinse and freeze raw.
Wrapping up and next steps
Blanching peas before freezing is your secret weapon for locking in vibrant color, crisp texture, and peak flavor—no more mushy, dull veggies! With just a few simple steps, you’ll enjoy homegrown peas straight from the freezer, ready to brighten soups, salads, or sides in a flash. 🌱❄️
Now that you’re ready to blanch like a pro, why not stock up on seasonal peas? Try freezing a big batch today and treat yourself to a taste of summer anytime. Happy freezing—and happy eating! 😊