
Companion Plants
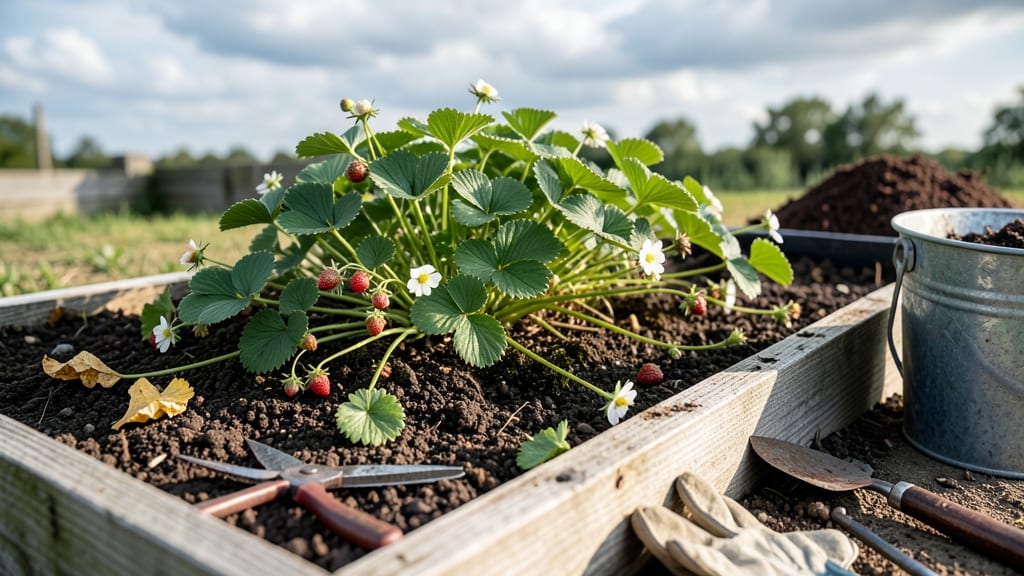
How to clean up strawberry plants in spring transforms your strawberry patch from last year’s mess into this year’s bounty. ✨ The right moves now mean fewer diseases, stronger plants, and more berries by summer—if you do it at the right time (after the last frost but before blooms appear).
Start by clearing away old leaves and mulch—they hide pests and diseases that love damp, dark places. Snip off any brown or moldy foliage with clean shears, and toss it in the trash (don’t compost it).
Next, prune runners (those long stems) to just 3–4 inches long, leaving only the strongest ones to root if you want more plants.
Your plants will reward you with vibrant green leaves and fresh growth within days. A light layer of fresh straw (or compost) keeps roots cool and moist, while a sprinkle of organic fertilizer feeds new shoots.
This prep work cuts down on pests too—no more slugs hiding under dead leaves or aphids moving in for summer.
Work on a dry morning to avoid spreading mud (which can smother roots), and repeat the process every 2–3 weeks until new leaves fully unfurl. The payoff? Bigger, sweeter berries and a garden that looks like it belongs in a catalog—not a neglected corner.
📚 In This Guide
- What you need
- Instructions
- Tips and common mistakes
- Wrapping up and next steps
What you need
- ● Pruning shears or sharp bypass pruners – 1 pair (sterilized with rubbing alcohol to prevent disease spread).
- ● Garden gloves – 1 pair (nitrile or leather for durability; opt for gardening-specific gloves for grip and protection).
- ● Garden fork or trowel – 1 (for loosening soil and removing weeds; 6–12-inch tines work best).
- ● Compost or well-aged manure – 2–3 gallons (for enriching soil; avoid fresh manure to prevent burning plants).
- ● Mulch (straw, pine needles, or shredded leaves) – 1–2 inches thick (to retain moisture and suppress weeds).
- ● Hose with adjustable nozzle or watering can – For rinsing tools and hydrating plants post-cleanup.
- ● Disinfectant spray (70% isopropyl alcohol or 10% bleach solution) – To sterilize tools between cuts.
- ● Knee pads or cushion – For comfort during extended pruning sessions.
- ● Garden twine or plant ties – To secure sprawling runners to stakes or trellises.
- ● Organic fungicide (neem oil or copper spray) – If your strawberries show signs of gray mold or leaf spot.
- ● Soil test kit – To check pH (ideal range: 5.5–6.5) before amending soil.
- ● Wheelbarrow or bucket – For hauling debris or compost.
Step-by-Step instructions for reviving strawberry plants in spring
Spring cleanup is where the magic happens—your strawberries reward you with bigger berries when you start here.
🌱 Step 1: Remove Last Year’s Debris and Weeds
Start by clearing away all dead leaves, old mulch, and plant debris from around your strawberry beds. This prevents fungal diseases from overwintering and gives your plants room to breathe. I like to use a small rake to pull weeds gently—don’t dig too deep, or you’ll disturb the roots of your strawberries.
Pay special attention to the crowns of your plants. If you see any black, mushy spots, those are signs of rot. Snip those areas off with clean pruners right away. Healthy crowns should look firm and slightly plump, not shriveled or hollow. This is also the perfect time to remove any runners from last year—they’ll just compete with your main plants for energy.
✂️ Step 2: Prune Dead and Weak Growth
Now’s the time to get up close with your pruners. Cut back any brown, crispy leaves or stems that look like they’ve been chewed by pests or frozen over winter. You’ll also want to trim off any weak, spindly growth that’s growing upward instead of outward. These thin stems won’t produce many berries and just waste your plant’s energy.
I always leave the green, healthy leaves untouched—they’re working hard to feed your plant. If you’re unsure whether a leaf is dead or just dormant, give it a little tug. If it comes off easily, it’s dead. If it resists, leave it be. This pruning step is all about giving your plant the best chance to focus its energy where it counts.
💧 Step 3: Refresh the Soil and Mulch
After pruning, give your strawberry beds a good fluff with your fingers or a small fork. This aerates the soil and helps water and nutrients reach the roots more easily. If your soil feels compacted or hard, mix in a 1-inch layer of compost around each plant—this boosts fertility without overwhelming the roots.
Now for the mulch. Spread a fresh layer of 2-3 inches of straw or shredded leaves over the soil, but keep it at least 1 inch away from the crowns of your plants. This mulch will help retain moisture, suppress weeds, and keep the soil temperature steady. Just avoid piling it too close to the crowns—too much moisture there can cause rot.
☀️ Step 4: Inspect for Pests and Protect Plants
Flip over a few leaves and check the undersides for tiny eggs or webbing—signs of slugs, aphids, or spider mites. If you spot any, treat the plants immediately with neem oil or insecticidal soap. I also like to set out a few beer traps for slugs around the edges of the bed. Prevention now saves headaches later.
Finally, give your plants a light watering to settle everything in. The goal is to keep the soil moist but not soggy. If your area gets late frosts, consider covering your beds with frost cloth for a few more weeks. Strawberries are tender until the soil warms up to at least 50°F consistently. Once the threat of frost passes, you’re ready to watch those berries start forming!
Tips & tricks for reviving strawberry plants
Between us, spring cleanup isn't just about tidying up—it's your secret weapon for a bumper harvest. Here's what I've learned after years of trial and error.
Crown Care is Critical: When checking crowns in Step 1, look for that firm, plump texture. If you find any crowns that feel hollow or have soft spots, they're already too far gone to save. I've learned the hard way that cutting out just the blackened areas isn't enough—you need to remove the entire crown if it's compromised. Healthy crowns are your plant's foundation, so don't skimp on this inspection.
Pruning Precision: In Step 2, I've found that removing only the truly dead growth makes all the difference. That weak, spindly growth might look sad, but it's often just dormant. Give it a week to show its true colors before deciding to cut. And here's my game-changer: use clean, sharp pruners and dip them in rubbing alcohol between cuts to prevent spreading any potential diseases you might encounter.
Mulch Magic: That 2-3 inch layer of mulch in Step 3 isn't just decoration—it's working overtime. The key is placement: keep it 1 inch away from crowns to prevent rot while still protecting your plants. I've had the best results with straw mulch because it breaks down slowly, adding organic matter to the soil as it decomposes. Plus, it looks great and makes weeding easier!
Pest Prevention: Don't wait until you see pests in Step 4 to act. I've found that doing a quick inspection every few days during spring is worth the effort. The earlier you catch those tiny eggs or webbing, the easier they are to control. Pro tip: neem oil works wonders but needs to be reapplied after rain. Keep a small spray bottle handy for quick treatments.
Pro Tips for Clean Up Strawberry Plants In Spring
- Between us, spring cleanup isn't just about tidying up—it's your secret weapon for a bumper harvest. Here's what I've...
- Crown Care is Critical: When checking crowns in Step 1, look for that firm, plump texture. If you find any crowns tha...
- Pruning Precision: In Step 2, I've found that removing only the truly dead growth makes all the difference. That weak...
Frequently asked questions
Got questions about spring strawberry cleanup? You’re not alone! Here are answers to the most common concerns to help you tackle the task with confidence.
When is the best time to clean up strawberry plants in spring?
The ideal window is early to mid-spring, once the soil is workable (around 40°F/4°C) and new growth appears. Avoid pruning too early—wait until frost risk has passed but before flowers emerge. June-bearing varieties benefit most from this timing, while everbearing and day-neutral types may need a lighter touch.
Should I cut off all the old leaves, or just some?
Remove only the dead, brown, or moldy leaves—never trim healthy green foliage. Old leaves can harbor pests/diseases, but live leaves photosynthesize, feeding the plant. For June-bearing types, leave 2-3 inches of stubble after pruning to protect crowns from sunburn. Everbearers? Trim sparingly to avoid stress.
What if my strawberry plants look healthy but have weeds growing around them?
Weeds compete for nutrients, so mulch heavily with straw (4-6 inches) or shredded leaves to suppress them naturally. Avoid synthetic mulches or herbicides—they can harm strawberry roots. Hand-pull weeds carefully to avoid disturbing the shallow root system, or use a hoe only in the rows between plants.
How do I prevent pests after cleaning up my strawberry bed?
Start with cleanup prevention: Remove all debris (including old runners) to eliminate hiding spots for slugs, aphids, and fungus gnats. Apply neem oil or insecticidal soap as a preventive spray, and introduce beneficial insects like ladybugs. For slugs, set out beer traps or use copper tape barriers around beds.
Can I compost the pruned strawberry leaves?
No, do not compost diseased or moldy leaves
—they can spread pathogens. Healthy, pruned leaves? Yes! Toss them into your compost pile (they’ll break down quickly) or use them as nitrogen-rich mulch in your garden. Just avoid composting leaves with black spots (a sign of fungus) or sticky residue (aphids).
What if I missed spring cleanup—can I still do it in summer?
Summer cleanup is possible but riskier. Focus on removing only diseased leaves or runners to avoid shocking the plant. Avoid heavy pruning—it stresses plants when they’re fruiting. If your bed looks overgrown, thin out runners (not leaves) to redirect energy to fruit production. Water deeply afterward to help recovery.
Wrapping up and next steps
Spring is the perfect time to give your strawberry plants the TLC they deserve—a little cleanup goes a long way in ensuring a thriving, productive harvest! By removing old leaves, pruning runners, and protecting your plants from pests, you’re setting them up for juicy, abundant berries all season. 🍓✨
Now that you’re armed with the know-how, roll up your sleeves and enjoy the process—your future strawberry feasts will thank you! Next up? Consider adding companion plants like borage or thyme to boost growth and deter pests naturally. Happy gardening!