
Tools
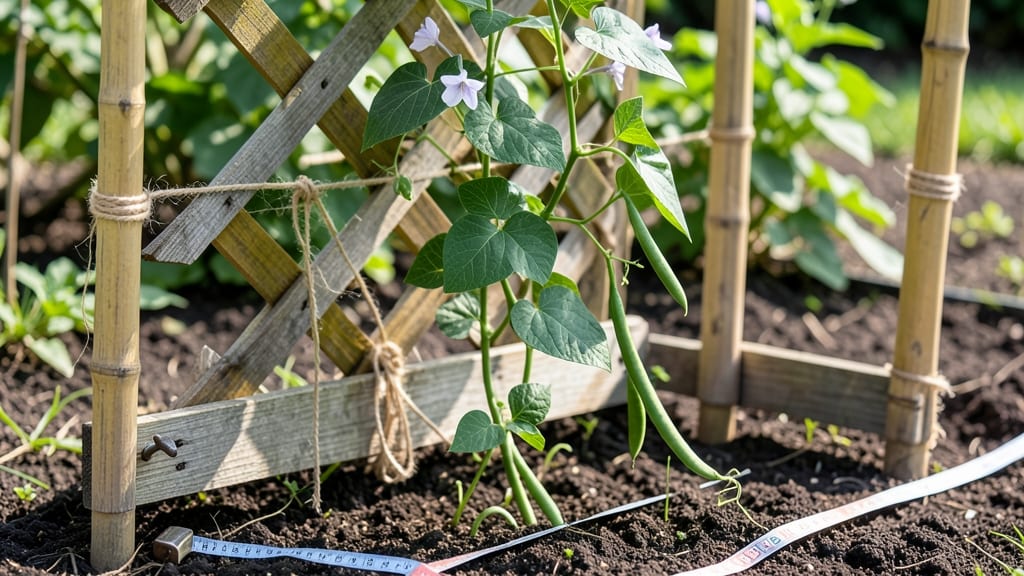
Building a cheap trellis for under $20 transformed my vegetable garden last summer. 🌱 Instead of struggling with sprawling vines, my pole beans climbed to new heights, producing double the harvest in the same space. The best part?
No fancy tools or expensive lumber—just repurposed materials and a few hours of work. You’ll need 3-4 stakes, some twine or wire, and a few wooden slats or bamboo poles (check your local hardware store’s clearance section).
My favorite budget-friendly version uses 2x4s cut into 3-foot lengths and chicken wire stretched between them—costs under $15 and holds up to 6-foot-tall plants. Stability comes from burying the stakes 6 inches deep or anchoring them with heavy rocks.
The payoff is immediate: cleaner garden beds, easier access to plants for harvesting, and healthier growth as vines get the support they need. My roses now bloom earlier and more abundantly because they’re not competing with weeds for space. Plus, trellises make your garden look intentional—even on a shoestring budget.
Works for beans, peas, cucumbers, or even morning glories. Skip the expensive kits and build your own—your plants (and your wallet) will thank you.
📚 In This Guide
- What you need
- Instructions
- Tips and common mistakes
- Wrapping up and next steps
What you need
- ● Wooden posts (4x4 or 2x4) – 2-4 pieces, 6-8 feet long (for corners or support beams). Budget tip: Check salvage yards or repurpose old fence posts!
- ● Wooden lattice panels or slats – 1-2 panels (4x8 ft) or 10-12 slats (1x4 or 2x4). Pro tip: Use cedar or pine for durability—avoid pressure-treated wood if vines will touch it!
- ● Galvanized screws or nails – 1 lb box (2.5-inch or 3-inch) (stainless steel or coated to prevent rust).
- ● Concrete mix or gravel – 5-10 lbs (for anchoring posts if needed).
- ○ Bamboo stakes or rebar (optional but helpful) – 4-6 pieces, 2-3 ft long (for extra stability in windy areas).
- ● Hammer or drill/driver
- ● Measuring tape
- ● Level (to keep your trellis straight!)
- ● Saw (hand saw, circular saw, or miter saw)
- ● Work gloves (trust me, your hands will thank you!)
- ● Post hole digger or shovel (if burying posts)
- ● Wire mesh or chicken wire – For a no-wood option (cut to size and bend into a frame!).
- ● Paint or stain – To protect wood and match your garden aesthetic.
- ● T-posts or metal stakes – If you want a temporary or lightweight design.
- ● Zip ties or twine – For securing vines to the trellis.
Step-by-Step instructions for building a sturdy DIY trellis
Here's my go-to method for creating a budget-friendly trellis that won't break under vines or wind.
✂️ Step 1: Gather Materials and Measure Your Space
For a 4-foot tall trellis (enough for most vining plants like cucumbers or beans), you'll need two 6-foot wooden posts (2x4s work perfectly), four 4-foot wooden slats (1x2s), and basic hardware (3-inch deck screws or galvanized nails). Measure where you want the trellis to stand—6 feet apart for a stable base, or adjust based on your garden layout.
I always mark the ground with stakes and string to visualize the placement before cutting anything. This prevents wasted materials and ensures your trellis aligns with your plants. For extra stability, dig 6-inch deep holes for the posts if you're working with heavier vines like pole beans or morning glories.
🪴 Step 2: Assemble the Frame and Attach Posts
Cut your 1x2 slats into 4 equal 3-foot lengths for the horizontal supports. Lay two posts upright 6 feet apart and use a level to ensure they're perfectly vertical. Secure them temporarily with stakes or clamps before drilling or nailing the slats between them. Space the slats 12 inches apart—this gives vines plenty of room to climb without overcrowding.
For the top, add a final slat at the very top to create a closed rectangle. This prevents the trellis from bowing under heavy vines. If you're using screws, pre-drill holes to avoid splitting the wood. I like to use galvanized screws because they resist rust, especially if your trellis sits near moisture.
🌿 Step 3: Reinforce Stability and Add Diagonal Supports
Here's where most cheap trellises fail—without diagonal bracing. Cut two additional 1x2 slats at a 45-degree angle (about 4.5 feet long) and attach them from the bottom corners to the center of the top slat. This creates an "X" shape inside the frame, dramatically increasing stability. Use two screws or nails per corner for extra strength.
For windy areas, add a third horizontal slat halfway up the trellis. This divides the structure into two sections, reducing wobble. If you're building this near a fence or wall, anchor one post securely to prevent shifting. A simple post anchor or heavy-duty zip tie to a sturdy structure works wonders.
☀️ Step 4: Finish and Position for Plant Growth
Sand any rough edges and apply a waterproof sealant (like outdoor wood stain) if your posts will sit in damp soil. This extends the trellis's lifespan by preventing rot. Now, position it near your chosen climbing plants—at least 12 inches away from the base of the plant to avoid root competition.
For vining plants like cucumbers, thread the main stem through the bottom slats and gently weave side runners along the trellis as they grow. If you're growing beans or peas, let them climb naturally—they'll latch onto the slats on their own. Avoid overloading one side; distribute weight evenly to prevent collapse.
⏰ Step 5: Maintain and Adjust as Needed
Check your trellis weekly for loose screws or wobbling posts, especially after rain or wind. Tighten anything that feels unstable immediately. If vines grow too heavy, add a second diagonal brace on the opposite side for extra support. I also like to prune excess foliage from the base of the plant to keep weight concentrated at the top.
At the end of the season, remove any dead vines and store the trellis in a dry place if you're in a cold climate. With proper care, this under-$20 trellis will last 3-5 years—far longer than flimsy store-bought versions.
Tips & tricks for building a sturdy garden trellis
Here's what I've learned from building (and fixing) my fair share of wobbly trellises over the years.
Material Selection: Don't skimp on the 2x4 posts—pressure-treated lumber lasts longer in damp soil. For the 1x2 slats, I've found that cedar resists rot better than pine, especially if you're building near moisture-prone areas. If you're on a tight budget, untreated pine works fine for one season, but expect to replace it sooner. The 3-inch galvanized screws are worth the extra cost—they won't corrode like regular nails.
Precision Cutting: When cutting your 1x2 slats into 3-foot lengths for Step 2, I recommend using a miter saw for clean, square cuts. If you don't have one, mark your cuts with a pencil and use a circular saw with a straightedge guide. The 12-inch spacing between slats is crucial—any closer and vines will tangle, any wider and they won't have enough support. I like to use painter's tape to mark the exact 12-inch intervals on my posts before attaching the slats.
Diagonal Bracing: The 45-degree angle for your diagonal supports in Step 3 is critical for stability. To get this right, I draw a triangle on scrap wood with sides of 3 feet (vertical), 3 feet (horizontal), and 4.5 feet (hypotenuse). This gives you the exact angle you need. When attaching, use two screws per corner—one at the bottom and one at the top of each diagonal. This creates a proper triangle that distributes weight evenly.
Post Placement: For the 6-foot spacing between posts, I've found that using a 10-foot tape measure makes this easier—just mark at 4 feet on either end. If you're working with heavier vines like squash or melons, consider digging your 6-inch deep holes for the posts before assembly. This prevents shifting after the trellis is built. For extra stability in windy areas, I've even buried one post completely and attached the other to a fence with heavy-duty zip ties.
Pro Tips for Build A Cheap Trellis
- Here's what I've learned from building (and fixing) my fair share of wobbly trellises over the years.
- Material Selection: Don't skimp on the 2x4 posts—pressure-treated lumber lasts longer in damp soil. For the 1x2 slats...
- Precision Cutting: When cutting your 1x2 slats into 3-foot lengths for Step 2, I recommend using a miter saw for clea...
Frequently asked questions
Got questions about building a budget-friendly trellis? You’re not alone!
Here are answers to the most common concerns—from materials to maintenance—so you can DIY with confidence.
What’s the cheapest way to build a trellis?
Use free or low-cost materials like scrap wood, bamboo stakes, or repurposed fencing. Skip power tools—hand saws and screws work fine. Check local buy-nothing groups or construction sites for discarded wood. A basic A-frame or teepee design keeps costs under $10 if you’re thrifty!
How long does it take to build a simple trellis?
For a small, DIY-friendly trellis (like a 4-foot-tall teepee or A-frame), plan 1–2 hours if you’re prepping materials ahead. Rushing? Pre-cut pieces and assemble on-site. Pro tip: Weekend mornings work best—sunlight helps glue dry faster!
Can I use a trellis for heavy plants like cucumbers or pumpkins?
Yes! For heavy vines, reinforce the base with concrete blocks or buried stakes (dig 12+ inches deep). Add cross-braces (like X-shaped supports) for stability. Avoid flimsy bamboo alone—combine it with 2x4s or PVC pipes for extra strength.
When is the best time to install a trellis?
Install before planting (early spring) so roots and vines have support from day one. If retrofitting, wait until plants are 3–6 inches tall to avoid uprooting. Winter is ideal for building—no distractions, and you’ll be ready for spring!
What if my trellis sags or breaks?
Sagging? Add more supports (like extra stakes or a center pole). Broken wood? Replace the section—rotten or split pieces weaken the structure. For quick fixes, use zip ties or wire to reinforce joints. Prevention tip: Space supports every 2–3 feet for even weight distribution.
Are there alternatives if I don’t want to build one?
Try:
- Store-bought kits ($15–$30): Look for collapsible or modular designs.
- Living trellises: Train fast-growing vines (like morning glories) on existing fences or pergolas.
- DIY wire cages: Bend galvanized wire into a cube shape for herbs or small veggies.
Wrapping up and next steps
Building a sturdy trellis on a budget is easier than you think—and the results are worth every penny! 🌱 With just a few materials and a little creativity, you’ve got a functional, eco-friendly garden helper that supports climbing plants while keeping costs low.
Whether you’re growing vines, flowers, or veggies, your new trellis will give your garden a serious upgrade without breaking the bank.
Now that you’re armed with the know-how, grab your tools and get building! Once your trellis is up, check out our guide on training plants to maximize its potential. Happy gardening—your future harvest (and neighbors) will thank you! 🌿✨