
Container Gardens
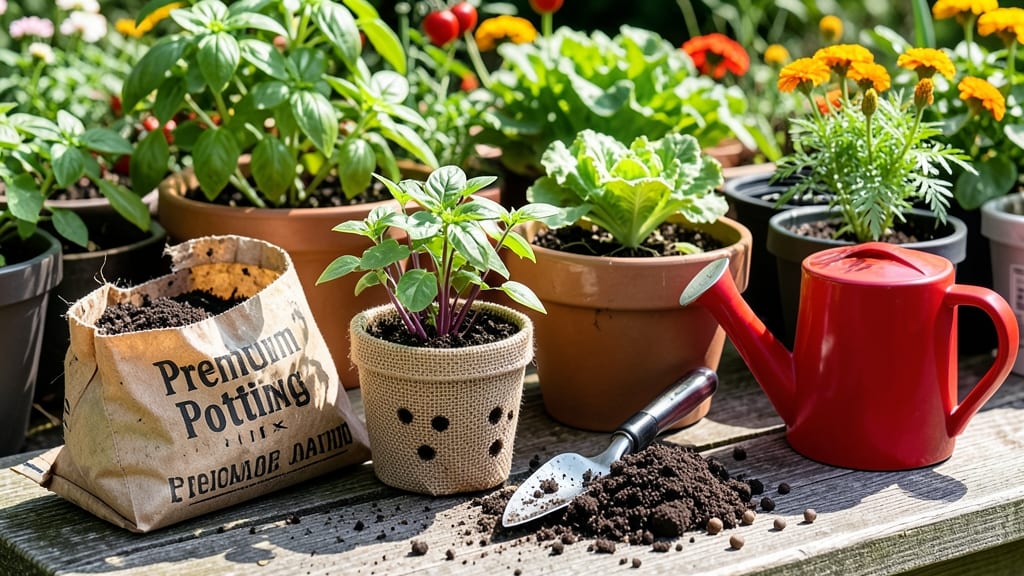
Building a container garden changed how I garden forever. 🌱 No more struggling with weeds or compacted soil—just fresh herbs, crisp veggies, and vibrant flowers in spaces as small as a windowsill or patio. The secret? Right-sized containers, lightweight soil, and plants that thrive in tight quarters.
I started with basic pots and now grow enough basil for pesto, cherry tomatoes for salads, and marigolds to keep pests away—all in less than 10 square feet. You’ll end up with a low-maintenance garden that produces year-round if you choose the right plants.
The key is matching container size to plant needs and keeping drainage simple—no fancy setups required. Works for balconies, rooftops, or even sunny windowsills. Let’s get your space growing!
📚 In This Guide
- What you need
- Instructions
- Tips and common mistakes
- Wrapping up and next steps
What you need
- ● Containers: 1–5+ containers (depending on your garden size) – choose pots with drainage holes (5–10 gallons for veggies, 1–3 gallons for herbs/flowers).
- ● Options: Plastic, ceramic, fabric grow bags, or repurposed buckets (with holes drilled).
- ● Potting Mix: 1–3 bags of high-quality, well-draining container-specific soil (avoid garden soil—it compacts!).
- ● Drainage Layer: Small pebbles, perlite, or broken pottery shards (1–2 inches per container).
- ● Seeds/Seedlings: Choose fast-growing, compact varieties (e.g., cherry tomatoes, basil, lettuce, marigolds).
- ● Basic Tools: Trowel or small shovel for planting.
- ● Gloves (to protect your hands!).
- ● Watering can or hose with a gentle spray nozzle.
- ● Fertilizer: Slow-release granules or liquid fertilizer for nutrient boosts.
- ● Mulch: Straw or shredded leaves to retain moisture.
- ● Support Structures: Small stakes or cages for climbing plants (e.g., cucumbers).
- ● Self-Watering System: Wick or reservoir kits for low-maintenance care.
- ● Decorative Touches: Paint, labels, or saucers for a polished look!
Step-by-Step instructions for designing your container garden
Here’s how to create a thriving container garden that maximizes space while keeping maintenance simple.
🪴 Step 1: Choose the Right Containers and Layout
Start by selecting containers with drainage holes—terracotta pots, fabric grow bags, or even repurposed buckets work well. Group containers by plant needs: herbs like basil and parsley thrive in 6-inch pots, while tomatoes and peppers need 12-inch containers to support their root systems. Place taller plants like sunflowers or snapdragons at the back or center of your layout to avoid shading smaller companions.
I arrange containers in a grid or staggered pattern for visual appeal, but functionality matters more. Ensure each plant has at least 6 hours of sunlight—rotate pots weekly to prevent leaning toward the light. For a 4-plant setup, I use a mix of hanging baskets for trailing plants like nasturtiums and shallow dishes for shallow-rooted herbs.
🌱 Step 2: Select Compatible Plants for Each Container
Pair plants with similar water and sunlight needs to simplify care. For example, basil, parsley, and chives make a perfect trio in a 12-inch pot—they all love moisture and partial shade. Avoid combining water hogs (like lettuce) with drought-tolerant plants (like rosemary). Check plant tags for mature size: a 3-inch seedling can become a 2-foot bush, so give it room to grow.
For flowers, mix annuals like petunias with edible herbs like thyme—they deter pests naturally. If you’re growing vegetables, pair nitrogen-fixers (like beans) with heavy feeders (like tomatoes) to boost soil fertility. I always label containers with plant names and watering needs to avoid confusion later.
💧 Step 3: Prepare Soil and Plant for Success
Fill containers with a lightweight potting mix (never garden soil—it compacts and drains poorly). Amend with compost or worm castings for nutrients, and top with a 1-inch layer of mulch to retain moisture. Press the soil gently around roots to eliminate air pockets, but don’t pack it down too firmly—roots need oxygen to grow.
Plant at the same depth as the nursery pot to avoid stress. Water deeply after planting until it drains from the bottom, then let the top 1 inch of soil dry before watering again. Overwatering is the #1 killer of container plants, so I use self-watering pots or drip irrigation for consistency.
☀️ Step 4: Optimize Light and Watering Routines
Most container gardens need full sun (6+ hours) for vegetables and flowers, while herbs like cilantro tolerate partial shade. If your space is shady, opt for shade-loving plants like ferns or lettuce. Adjust light by moving containers closer to windows or supplementing with a grow light for 12-14 hours daily during short days.
Water in the morning to reduce evaporation and fungal risks. Stick your finger 1 inch into the soil—if it’s dry, water until it runs out the drainage holes. Group containers with similar water needs together (e.g., succulents with herbs) to streamline care. I set a timer to check soil moisture every 2-3 days in summer, more frequently in heatwaves.
✂️ Step 5: Maintain and Harvest for Long-Term Growth
Prune herbs like basil and mint regularly to encourage bushier growth—pinch back the tips when they reach 3-4 inches. Deadhead spent flowers (like on petunias) to prolong blooming and redirect energy to new growth. Fertilize every 4-6 weeks with a balanced liquid fertilizer, but cut back in late summer to avoid tender new growth before frost.
Harvest vegetables like tomatoes and peppers when firm and fully colored. For herbs, snip leaves just above a set of leaves to promote branching. Watch for pests like aphids—spray with neem oil or introduce ladybugs for organic control. With consistent care, your container garden will stay productive for months, even in small spaces.
Tips & tricks for perfect container garden layouts
Here's what nobody tells you about maximizing your small-space garden—these tricks will transform your balcony or patio into a thriving, low-maintenance oasis.
Container Size Matters: The 6-inch pots for herbs and 12-inch containers for tomatoes and peppers in Step 1 aren't arbitrary—they reflect root space needs. For example, a basil plant can outgrow its 6-inch pot by summer, so consider upgrading to 8-inch pots if you plan to harvest heavily. I've seen basil roots circle the bottom of a 6-inch pot by month three, stunting growth. Always check plant tags for mature size—what starts as a 3-inch seedling can become a 2-foot bush!
Light Rotation Strategy: The weekly rotation mentioned in Step 1 prevents plants from leaning toward the light, but here's the secret: pair containers so they complement each other's light needs. Place sun-loving tomatoes next to shade-tolerant basil—the tomatoes will get their full sun while the basil benefits from partial shade during peak afternoon heat. This creates a natural light gradient that works with your space, not against it.
Soil Science: In Step 3, the emphasis on lightweight potting mix is critical, but here's the upgrade: mix in perlite or vermiculite (20% by volume) to improve drainage and aeration. I've found this prevents the dreaded "soggy bottom" that kills container plants. For extra insurance, add a handful of orchid bark to the mix—it holds moisture while preventing compaction. This tweak keeps roots happy without the risk of overwatering.
Watering Hack: The 1-inch soil moisture check in Step 4 is perfect, but here's how to make it foolproof: use a moisture meter or even a wooden skewer to test soil depth. I've ruined plants by guessing—especially succulents that can rot in just 48 hours of overwatering. For busy gardeners, consider self-watering containers with reservoir systems—they maintain consistent moisture without the guesswork.
Pro Tips for Build A Container Garden
- Here's what nobody tells you about maximizing your small-space garden—these tricks will transform your balcony or pat...
- Container Size Matters: The 6-inch pots for herbs and 12-inch containers for tomatoes and peppers in Step 1 aren't ar...
- Light Rotation Strategy: The weekly rotation mentioned in Step 1 prevents plants from leaning toward the light, but h...
Frequently asked questions
Got questions? You’re not alone! Container gardening is easy once you know the tricks, but every green thumb starts somewhere. Here are answers to the most common container garden questions to help you grow with confidence.
What’s the best soil mix for container gardens?
Use a lightweight, well-draining potting mix designed for containers. Avoid garden soil—it compacts and drains poorly. Mix in perlite or vermiculite (10-20%) to improve aeration, and add compost (20-30%) for nutrients. For veggies, a 50/50 blend of potting soil and compost works wonders!
When is the best time to start a container garden?
Start 4-6 weeks before your last frost date for cool-season crops (like lettuce or spinach) or after frost for warm-season plants (tomatoes, peppers). Containers warm up faster than ground soil, so you can often plant 2-4 weeks earlier than traditional gardens. Check your local frost dates to time it right!
How often should I water my container garden?
Containers dry out faster than ground beds—check moisture daily in hot weather. Water when the top inch of soil feels dry. Use self-watering containers or drip irrigation for consistency. Mulch (straw or shredded leaves) helps retain moisture. Pro tip: Water deeply (until it drains from the bottom) to encourage root growth.
How do I keep pests out of my container garden?
Prevent pests with healthy soil, proper spacing, and companion planting. Use neem oil or insecticidal soap for early signs of bugs. Copper tape on container edges deters slugs and snails. For aphids, blast them off with a hose spray. Rotate crops yearly to avoid soil-borne pests, and inspect new plants before adding them to your garden.
Can I use any container, or are there restrictions?
Most clean, durable containers work—plastic, ceramic, fabric grow bags, or even repurposed items (buckets, bathtubs). Ensure they have drainage holes (drill them if needed). Avoid treated wood without a liner, as chemicals can leach into soil. Size matters: Aim for at least 5-7 gallons per plant (bigger = happier roots!).
What are the easiest plants to grow in containers?
Start with low-maintenance winners:
- Herbs: Basil, mint, thyme, and parsley thrive in small pots.
- Veggies: Lettuce, radishes, cherry tomatoes, and peppers are container-friendly.
- Flowers: Marigolds, petunias, and nasturtiums add color and repel pests.
Choose compact varieties labeled “bush” or “dwarf” for best results.
Wrapping up and next steps
Building a container garden is all about transforming small spaces into thriving green oases—whether you’re growing fragrant herbs, crisp veggies, or vibrant flowers! 🌱 With the right space-saving layouts, containers, and care tips, you’re well on your way to a lush, low-maintenance garden that fits any balcony, patio, or windowsill.
Now that you’ve got the know-how, roll up your sleeves and start planting! Begin with just one container—herbs like basil or mint grow fast and reward you with fresh flavors in weeks. Need inspiration? Sketch a simple layout, gather your supplies, and let your green thumb shine. Happy gardening!