
Tools
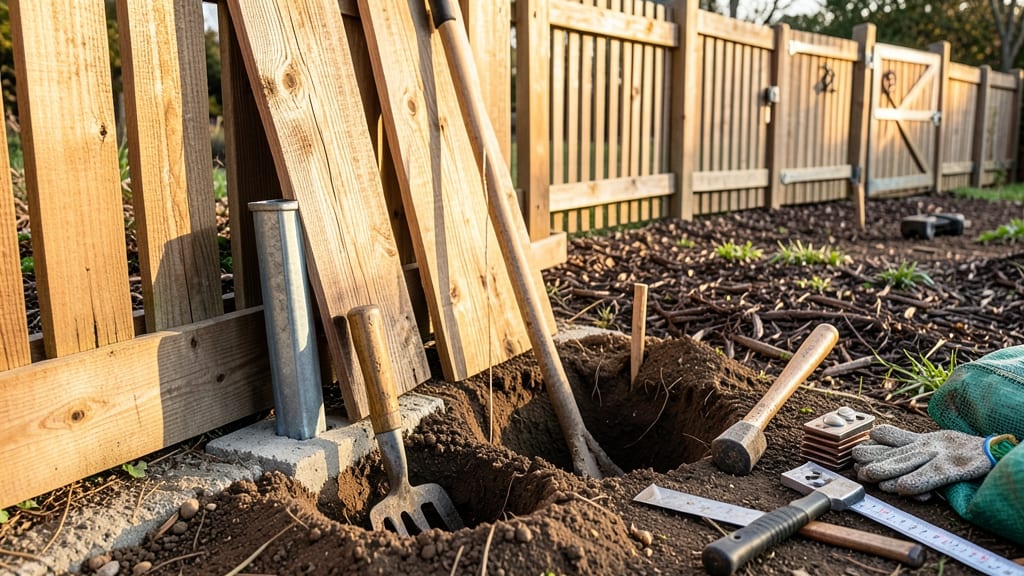
A strong fence transforms your garden into a private sanctuary—but how to build a fenced-in garden properly starts with the right materials and planning. 🌿 I’ve built three fences over the years, and the right materials—whether wood, metal, or vinyl—make all the difference in longevity and curb appeal.
The key isn’t just hammering posts; it’s planning for height, gate placement, and how it blends with your yard’s existing features.
You’ll need basic tools—a post hole digger, level, drill, and measuring tape—and materials that match your climate. Wood offers classic charm but needs sealing; metal resists rot but can get hot; vinyl stays low-maintenance but costs more upfront. A 6-foot fence is standard for privacy, but check local codes first.
By the end, you’ll have a sturdy enclosure that keeps pets, kids, and critters out while creating a peaceful growing space. The best part? No more worrying about wandering deer or nosy neighbors—just you, your soil, and the plants you love.
Works for any yard size, from small urban plots to sprawling country gardens. Let’s get those posts in the ground and turn your vision into reality!
📚 In This Guide
- What you need
- Instructions
- Tips and common mistakes
- Wrapping up and next steps
What you need
- ● Fencing materials: Wooden posts (4x4 or 6x6 pressure-treated, 6–8 ft tall, 1 per 6–8 ft of fence)
- ● Fence panels or pickets (6–8 ft tall, quantity based on garden perimeter)
- ● Metal or vinyl fence posts (alternative to wood, check local codes)
- ● Hardware: Galvanized or stainless steel screws/nails (2–3 inches long, 100+ pieces)
- ● Post anchors or concrete (for securing posts, 1 bag per 4–6 posts)
- ● Hinges and latch (if adding a gate, 1–2 sets)
- ● Tools: Post hole digger or auger (for digging holes 12–18 inches wide)
- ● Level (to ensure straight, even panels)
- ● Drill/driver (for screws)
- ● Measuring tape (precision is key!)
- ● Circular saw or handsaw (for cutting materials)
- ● Wheelbarrow (for hauling dirt, gravel, or concrete)
- ● Safety gear: gloves, goggles, ear protection
- ● Gravel or landscape fabric (for drainage and weed control)
- ● Stakes and string (for marking layout)
- ● Post caps (to protect wood from moisture)
- ● Decorative elements (e.g., lattice, trellis, or lighting)
- ● Gate hardware (e.g., deadbolts, decorative knobs)
Step-by-Step instructions for building a sturdy garden fence
Here's how I build a fence that lasts years and keeps critters out—no guesswork, just solid construction.
🪴 Step 1: Mark and Measure Your Garden Layout
Use a 20-foot tape measure and wooden stakes to outline your garden’s perimeter. Drive stakes at each corner and every 6 feet along the edges. Connect them with string lines to visualize the fence’s path—this prevents crooked lines later. I like to walk the perimeter twice: once to check for level ground, and again to adjust if the area isn’t perfectly rectangular.
Check for underground utilities with a call-before-you-dig service—hitting a buried line turns a weekend project into a disaster. If your yard slopes, mark the highest point of the fence line; you’ll need to adjust post depths later to keep it level. A laser level helps here, but even a bubble level on a board works if you’re patient.
☀️ Step 2: Dig Post Holes and Set Corner Posts First
Dig post holes 6 inches wider than your 4x4 pressure-treated posts (typically 8-10 inches in diameter). Use a post hole digger or rent a post auger for deeper holes. Corner posts go deepest—30 inches below ground—while regular posts need 24 inches of depth. Tap a 2x4 scrap into the hole to check depth; it should sit 6 inches above ground after settling.
Set corner posts in concrete mix (use the 5-gallon bucket of pre-mixed concrete from your list). Pour the mix into the hole, slide the post in, and brace it with 2x4 stakes while the concrete sets (24 hours). Check for plumb (vertical alignment) with a level before it hardens—adjust now or deal with a crooked fence later.
✂️ Step 3: Install Remaining Posts and Attach Horizontal Rails
Mark the top of each post at 7 feet (standard height for privacy) using a string line stretched between corner posts. Dig holes for the remaining posts, ensuring they’re level and plumb before setting in concrete. Let the concrete cure 24 hours before proceeding.
Cut 2x4 rails to fit between posts, leaving ½ inch of space for expansion. Attach them 12 inches from the ground (for small gardens) or 18-24 inches (for taller barriers) and 60 inches from the top. Use 3-inch deck screws and a drill with a countersink bit to avoid splitting wood. Space screws 12 inches apart—this keeps the fence rigid against wind.
🪴 Step 4: Add Fence Panels or Picket Slats
For privacy, attach 6-foot tall fence panels (pre-cut or DIY with 1x6 boards) between rails using 2½-inch screws. Leave ¼ inch gaps between boards for drainage. For a picket-style fence, space 2x4 pickets 4 inches apart, cutting them to 6 feet tall. Use a circular saw for clean cuts—measure twice, cut once.
Pre-drill holes ⅛ inch smaller than your screws to prevent wood splitting. Start screws from the inside of the fence (hidden side) for a cleaner look. If using chain-link mesh, weave it between rails with staple guns, pulling taut as you go. Double-check that gates swing freely—adjust hinges before attaching the final panel.
💧 Step 5: Install Gates and Finish with Caps
Build gates from 2x4 frames and 1x6 slats, hinging them to a post with heavy-duty hinges. Cut a latch from a 2x4 and attach it 3 feet from the ground. For a sliding gate, use a track system mounted on the ground. Test the gate’s swing before finalizing screws—it should open 90 degrees without binding.
Top each post with a post cap (or cut a 2x4 at 45 degrees) to shed water. Paint or stain the wood before assembly—it’s easier than touching up later. Seal the bottom of the fence with landscape fabric to block weeds, tucking it into the ground. Step back and admire your work—now it’s time to plant!
Tips & tricks for building a sturdy garden fence
A few smart moves will save you time, frustration, and ensure your fence stands strong for years. Here's what I've learned from building multiple fences myself.
Layout Precision: In Step 1, when marking your garden layout, use a helper to hold the string line taut while you drive stakes. This prevents sagging lines that lead to crooked fences. I also recommend using a chalk line instead of string—it snaps when taut, giving you a perfectly straight guide without guesswork. For longer sections, break your fence into 10-foot segments and measure each one separately to maintain accuracy.
Concrete Curing Strategy: The 24-hour concrete curing time in Step 2 is non-negotiable, but here's how to work around it: Pour the concrete for corner posts first, then move to regular posts. While the first batch sets, you can dig holes for the remaining posts. Use a plastic mixing bucket (like the 5-gallon one mentioned) to create a temporary form around each post—this keeps concrete from spilling out while you brace it. After 24 hours, remove the forms and continue with rails.
Post Alignment Secret: For Step 3's level and plumb checks, I've found a simple trick: After setting a post in concrete, place a 2x4 board horizontally against it at the top. Use a level on the board to check plumb—this gives you a wider reference than checking the post directly. For level checks, stretch a string line between corner posts at the 7-foot height mark and adjust each post as you go. This ensures all tops align perfectly before attaching rails.
Gate Installation Tip: When building gates in Step 5, leave a 1/8-inch gap between the gate edge and the fence frame—this prevents binding when the wood expands. For hinges, use 3-inch exterior screws and pre-drill holes to avoid splitting. Test the gate swing before fully tightening screws—adjust hinges so it opens smoothly to 90 degrees. I've learned this the hard way: gates that don't swing properly become a headache years later when wood swells.
Pro Tips for Build A Fenced In Garden
- A few smart moves will save you time, frustration, and ensure your fence stands strong for years. Here's what I've le...
- Layout Precision: In Step 1, when marking your garden layout, use a helper to hold the string line taut while you dri...
- Concrete Curing Strategy: The 24-hour concrete curing time in Step 2 is non-negotiable, but here's how to work around...
Frequently asked questions
Got questions about building your fenced-in garden?
Here are some of the most common concerns—plus straightforward answers to help you plan with confidence.
What’s the best time of year to install a garden fence?
The ideal time is spring or early fall when temperatures are mild and soil is workable. Avoid winter (freezing ground) or peak summer (heat stress). If you’re in a warm climate, late fall can also work—just ensure the ground isn’t waterlogged.
How much does a fenced garden cost, and where can I save money?
Costs vary widely: $5–$30 per linear foot for materials (wood, vinyl, or metal) plus $1–$3 per foot for labor. To save, DIY with pressure-treated wood or opt for semi-transparent fencing (like bamboo or lattice) for partial privacy. Check salvage yards for discounted materials too!
Do I need permits for a garden fence?
It depends on your location! Check local building codes—many areas require permits for fences over 6 feet tall or near property lines. A quick call to your city’s planning department or a local hardware store can clarify rules. When in doubt, err on the side of caution to avoid fines.
What’s the easiest fence type for a beginner to install?
Start with vinyl or wood panel fencing (pre-cut sections) or post-and-rail fencing—both are beginner-friendly. For speed, consider temporary fencing (like plastic panels) if you’re testing layouts. Avoid stone or brick unless you’re experienced with masonry.
Will a fence keep out burrowing animals like rabbits or gophers?
Yes, but depth matters! Bury the fence 12–18 inches underground or add an apron extension outward to block diggers. For extra protection, use hardware cloth (1/4-inch mesh) along the base.
How do I prevent my fence from leaning or sagging over time?
Use concrete footings (not just stakes) for posts and pre-drill holes to avoid wood splitting. Space posts every 6–8 feet and use galvanized screws/nails to resist rust. For wood fences, add horizontal braces mid-height for stability.
Can I build a fence around existing plants or trees?
Yes, but plan carefully! Avoid damaging roots—keep fences at least 2 feet away from tree trunks. For mature trees, use flexible fencing (like vinyl) to accommodate growth. If you must fence close, call 811 to check for underground utilities first.
Wrapping up and next steps
Building a fenced-in garden is a rewarding project that enhances privacy, security, and curb appeal—while giving you a space to grow your dreams (literally!). By following this step-by-step framework, you’ve got everything you need to create a sturdy, long-lasting enclosure tailored to your needs.
Whether you’re a DIY novice or a seasoned builder, the key is patience, precision, and a little creativity.
Now that your vision is taking shape, take the next step: sketch out your garden’s layout, pick your plants, and start prepping the soil. Your future green oasis is just a few shovels (or clicks) away—go make it happen! 🌱✨