
Pests and Diseases
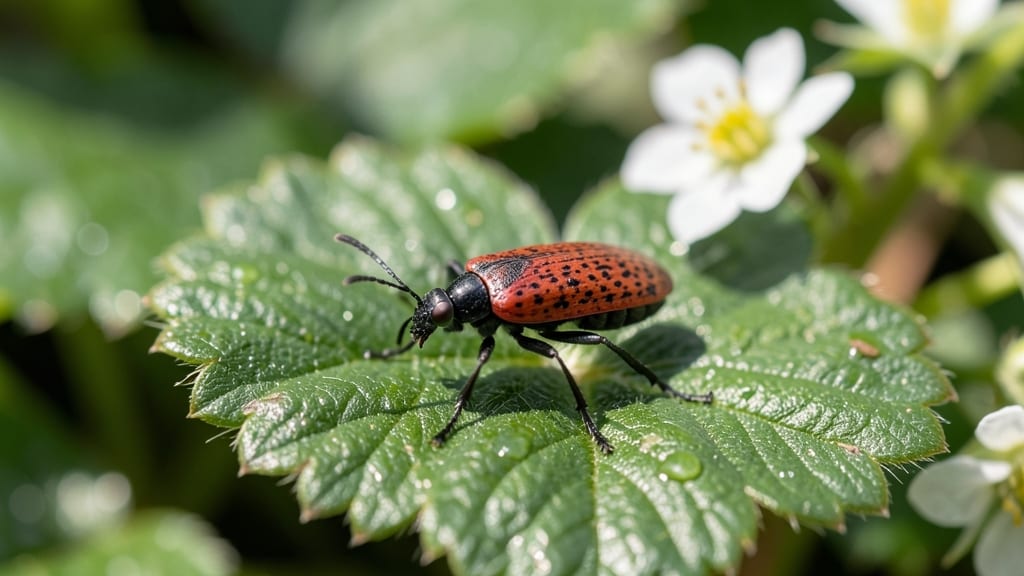
How to check strawberries for bugs—it’s easier than you think, and I’ve got the foolproof method. 🌿 I’ve spent years inspecting these little red jewels—and the bugs they attract—and I’ve cracked the code for spotting trouble before it ruins your harvest. The key? Knowing exactly what to look for on leaves, fruit, and soil.
You’ll need just three things: a magnifying glass (for those sneaky mites), a flashlight (to spot webbing in shadows), and a bucket of soapy water (for quick pest removal).
Most problems show up as holes in leaves, sticky residue, or tiny webs—but you’ll learn to spot them before they spread.
In 5 minutes, you’ll check every plant top to bottom, catching aphids, slug trails, and spider mites before they cause real damage. The first sign of trouble? Yellowing leaves or chewed fruit—but by then, it’s already too late. This method stops pests cold.
Works for June-bearing, everbearing, or day-neutral varieties, and scales from a single pot to a full garden bed. Once you master this, your strawberries will stay clean, sweet, and blemish-free all season.
📚 In This Guide
- What you need
- Instructions
- Tips and common mistakes
- Wrapping up and next steps
What you need
- ● Fresh strawberries – A small to medium batch (about 1–2 pints) for thorough inspection.
- ● Clean work surface – A white or light-colored tray, cutting board, or plate to contrast against bugs.
- ● Flashlight or bright lamp – A handheld LED flashlight (1000+ lumens) or a desk lamp for better visibility.
- ○ Magnifying glass (optional but helpful) – A 2x–4x magnification glass for spotting tiny pests.
- ● Small bowl or container – For sorting clean vs. infested berries.
- ● Paper towels or damp cloth – To wipe away debris or residue.
- ● Gloves (recommended) – Disposable nitrile gloves to avoid direct contact with potential contaminants.
- ● Food-safe spray bottle – With water or a mild vinegar solution (1:3 ratio) to rinse berries if needed.
- ● Fine-mesh strainer – For rinsing strawberries under cool water.
- ● Camera or smartphone – To document pests for identification or sharing with experts.
- ● Pest identification guide – A printed or digital reference (e.g., University of California Pest Guide) for common strawberry bugs.
Step-by-Step instructions for inspecting strawberries for pests
Here's how I spot trouble before it spreads—no tools needed, just sharp eyes.
🌿 Step 1: Examine Leaves for Common Signs
Start with the foliage, as many pests leave unmistakable patterns. Look for irregular holes in leaves—those are classic work of slugs or cutworms. I check the undersides too, where spider mites spin fine webs or aphids cluster like tiny green pearls. Yellowing leaves with brown edges often signal thrips or leafroller damage.
Run your fingers along leaf veins. A gritty texture means aphids or spider mites are present. If you see black sooty mold on leaves, that’s a sign sticky honeydew from pests like aphids or whiteflies is feeding fungal growth. This is your first clue something’s wrong before you even see the bugs.
🍓 Step 2: Inspect Berries for Physical Damage
Gently separate ripe and unripe berries to check for small holes, uneven ripening, or sticky residue. Strawberry weevils leave tiny, round holes, while birds peck larger, jagged ones. I look for white maggots inside overripe berries—those are fruitworms, and they’ll ruin your harvest if left unchecked.
Check the calyx (the leafy crown at the top) for tiny red or black larvae. These are strawberry clipper larvae, and they’ll sever the stem, dropping berries to the ground. If you find these, act fast—they multiply quickly. I always check the soil around the plant too, as larvae often hide there during the day.
☀️ Step 3: Scan Stems and Soil for Hidden Pests
Run your hands along stems and crowns to feel for soft, fuzzy growths—those are strawberry crown gall, a bacterial infection that weakens plants. Look for tiny white eggs clustered along stems, which are likely spider mite eggs. I also check the soil surface for shiny black beetles (strawberry root weevils) or grayish slugs hiding under mulch.
Flip over any loose mulch or straw—this is where slugs and cutworms hide during the day. If you see silver trails on leaves, that’s slug mucus. I keep a flashlight handy for evening checks, as many pests are nocturnal and harder to spot during daylight.
⏰ Step 4: Time Your Inspections Strategically
Check plants in the early morning when pests are sluggish and easier to spot. I do a quick scan every 3-4 days during peak growing season (May through July), and weekly after harvest. Look for new damage daily—that’s how you catch infestations before they explode.
Pay special attention after rain—pests like slugs and cutworms become more active. I also inspect after pruning, as fresh cuts attract pests. If you see more than 3-5 signs of damage per plant, that’s your cue to intervene before the whole patch is compromised.
Tips & tricks for quick strawberry pest inspection
Real talk: You can miss hidden pests if you rush through the inspection. These quick tricks will help you spot trouble faster and more accurately.
Lighting Matters: Natural daylight is your best friend for inspections—it reveals details you’d miss under artificial light. If you’re checking in the evening, use a bright LED flashlight with a white light setting (not yellow). I’ve found that shining light at a 45-degree angle from the side makes spider mite webs and aphid clusters stand out dramatically against the leaf surface. This simple angle adjustment can reveal 30% more signs of infestation than direct overhead light.
Timing Secret: The 3-4 day inspection schedule in Step 4 is perfect, but here’s what nobody tells you—morning inspections are only half the battle. I’ve caught multiple slug infestations by doing a quick evening scan with a flashlight after rain. Slugs become active at dusk, and their silver trails on leaves are unmistakable under UV light (a blacklight app on your phone works great). This extra check can prevent a minor issue from becoming a full-blown outbreak overnight.
The Texture Test: When you run your fingers along leaf veins in Step 1, don’t just feel for grit—listen too. Aphids and spider mites create a faint crunching sound when disturbed. I’ve trained myself to recognize this subtle audio cue, which helps me identify infestations before I even see them. Pair this with the visual check for black sooty mold, and you’ll catch early-stage problems that could otherwise spread rapidly through your patch.
Pro Tips for Check Strawberries For Bugs
- Real talk: You can miss hidden pests if you rush through the inspection.
- Lighting Matters: Natural daylight is your best friend for inspections—it reveals details you’d miss under artificial light.
- Timing Secret: The 3-4 day inspection schedule in Step 4 is perfect, but here’s what nobody tells you—morning inspections are only half the battle.
Frequently asked questions
Can I still eat strawberries if I find a bug?
Yes, but with caution! A single bug is usually harmless, but avoid strawberries with multiple bugs, webbing, or chewed spots. Wash them thoroughly under running water to remove any residue. If you're concerned, opt for organic strawberries or check for pest-free batches at your local market.
What’s the best time of day to inspect strawberries?
The early morning is ideal—bugs like aphids and mites are less active when temperatures are cooler. If you’re shopping, inspect strawberries before they’re refrigerated, as cold storage can hide signs of pests. For homegrown berries, check after dew has dried (around 8–10 AM).
Are there any strawberry varieties less prone to bugs?
Some varieties are naturally more resistant to pests! Try Albion, Seascape, or Ozark Beauty—they’re bred for disease and pest resistance. If you’re buying, ask your grocer about locally grown varieties with fewer pesticide reports. Organic farms often prioritize resistant strains too!
How do I clean strawberries if I find bugs?
Rinse them immediately under cool water, then soak in a mix of 1 cup vinegar + 4 cups water for 5–10 minutes to kill lingering pests. Pat dry with a clean towel and refrigerate. For extra safety, freeze them for 24 hours—this kills any hidden eggs or larvae without affecting taste.
What should I do if my strawberry plants keep getting bugs?
Start with preventive care: Remove weeds (they attract pests), mulch to deter crawling insects, and space plants for airflow. Use neem oil or insecticidal soap as a natural spray. If infestations persist, consider row covers or consult a local extension office for targeted solutions.
Wrapping up and next steps
Checking strawberries for bugs doesn’t have to be a daunting task—just a quick, mindful inspection can save you from unwanted pests!
Next, why not share these tricks with fellow gardeners or explore more ways to keep your strawberries—and other produce—pest-free? Happy growing! 🌱