
Propagation
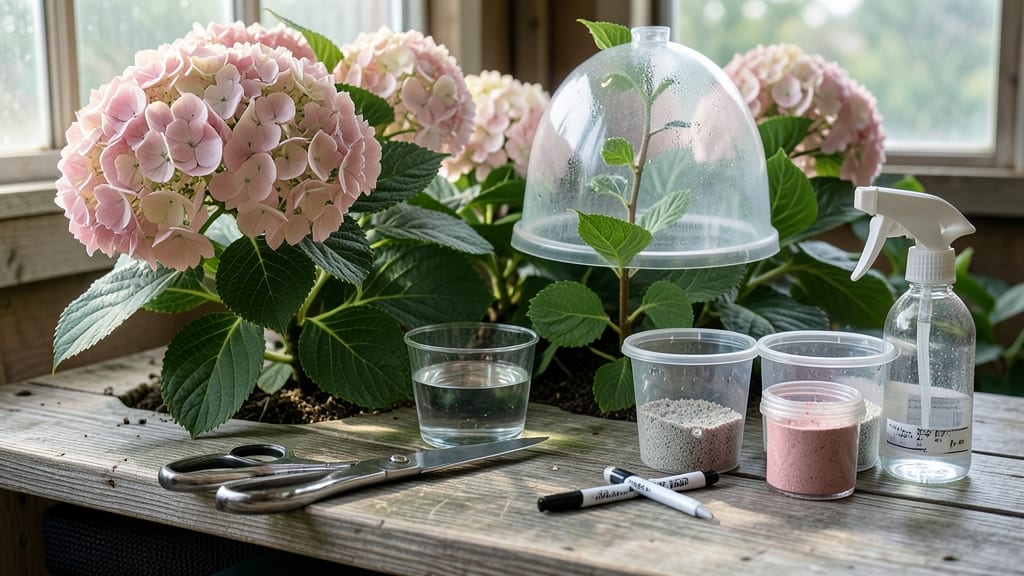
How to clone hydrangea from a single cutting could transform your garden into a showstopping display. 🌿 I’ve turned scraps into thriving plants using a method so simple you’ll wonder why you didn’t try it sooner—no digging required. The secret lies in layering, where you coax stems to root while still attached to the mother plant. You’ll need just a few tools, a little patience, and the right timing—spring or early summer, when growth is vigorous. Most beginners get stuck at the rooting stage, but with the right humidity and a quick dip in rooting hormone, success is almost guaranteed. By fall, you’ll be transplanting your new clones into pots or the ground, watching them bloom just like their parent. The best part? You’ll have extra plants to share or expand your garden without spending a dime. This method works for bigleaf, panicle, and oakleaf hydrangeas alike. Let’s get those cuttings growing!
📚 In This Guide
- What you need
- Instructions
- Tips and common mistakes
- Wrapping up and next steps
What you need
- ● Healthy hydrangea plant: Choose a mature plant (at least 2–3 years old) with strong, flexible stems—avoid woody or brittle growth.
- ○ Rooting hormone (optional but recommended): A powder or gel (e.g., Rootone or Dip ‘N Grow) to boost root development.
- ● Sharp pruning shears or clean knife: Sterilized with rubbing alcohol to prevent disease.
- ● Small stakes or U-shaped wire: To secure stems in place (e.g., 6-inch garden stakes or bent wire).
- ● Moisture-retentive soil or potting mix: A well-draining blend (e.g., 50% peat moss + 50% perlite or sand).
- ● Plastic wrap or clear plastic bag: To create a humid microclimate (e.g., a gallon-sized zip-top bag).
- ● Spray bottle with water: For keeping the soil and cuttings damp.
- ● Garden twine or zip ties: To loosely tie stems to stakes (avoid cutting off circulation!).
- ○ Gloves (optional): To protect your hands from thorns or soil.
- ● Hormone-free alternative: Cinnamon powder or willow water (natural rooting aids).
- ● Mini greenhouse or propagation tray: For controlled humidity if you’re cloning multiple plants.
- ● Fertilizer (low-nitrogen, e.g., fish emulsion): Once roots form (after 4–6 weeks).
- ● Label markers: To track which hydrangea varieties you’re cloning.
- ● Shade cloth (lightweight): To protect new cuttings from harsh sun during rooting.
Step-by-Step instructions for cloning hydrangeas through layering
Here's how I've successfully doubled my hydrangea bushes year after year—no digging required.
🌿 Step 1: Select Healthy Stems for Layering
Choose low-growing, flexible stems that are about pencil-thick and still attached to the mother plant. These should be green and vigorous, not woody or dried out. I look for stems that naturally bend toward the ground—they're perfect candidates. Avoid stems that are flowering this season, as they won't root well.
Gently bend a selected stem until it touches the soil. If it stays in place without popping back up, it's flexible enough. For stubborn stems, I make a small cut (about 1/4 inch deep) along the bottom to encourage root formation later. This is where the magic starts—nature will do most of the work if we set it up right.
🌱 Step 2: Create the Layer and Secure It
Dig a small trench (2-3 inches deep) along the stem you've chosen. Gently bend the stem into the trench, making sure it stays in contact with the soil. If needed, use a U-shaped wire or bent piece of rebar to hold it in place without crushing the stem. The goal is to keep the stem buried while leaving the top portion exposed and growing upward.
I like to cover the buried portion with 1-2 inches of soil, then secure it lightly with a small rock or stake. Don't bury the entire stem—just enough to encourage roots to form where it touches the soil. Water the area gently but thoroughly, making sure the soil around the stem stays moist but not soggy. This step is all about creating the right conditions for roots to sprout.
💧 Step 3: Encourage Root Growth and Monitor Progress
Keep the soil around the layered stem consistently moist for the next 4-6 weeks. I check it daily during dry spells—if the top inch feels dry, it's time to water. Avoid soaking the area, as this can rot the stem before roots have a chance to form. You'll know you're on the right track when you see new growth at the top of the stem and small roots forming at the buried section.
After about 6 weeks, gently tug on the layered stem near the base. If you feel resistance, roots have formed! If not, give it another 2-3 weeks of care. I've found that patience here pays off—rushing leads to weak roots that won't support a healthy new plant. Once roots are established, you're ready for the final step.
✂️ Step 4: Separate and Plant the New Hydrangea
When the layered stem has strong roots (usually 6-8 weeks after layering), it's time to separate it from the mother plant. Using clean, sharp pruners, cut the stem just below the new roots. This is the moment of truth—handle the new plant carefully to avoid damaging the delicate root system. Shake off excess soil to check for roots; you should see a network of white or tan roots.
Plant the new hydrangea in its permanent spot, making sure the root ball is level with the soil surface. Water it deeply to help it settle in. In the first 2-3 weeks, keep the soil moist and provide partial shade to reduce stress. You'll see new growth within a few weeks—a sign that your clone is thriving. This method gives you a head start on growing a mature hydrangea without the wait of starting from seed or a tiny cutting.
☀️ Step 5: Care for Your New Plant Through the First Season
Your cloned hydrangea will need consistent watering during its first growing season, especially in hot or dry weather. I water deeply once a week, checking the soil first—if the top 2 inches feel dry, it's time to water again. Mulch around the base with 2-3 inches of organic mulch to retain moisture and regulate soil temperature.
In the first year, focus on establishing strong roots rather than blooms. You might see fewer flowers, but this is normal. Prune lightly in late winter or early spring to shape the plant and encourage bushier growth. By the second year, your clone should be fully established and ready to bloom like the mother plant.
Tips & tricks for perfect hydrangea layering
These simple tricks will help you avoid common pitfalls and maximize your success with hydrangea cloning.
Stem Selection Wisdom: In Step 1, look for stems that naturally bend toward the ground—they're often the most flexible and ready to root. I've found that stems with slight woody texture (but not fully hardened) work best. Avoid stems with flowers or seed heads, as they'll drain energy from root development. Confession: I skipped this rule once and ended up with stems that never rooted—don't make my mistake!
Layering Technique: When creating the trench in Step 2, make it just deep enough to cover about 1-2 inches of the stem. The key is maintaining contact with the soil while leaving the top portion exposed. I use a small garden fork to loosen the soil without disturbing the roots of the mother plant. For stubborn stems that won't stay bent, try making a small nick (about 1/4 inch) on the underside where it touches the soil—this encourages faster root formation.
Moisture Management: During the critical 4-6 week rooting period in Step 3, consistency is everything. I've learned that checking soil moisture daily is better than relying on memory. Use your finger to test the top inch—if it feels dry, water gently until moisture reaches about 2 inches deep. Overwatering can cause stem rot, while underwatering prevents root development. A simple spray bottle works well for touch-ups between waterings.
Root Testing: In Step 4, when testing for roots at 6 weeks, be gentle but firm. If you feel even slight resistance when tugging, roots have formed! I've found that early morning is the best time to test—soil is moist from overnight dew, and stems are more pliable. If no roots are present, give it another 2-3 weeks before attempting separation. Remember, patience here prevents transplant shock later.
Pro Tips for Clone Hydrangea
- These simple tricks will help you avoid common pitfalls and maximize your success with hydrangea cloning.
- Stem Selection Wisdom: In Step 1, look for stems that naturally bend toward the ground—they're often the most flexibl...
- Layering Technique: When creating the trench in Step 2, make it just deep enough to cover about 1-2 inches of the ste...
Frequently asked questions
Got questions about cloning hydrangeas? You’re not alone! Here are some of the most common queries—plus straightforward answers to help you propagate like a pro.
When is the best time to layer hydrangeas?
The ideal window is late spring to early summer (May–June) when new growth is vigorous but before extreme heat sets in. This gives roots enough time to form before winter. For cooler climates, early spring works too—just avoid frost!
How long does it take for hydrangea layers to root?
Patience pays off! Most hydrangea layers root in 4–8 weeks, depending on humidity and soil conditions. Check for resistance at the wound site—if it feels spongy, roots are forming. Pro tip: Keep soil consistently moist (but not soggy) to speed things up.
Can I clone hydrangeas from cuttings instead of layering?
While layering is easier for beginners, stem cuttings work too. Use semi-hardwood stems (from late spring to early fall), dip in rooting hormone, and plant in perlite or sand. Success rates are lower (~50–70%), but it’s a great backup method.
Why did my hydrangea layer fail to root?
Common culprits include overwatering (roots rot), drought stress (soil too dry), or poor wound exposure (not enough stem contact with soil). Try again with a clean cut, fresh soil, and a humidity dome (like a plastic bag) to trap moisture.
Will cloned hydrangeas look identical to the parent plant?
Yes! Clones are genetic duplicates, so colors, shapes, and growth habits will match the original. This is why cloning is perfect for preserving rare varieties or filling gaps in your garden. Just remember: soil pH still affects bloom color (e.g., blue vs. pink).
Still stumped? Drop your question in the comments—we’re happy to help troubleshoot your hydrangea cloning journey!
Wrapping up and next steps
Cloning hydrangeas through layering is a rewarding way to expand your garden without the stress of digging up roots! Whether you’re a beginner or a seasoned gardener, this method is simple, cost-effective, and ensures healthy new plants.
With patience and the right techniques—like proper timing, moisture control, and gentle care—you’ll soon enjoy lush, thriving hydrangeas in multiple spots.
Ready to multiply your blooms? Grab your supplies, pick a sunny day, and give layering a try. Once you’ve mastered this trick, you can experiment with other propagation methods or even share your new cuttings with fellow plant lovers! 🌿✨