
Pruning
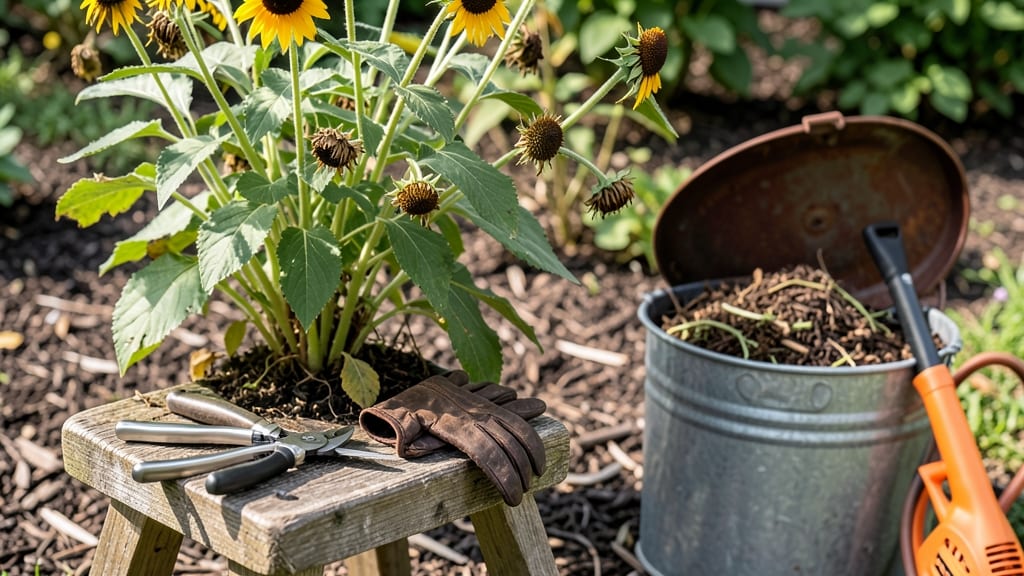
How to cut back Black-Eyed Susans for winter—don’t wait until spring. ✂️ Cutting them back now, after the first hard frost, clears out last year’s stems, prevents disease, and gives those bright yellow blooms a stronger start next season. I’ve pruned mine for five years, and the difference in spring vigor is night-and-day.
The key is timing and technique: wait until stems turn crispy brown (usually late fall), then cut back to 3-4 inches above the ground with clean, sharp pruners.
This height protects the crown from winter damage while giving new growth room to emerge early. Avoid leaving stubby stems—they harbor pests and fungi.
After pruning, spread a 2-3 inch layer of mulch to insulate the crown and retain moisture. By late spring, you’ll see fresh growth pushing through, followed by those classic daisy-like blooms that last from summer into fall. The plants reward your effort with longer bloom times and healthier foliage.
This method works for both Rudbeckia hirta (the classic black-eyed Susan) and larger varieties like Rudbeckia fulgida. Just adjust the cutting height—taller varieties can handle being cut back to 6 inches. Now grab those shears and give your perennials a fresh start!
📚 In This Guide
- What you need
- Instructions
- Tips and common mistakes
- Wrapping up and next steps
What you need
- ● Pruning shears or hedge clippers: Bypass pruners (for clean cuts on smaller stems)
- ● OR hedge shears (for larger patches or thick growth)
- ● Specs: Sharp, stainless steel blades (avoid dull tools—they crush stems)
- ● Gloves: Heavy-duty gardening gloves (to protect against thorns and rough stems)
- ○ Optional: Nitrile-coated gloves for extra grip in wet conditions
- ○ Disinfectant (optional but recommended): 70% isopropyl alcohol or rubbing alcohol (to sterilize tools between cuts)
- ● Quantity: Small spray bottle or wipe
- ● Trash bag or compost bin: For disposing of pruned stems (check local compost rules—Black Eyed Susans are non-invasive)
- ● Timing: Prune after the first hard frost (typically late fall) but before the ground freezes solid.
- ● Weather: Choose a dry, overcast day to avoid cutting wet stems (which can spread disease).
- ● Safety gear: Safety glasses (if working near eyes or in windy conditions).
- ● Loppers: For stubborn, thicker stems (if your plants are mature).
- ● Knee pads: If you’re working close to the ground or have joint concerns.
- ● Pruning saw: For very thick growth (rare for Black Eyed Susans but useful for overgrown patches).
- ● Markers or flags: To label areas if you’re dividing or rearranging plants.
Step-by-Step instructions for cutting back Black Eyed Susans
Here's the precise method I use every fall to protect these hardy perennials while ensuring a stronger spring comeback.
✂️ Step 1: Time Your Cuts for Optimal Dormancy
Wait until after the first hard frost when foliage has browned completely but before heavy snowfall. Black Eyed Susans thrive when they enter dormancy gradually, so cutting too early disrupts their natural cycle. I typically work in late November when the stems feel brittle and leaves crumble easily between fingers.
This timing prevents disease buildup in moist stems while allowing the plant to store energy underground. If you cut back too soon, you risk encouraging fungal growth during winter rains. The goal is to remove dead foliage while preserving the root system's strength for spring.
✂️ Step 2: Use Proper Cutting Technique
Grab sharp bypass pruners or clean loppers and cut each stem back to within 2-3 inches of the ground. Avoid leaving stubs taller than 1 inch—these can harbor pests and diseases. I make clean cuts at a 45-degree angle just above a leaf node or bud when possible, which encourages new growth from the right spot.
Never pull stems by hand or use dull shears—they crush stems and create jagged cuts that invite infection. Work on dry days when stems are firm, not after rain when they're pliable. For large clumps, divide the plant first if stems exceed 3 feet in diameter to improve airflow.
🌱 Step 3: Clear Debris and Protect Roots
Remove all cut stems and foliage from the bed immediately—never leave them piled around the base. Black Eyed Susans are prone to crown rot, and wet debris creates the perfect environment for pathogens. I use a stiff rake to gather debris and either compost it (if disease-free) or dispose of it in yard waste.
After clearing, apply a 2-3 inch layer of mulch (like shredded leaves or straw) around the base but keep it 2 inches away from stems to prevent moisture buildup. This insulates roots while allowing winter air circulation. The mulch should feel fluffy, not compacted—think "light as a snowbank" rather than "heavy like a blanket."
☀️ Step 4: Prepare for Spring Growth
In early spring, when new shoots appear (usually by late March in most climates), remove any remaining mulch and inspect the crown. Healthy roots will show green buds within 1-2 weeks of warming soil. If you see blackened or mushy tissue, trim it away immediately with sterilized pruners.
This is also the time to fertilize lightly with balanced 10-10-10 if your soil is poor. I apply it in a 1-inch wide band around the perimeter, keeping it away from stems. Water deeply after fertilizing to help nutrients reach the roots. By mid-April, you should see 3-4 inch tall shoots—that's your signal the plant is ready to rebound.
Tips & tricks for perfect Black Eyed Susan winter pruning
These simple yet game-changing tips will help you avoid common mistakes and ensure your Black Eyed Susans return stronger than ever next spring.
Timing is Everything: Look for these three key signs that it's time to prune: completely browned foliage, brittle stems that snap easily, and dry leaves that crumble between your fingers. I always check the weather forecast too—aim for a dry, sunny day with temperatures above freezing. This timing window is narrow, so don't wait until snow flies! The late November target in Step 1 gives you that perfect balance between dormancy and disease prevention.
Tool Selection Matters: Sharp tools are non-negotiable for clean cuts that heal properly. I've ruined plants with dull shears that crush stems instead of cutting cleanly. Invest in a good pair of bypass pruners—they make work easier and reduce the risk of disease transmission. For larger stems, use loppers with a 6-inch cutting blade. Sterilize your tools with rubbing alcohol between cuts if you're working with multiple plants to prevent spreading any potential pathogens.
Mulch Application Technique: When you apply that 2-3 inch layer of mulch in Step 3, think "air circulation" not "blanket." The 2-inch gap from stems is crucial—it prevents moisture buildup that leads to crown rot. I like to use shredded leaves because they break down slowly, providing insulation while allowing water to penetrate. For extra protection in cold climates, consider adding a layer of evergreen boughs over the mulch—this creates a mini insulation barrier without suffocating the plant.
Spring Inspection Strategy: That early spring inspection in Step 4 is your chance to catch problems before they spread. I always bring a small trowel and sterilized pruners when I remove the mulch. Look for these red flags: blackened tissue at the crown base, mushy stems, or any unusual growth patterns. Healthy roots should show firm, white tissue when you gently scrape away the outer layer. If you find issues, trim away all affected areas down to healthy tissue and dispose of the debris immediately.
Pro Tips for Cut Back Black Eyed Susans For Winter
- These simple yet game-changing tips will help you avoid common mistakes and ensure your Black Eyed Susans return stro...
- Timing is Everything: Look for these three key signs that it's time to prune: completely browned foliage, brittle ste...
- Tool Selection Matters: Sharp tools are non-negotiable for clean cuts that heal properly. I've ruined plants with dul...
Frequently asked questions
Got questions about trimming your Rudbeckia hirta (Black Eyed Susans) for winter? You're not alone! Here are some of the most common queries—plus straightforward answers to keep your perennials thriving.
When is the best time to cut back Black Eyed Susans?
Wait until late fall or early winter (after the first hard frost) to prune. This gives the plant time to harden off, but avoids cutting too early, which can encourage new growth that might not survive winter. Aim for November to February in most climates.
Should I cut them back before or after snowfall?
After the first snow is ideal—it signals the plant is dormant. However, if snow is forecast, cut them back before to avoid damaging stems. Just avoid pruning in freezing temps (below 32°F/0°C) to prevent stress.
How short can I cut Black Eyed Susans?
Leave 2–3 inches of stem above the ground. Cutting too short risks damaging the crown or leaving no protection for overwintering. If you accidentally cut too low, don’t worry—new growth will sprout from the base in spring!
Will cutting back Black Eyed Susans kill them?
Nope! These hardy perennials thrive with proper pruning. The key is timing and technique. Cutting back too early or too late can stress the plant, but a clean cut in late fall/winter ensures a stronger rebloom in spring.
What if my Black Eyed Susans don’t regrow in spring?
Check for rot or pests first. If the crown is mushy or stems are hollow, the plant may have died over winter. If the soil is healthy and you pruned correctly, new shoots should appear by early spring. If not, consider replanting!
Can I leave the dead stems for winter interest?
While some gardeners leave seed heads for texture, Black Eyed Susans benefit from cleanup. Dead stems can harbor pests or mold. Plus, a tidy winter garden looks neater and reduces disease risk.
Wrapping up and next steps
Cutting back your Black Eyed Susans for winter is a simple yet powerful way to ensure vibrant blooms next spring! By following these steps—using sharp tools, timing cuts right, and protecting the base—you’re giving your plants the best chance to thrive.
With a little effort now, you’ll be rewarded with a stunning display of golden cheer come spring. 🌻
Ready to take action? Grab your pruners and get started! If you’re new to pruning, consider watching a quick tutorial or joining a local gardening group for extra tips. Happy gardening!