
Planting
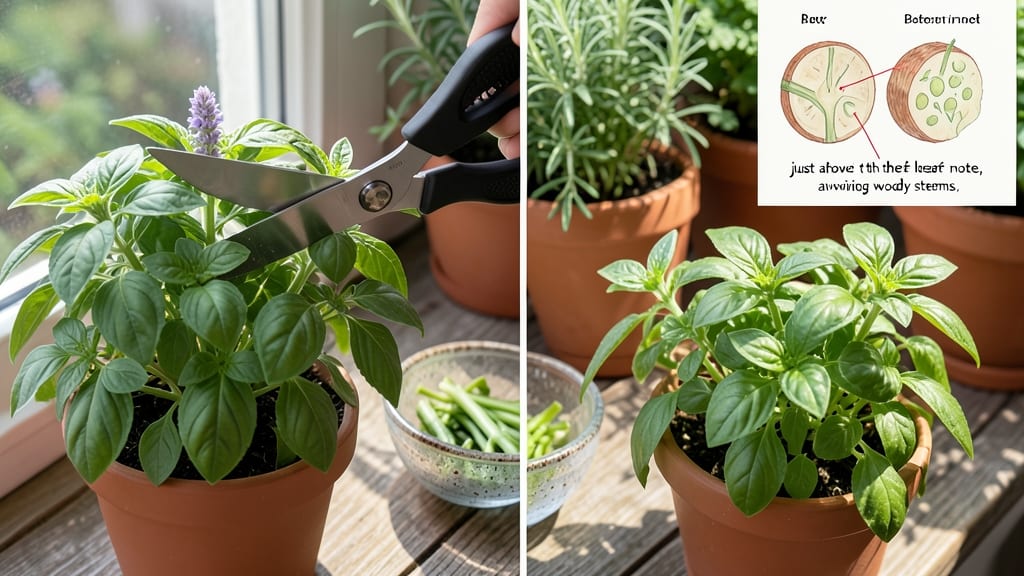
Your herb garden can double in size this season—if you learn how to cut herbs without killing the plant. ✂️ I’ve saved more herbs from over-pruning than I’d like to admit, and the secret lies in where (and how) you make those snips.
Most people hack at the top like they’re trimming hedge clippings, but herbs need precision to regrow lushly.
The right technique depends on the herb: basil thrives when you pinch above leaf pairs, rosemary needs a hard cut back to woody stems, and mint spreads best when you trim the tips to encourage bushiness.
Clean, sharp scissors are non-negotiable—dull blades crush stems and invite disease, while dirty ones spread pathogens faster than you can say "wilted cilantro."
When done correctly, you’ll see new growth within 10-14 days, with plants that stay compact, leafy, and productive for months. The key? Cut just above a leaf node (that little bump where leaves grow) and never take more than 1/3 of the plant at once.
Over-pruning is the fastest way to turn a thriving herb into a sad, leggy shadow of itself.
Season matters too—spring and summer are prime trimming times, while winter’s the time to let perennials rest. Even a few minutes of careful cutting now means a harvest that’ll last all season long. Let’s get those shears sharp and those herbs thriving!
📚 In This Guide
- What you need
- Instructions
- Tips and common mistakes
- Wrapping up and next steps
What you need
- ● Sharp pruning shears or scissors – Look for bypass pruners (for larger stems) or clean kitchen scissors (for delicate herbs). Dull blades crush stems, stunting regrowth!
- ● Disinfectant (70% isopropyl alcohol or diluted bleach) – Sterilize tools before and after use to prevent disease.
- ○ Gloves (optional but recommended) – Protects hands from sap (e.g., mint) or thorns (rosemary).
- ● Healthy, mature plants – Wait until herbs are at least 3–6 inches tall and have 4–6 sets of leaves.
- ● Sunlight & water schedule – Ensure herbs are well-watered 1–2 days before trimming (avoid soggy soil).
- ● Patience – Never cut more than 1/3 of the plant at once!
- ● Marking pen or chalk – For labeling regrowth zones.
- ● Small container with water – To store cuttings for propagation.
- ● Herb-specific sharpener – Keeps blades razor-sharp for clean cuts.
Step-by-step instructions for precision trimming of herb plants
Here's how I keep my herbs thriving year after year through smart cutting techniques.
✂️ Step 1: Identify the Right Cutting Points
Look for where the stem has at least 3-4 sets of leaves—this is your target. I always cut just above a leaf node (the small bump where leaves grow out) because new growth always emerges from these points. Avoid cutting into bare stems or you'll stunt regrowth.
For bushy herbs like thyme and oregano, I trim back about one-third of the plant at a time. For upright herbs like rosemary and basil, I focus on removing only the top 2-3 inches of growth. This encourages branching rather than leggy stems.
⏰ Step 2: Time Your Cuts for Maximum Growth
The best time to trim is in the morning after dew has dried but before the heat of midday. I've found this gives plants a full day to recover before nighttime stress. Avoid cutting after heavy rain or when plants are wilting from heat—this weakens them further.
For perennial herbs, I do a light trim every 2-3 weeks during active growth (spring through fall). Annual herbs like basil get more frequent attention—weekly trims keep them bushy and productive. Watch for new growth appearing within 7-10 days of cutting—that's your signal you're doing it right.
🌿 Step 3: Use the Right Tools for Clean Cuts
Never use scissors or dull blades—they crush stems and invite disease. I keep a pair of sharp pruning shears (for thicker stems) and clean kitchen scissors (for delicate herbs) dedicated just to this task. After each use, I wipe them with rubbing alcohol to prevent bacterial spread.
Make cuts at a 45-degree angle about ¼ inch above the leaf node. This increases surface area for water uptake and keeps rainwater from pooling on the cut. For woody stems, I use shears; for soft herbs, I pinch with my fingers for precision control.
💧 Step 4: Care for Plants After Trimming
Water immediately after cutting to help plants recover. I give herbs a deep drink (until water runs out the drainage holes) because trimming creates new growth points that need moisture. Avoid fertilizing right after trimming—let roots recover for 3-5 days first.
Move potted herbs to a shady spot for 24 hours after heavy trimming. This reduces stress while new growth establishes. You'll notice within 3-5 days that the plant looks perkier and starts putting out fresh leaves—this is your reward for proper technique.
☀️ Step 5: Monitor for Regrowth Signals
Watch for new leaf pairs emerging from the nodes where you cut. Healthy regrowth should be bright green and upright, not yellow or wilted. If you see only sparse new growth after 2 weeks, your cuts were too severe—next time trim back less aggressively.
For herbs that bolt (like cilantro or dill), I cut back harder to encourage leaf production rather than flowers. The more you harvest leaves, the less energy the plant wastes on flowering. With consistent care, your herbs will stay lush and productive for months beyond what store-bought plants manage.
Tips & tricks for precision herb trimming
These simple tricks will help you keep your herbs thriving—and actually grow more—after every cut.
The Growth Factor: When trimming bushy herbs like thyme or oregano, focus on cutting back one-third of the plant at a time. This mimics natural pruning and prevents shock. For upright herbs like rosemary, stick to removing just the top 2-3 inches—this encourages branching instead of leggy stems that never produce leaves. Think of it as sculpting: you want to shape the plant, not strip it bare.
Timing Secret: That morning after dew has dried window is crucial. I've learned the hard way that trimming after rain or in midday heat stresses plants. If you must trim later, wait until evening when temperatures drop. The goal is to give your herbs a full day to recover before nighttime cooling sets in. Pro tip: If your plants look wilted, wait until they perk up before cutting—healthy leaves handle trimming better.
Tool Intelligence: Sharp tools make all the difference. I keep two dedicated tools: pruning shears for woody stems and clean kitchen scissors for delicate herbs. The 45-degree angle cut about ¼ inch above the leaf node is key—it prevents water pooling and increases surface area for new growth. For soft herbs, pinch with your fingers instead of cutting; this gives you more control over the exact spot. And always sanitize your tools with rubbing alcohol between uses to prevent disease spread.
Post-Trim Recovery: After cutting, give your herbs a deep drink—water until it runs out the drainage holes. This helps them bounce back faster. Then move them to a shady spot for 24 hours to reduce stress. Within 3-5 days, you'll notice new growth appearing from those leaf nodes. If you see yellowing or sparse regrowth after 2 weeks, your cuts were too aggressive next time—trim back less.
Pro Tips for Cut Herbs Without Killing The Plant
- These simple tricks will help you keep your herbs thriving—and actually grow more—after every cut.
- The Growth Factor: When trimming bushy herbs like thyme or oregano, focus on cutting back one-third of the plant at a...
- Timing Secret: That morning after dew has dried window is crucial. I've learned the hard way that trimming after rain...
Frequently asked questions
How often should I trim my herbs to keep them healthy?
Trim herbs regularly but gently—about every 4-6 weeks for fast growers like basil or cilantro, and 2-3 times per season for slower varieties like rosemary or thyme. Over-trimming stresses plants, while under-trimming leads to leggy growth. Focus on harvesting leaves, not stems, to encourage bushier regrowth.
Can I cut herbs in the morning or evening?
Morning is ideal—herbs are hydrated and flavors are most potent. Avoid cutting in hot afternoons (stresses plants) or right before frost (damages tender leaves). If evening trimming is unavoidable, do it 2-3 hours before sunset to let plants recover overnight.
What’s the best way to revive a herb plant that’s looking sad after trimming?
Revive wilted herbs with these steps:
- Water deeply (but avoid soggy soil—use well-draining pots).
- Move to bright, indirect light (no harsh sun for 1-2 days).
- Trim only yellow/brown leaves (never healthy ones).
- Fertilize lightly with half-strength organic fertilizer after 1 week.
Is it okay to use scissors or should I pinch leaves by hand?
Both work! Hand-pinching (removing leaves with fingers) is gentler and encourages branching. Use clean, sharp scissors for thicker stems (like rosemary) or large leaves (e.g., mint). Never use dull tools—tearing damages plants. Disinfect blades with rubbing alcohol between cuts.
Can I save cut herb stems for regrowth in water?
Yes! Many herbs (like basil, mint, or cilantro) root easily in water. Place stems in a jar with 1 inch of water, change water every 2-3 days, and keep in bright light. Roots form in 1-2 weeks. For woody herbs (rosemary, thyme), this method often fails—stick to soil propagation instead.
Wrapping up and next steps
Mastering the art of cutting herbs is simpler than you think—and it’s the secret to a thriving, bountiful garden! 🌿 By using the right tools, timing, and techniques, you’ll encourage lush regrowth while keeping your plants happy and healthy.
Now that you’re armed with these tips, grab those shears and get trimming!
Ready to take it further? Experiment with different herbs, track their regrowth patterns, and soon you’ll be a pro at harvesting without harm. Happy gardening—your kitchen (and plants) will thank you!