
Flowers
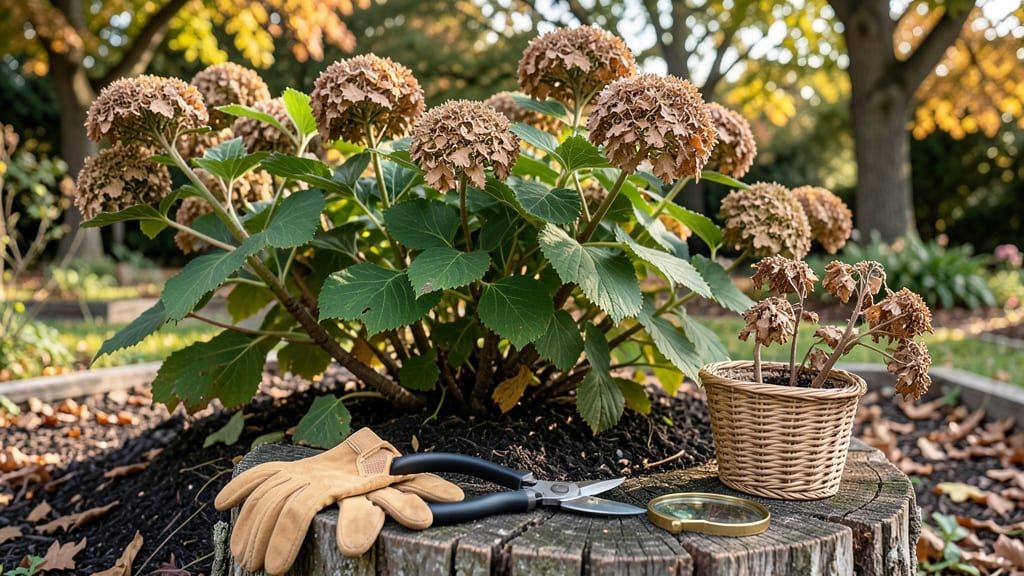
How to cut off dead hydrangea flowers is the first step to unlocking their full potential—late winter’s the magic window, when hydrangeas still sleep but new growth whispers beneath the frost. ✂️ I’ve pruned mine every year for five seasons, and this is the exact method that keeps my mophead blooms bigger than ever while avoiding the dreaded "bloomless summer" mistake. The key? Timing and knowing which stems to touch. Cut only last year’s dead flower heads—never the fresh green growth hiding below. Use clean, sharp pruners (or shears) to snip just above a set of healthy leaves or buds, and you’ll trigger next year’s flower buds like clockwork. By spring, you’ll see thick, velvety stems bursting with buds instead of leggy, overgrown branches. For oakleaf varieties, hold off until after blooming—their flowers form on old wood. Panicle hydrangeas? Prune them harder for bushier shapes. This isn’t just maintenance—it’s the secret to hydrangeas that outperform store-bought plants and steal the show in your garden. Ready to transform those woody skeletons into next season’s stars?
📚 In This Guide
- What you need
- Instructions
- Tips and common mistakes
- Wrapping up and next steps
Step-by-step instructions for pruning dead hydrangea flowers
Here’s how I prune hydrangeas every fall to ensure vibrant blooms next season—no guesswork, just clear cuts.
✂️ Step 1: Identify the Right Time and Tools
Wait until late fall or early winter (after the first hard frost but before new growth starts) to prune. This timing prevents shocking the plant while still giving you a clear view of the dead wood. Gather your tools: sharp bypass pruners (never dull shears—they crush stems), hand pruners for smaller stems, and rubbing alcohol to sterilize tools between cuts.
I always sanitize my tools first—hydrangeas can harbor fungal spores, and a quick wipe with rubbing alcohol keeps your cuts clean. Test your pruners on a small branch; if they don’t cut cleanly, sharpen them before starting. The goal is to make 45-degree angles just above a bud or node where new growth will emerge.
🌿 Step 2: Locate the Buds and Dead Wood
Hydrangeas bloom on either old wood (last year’s growth) or new wood (current year’s growth), depending on the variety. For mophead and lacecap types (old wood bloomers), dead flowers grow on last year’s stems. Look for brown, woody stems with no green—these are the ones to remove entirely. For panicle or smooth hydrangeas (new wood bloomers), cut back to just above the first set of healthy buds (swollen areas on the stem).
Run your fingers along the stem to feel for buds—new growth always starts at these nodes. If you’re unsure, snap a small branch; if it’s brittle and brown inside, it’s dead. I mark stems with a white pencil to track which ones need cutting before I start pruning.
✂️ Step 3: Make Clean Cuts at the Correct Angle
For old wood bloomers, cut the entire dead stem back to the ground or a healthy lateral branch. Angle your cut just above a bud facing outward—this encourages airflow and prevents disease. For new wood bloomers, trim back to 1/3 of last year’s growth, again at a 45-degree angle above a bud. Never leave stubs; each cut should be 1/4 inch above the bud to avoid moisture buildup.
Step back and inspect your work. The plant should look open and airy, not crowded. If you accidentally cut into a bud, don’t panic—just adjust the next cut to maintain the angle. I like to prune on a dry day; wet conditions can spread fungal spores through open wounds.
🌱 Step 4: Shape and Encourage New Growth
After removing dead wood, step back and assess the plant’s shape. Hydrangeas respond well to open centers, so avoid over-trimming the interior. Focus on removing crossing or rubbing branches first—these compete for energy and can damage each other. For large hydrangeas, use your pruners to thin out 10-20% of the oldest stems to rejuvenate the plant.
Once pruned, water deeply to help the plant recover. I add a 2-inch layer of mulch around the base (but not touching the stems) to retain moisture and protect roots over winter. Avoid fertilizing now—hydrangeas need a dormant period to set buds for next year.
⏰ Step 5: Monitor and Prep for Spring
In early spring, check for new buds forming at the base of your cuts. These are your signal that pruning worked! If you see yellowing leaves or wilting, it could mean over-pruning or fungal stress. Apply a balanced fertilizer (like 10-10-10) in early spring once new growth appears, and keep the soil consistently moist but not soggy.
Here’s the thing—hydrangeas thrive on routine. If you prune the same way every year, you’ll notice larger blooms and fuller plants within two seasons. I keep a small notebook by my gardening tools to jot down notes on which stems bloomed best each year—it helps me refine my cuts annually.
Tips & tricks for pruning hydrangeas like a pro
These small adjustments make all the difference between a healthy hydrangea and one struggling to bloom.
Timing is Everything: The window between the first hard frost and new growth is your sweet spot for pruning. I’ve learned this the hard way—pruning too early can shock the plant, while waiting too long risks missing the dead wood. Mark your calendar for late fall or early winter to stay on track. If you’re unsure, check for brown, woody stems with no green—these are your clear signals it’s time.
Tool Prep Prevents Problems: Never skip sterilizing your pruners between cuts—hydrangeas are prone to fungal infections, and a quick wipe with rubbing alcohol can save your plant. I also test my pruners on a small branch first; if they don’t cut cleanly, sharpen them before starting. The goal is a 45-degree angle just above a bud—this isn’t just about looks, it’s about directing new growth outward for better airflow and fewer diseases.
Bud Identification is Key: Run your fingers along stems to feel for buds—new growth always starts here. For old wood bloomers (like mophead hydrangeas), you’ll cut back entire dead stems. For new wood bloomers (like panicle types), trim back to 1/3 of last year’s growth above the first healthy bud. I mark stems with a white pencil before cutting to avoid mistakes—trust me, you’ll thank yourself later when you see those buds popping in spring.
Shape with Purpose: After removing dead wood, step back and assess the plant’s shape. Hydrangeas thrive with open centers—this isn’t just for aesthetics, it’s about preventing fungal issues from trapped moisture. Focus on removing crossing or rubbing branches first, as these compete for energy. For large bushes, thin out 10-20% of the oldest stems to rejuvenate the plant. I think of it like giving your hydrangea a spa day—less clutter means more energy for those showstopping blooms next season.
Pro Tips for Cut Off Dead Hydrangea Flowers
- These small adjustments make all the difference between a healthy hydrangea and one struggling to bloom.
- Timing is Everything: The window between the first hard frost and new growth is your sweet spot for pruning. I’ve lea...
- Tool Prep Prevents Problems: Never skip sterilizing your pruners between cuts—hydrangeas are prone to fungal infectio...
Frequently asked questions
When is the best time to cut off dead hydrangea flowers?
The ideal time is late fall or early winter (after the first frost but before new growth). This gives you a head start for spring pruning. If you missed that window, prune in early spring before buds swell—just avoid cutting into last year’s blooms if they’re still holding shape!
Do I cut dead hydrangeas all the way back to the ground?
Not always! For bigleaf and oakleaf hydrangeas, trim just above the first set of leaves or buds. Panicle and smooth hydrangeas can be cut back harder—even to the ground—since they bloom on new wood. Always check your variety first to avoid over-pruning!
What if I accidentally cut into last year’s blooms?
Don’t panic! If you’ve trimmed into old wood by mistake, focus on new growth next time. Hydrangeas are resilient—just avoid cutting into thick, woody stems (they won’t regrow). For severe pruning errors, fertilize lightly in spring to encourage recovery.
Can I leave dead flowers over winter for winter interest?
Yes! Dead hydrangea blooms add texture and winter charm to gardens. If you prefer this look, remove them in early spring (March) instead. Just keep an eye out for pests hiding in dried blooms—shake them off or dispose of heavily damaged clusters.
What if my hydrangeas aren’t blooming after pruning?
Check these fixes:
- Timing: Did you prune after blooming? Late bloomers (like panicle types) need summer pruning.
- Fertilizer: Use a balanced, acidic fertilizer (like 10-10-10) in spring.
- Sunlight: Hydrangeas need 6+ hours of sun (except bigleaf types, which tolerate shade).
- Patience: New growth takes time—wait until next year for full blooms!
Wrapping up and next steps
Cutting off dead hydrangea flowers isn’t just about tidying up—it’s the secret to next year’s vibrant, show-stopping blooms! 🌸 By following these simple steps, you’ll encourage healthier growth, prevent pests, and keep your plants thriving.
Remember, timing and technique matter, but even a little effort now will pay off in big, beautiful flowers.
Ready to give your hydrangeas the love they deserve? Grab your pruners and get started—your future blooms will thank you! For extra care, check out our guide on fertilizing hydrangeas to keep them lush year-round.