
Pruning
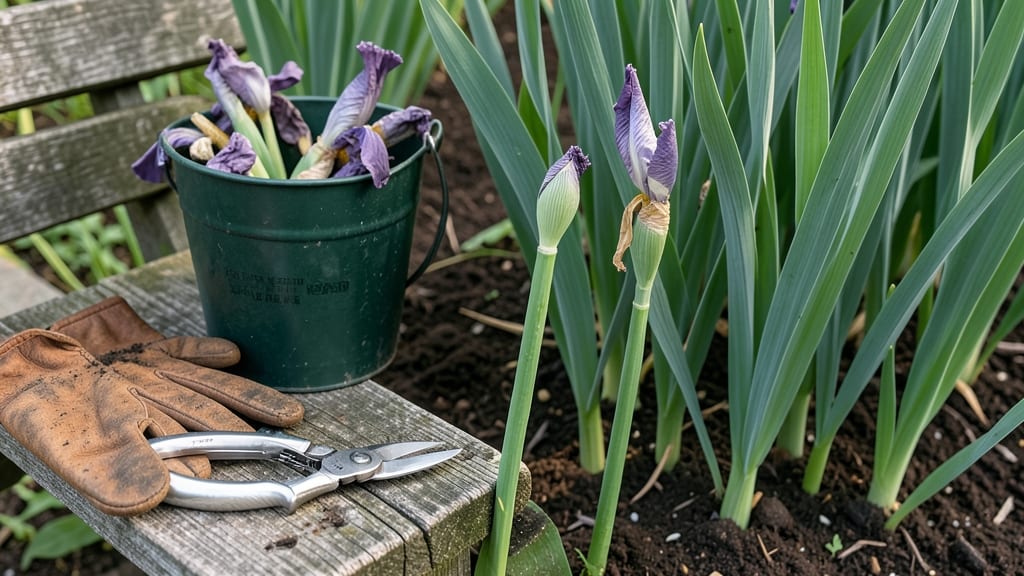
Deadheading bearded irises isn’t just cleanup—it’s the secret to next year’s showstopping blooms. 🌸 After those dramatic purple, yellow, or white flowers fade, cutting them properly keeps energy flowing to the rhizomes instead of wasted seeds.
I’ve revived struggling iris beds using this exact method, and the difference in reblooming is night-and-day.
You’ll need just three things: sharp pruners (clean blades prevent disease), a pair of gloves (rhizomes can be sharp), and a clear day to work. The timing is critical—wait until the blooms are fully spent but before they form seed pods.
A quick snip at the base of the flower stalk, about 2 inches below the faded bloom, is all it takes.
What you’re really doing is redirecting the plant’s energy. Without deadheading, bearded irises pour resources into seed production, leaving them weak for next season. Properly handled, they’ll reward you with taller stems, more buds, and blooms that arrive earlier.
The first year I did this, my irises doubled their flower count.
Fair warning: don’t cut the fan-shaped leaves—those feed the rhizomes. And if you see any brown, mushy growth on the rhizomes themselves, that’s rhizome rot, which requires different care.
Once you’ve mastered the snip, you’ll notice your iris patch looking healthier year after year, with fewer spent blooms cluttering the scene.
📚 In This Guide
- What you need
- Instructions
- Tips and common mistakes
- Wrapping up and next steps
What you need
- ● Clean, sharp pruners or garden shears: Bypass pruners (4–6" blades) work best to avoid crushing stems.
- ○ Disposable gloves: Optional but recommended to protect hands from thorns and dirt.
- ● Compost or mulch: For amending soil after deadheading (1–2 gallons, depending on garden size).
- ○ Garden fork or trowel: For loosening soil around rhizomes (optional but helpful).
- ● Hose or watering can: To rinse tools and clean up afterward.
- ● Rubbing alcohol (70% or higher): For sterilizing pruners between cuts to prevent disease spread.
- ● Plant food (balanced fertilizer, 10-10-10): 1–2 tbsp per plant after deadheading for a nutrient boost.
- ● Trash bag or bucket: For collecting spent blooms and debris (avoid composting diseased flowers).
- ● Knee pads or stool: For comfort if your garden is large or low to the ground.
Step-by-step instructions for deadheading bearded irises
Here’s the simple method I’ve used for years to keep my irises blooming bigger and brighter every season.
✂️ Step 1: Wait Until Blooms Fully Fade
Deadhead irises only after the petals have completely browned and dried on the stem. Cutting too early removes the seed pods that feed next year’s blooms. I wait until the flower head looks like a crumpled paper ball—no more vibrant colors, just dried petals.
This patience pays off. If you cut when blooms are still fresh, you’ll weaken the rhizome’s energy reserves for next season. The dried seed pods also add visual interest to the garden until they naturally fall away.
✂️ Step 2: Cut 2-3 Inches Below the Faded Bloom
Use clean, sharp pruners or shears to snip the stem about 2-3 inches below where the bloom faded. Avoid cutting too close to the rhizome—this prevents disease from entering the plant. I like to make a clean cut at a slight angle to help water run off.
Don’t pull the entire stem—just the faded bloom. Leaving the lower leaves intact ensures the rhizome continues photosynthesizing. If you accidentally cut into the fan of leaves, don’t panic; just trim the damaged area cleanly.
🌱 Step 3: Remove Seed Pods (Optional but Helpful)
After deadheading, you’ll often see small seed pods forming where the bloom was. These pods drain energy from the rhizome. Pinch or snip them off if you want stronger blooms next year. I remove about half of them to balance energy use—enough to prevent overcrowding but still allow some natural propagation.
Leave a few pods if you want more iris plants. Each pod produces seeds that can be planted to grow new rhizomes. Just be ready for a wait—germination can take up to two years in the ground.
☀️ Step 4: Maintain Healthy Growth for Next Season
After deadheading, keep the area around your irises weed-free and well-watered but not soggy. Irises thrive in full sun and dry soil—overwatering causes rhizome rot. I water deeply once a week unless we have heavy rain, then let the soil dry completely between waterings.
In late summer or early fall, you can fertilize with a low-nitrogen, high-phosphorus fertilizer to encourage strong root and bloom development. This is the time to give your irises the nutrients they need for next year’s spectacular display.
⏰ Step 5: Divide Crowded Rhizomes Every 3-4 Years
Even with proper deadheading, bearded iris rhizomes multiply and crowd over time. When you see fewer blooms or smaller flowers, it’s time to divide. Wait until late summer or early fall after the blooms fade but before winter dormancy.
Dig up the clump, separate the rhizomes with a clean knife, and replant the healthiest sections. Discard any mushy or diseased rhizomes. This rejuvenation step ensures your irises keep blooming at their best for years to come.
Tips & tricks for perfect iris deadheading
Here’s what I’ve learned after years of perfecting this process—simple tricks that’ll make all the difference for your iris garden.
Timing is Everything: The moment you deadhead makes a huge difference. I’ve learned the hard way that cutting too early—when petals are still vibrant—robs your rhizomes of the energy they need to bloom again next year. Wait until the blooms look like dried paper balls, and you’ll see bigger, brighter flowers in spring. This one step alone can double your bloom count!
Tool Matters: Never use dull scissors or your fingers for deadheading! Sharp, clean pruners make precise cuts that heal faster and prevent disease. I keep a pair of garden shears just for irises, and I sterilize them with rubbing alcohol between uses. A clean cut at the right angle also helps water run off, keeping your plants healthier longer.
Seed Pod Strategy: Here’s what nobody tells you—those seed pods aren’t just decorative. They’re energy vampires for your rhizomes. I remove about half of them to balance energy use while still allowing some natural propagation. If you’re patient, those seeds can grow into new iris plants, but they’ll take up to two years to bloom. It’s a trade-off between instant blooms and future expansion!
Seasonal Care: After deadheading, your irises need consistent care to thrive. I water deeply once a week but let the soil dry completely between waterings—irises hate soggy roots. In late summer, I add a low-nitrogen, high-phosphorus fertilizer to give them a nutrient boost for next year’s blooms. This simple seasonal routine keeps my irises looking their best year after year.
Pro Tips for Deadhead Bearded Irises
- Here’s what I’ve learned after years of perfecting this process—simple tricks that’ll make all the difference for you...
- Timing is Everything: The moment you deadhead makes a huge difference. I’ve learned the hard way that cutting too ear...
- Tool Matters: Never use dull scissors or your fingers for deadheading! Sharp, clean pruners make precise cuts that he...
Frequently asked questions
Got questions about deadheading bearded irises? You’re not alone—this step can feel tricky at first! Below, we’ve rounded up the most common queries to help you master the process like a pro.
When is the best time to deadhead bearded irises?
Deadhead your bearded irises immediately after the blooms fade but before the seed pods form. This usually means late spring to early summer, depending on your climate. Waiting too long lets the plant redirect energy to seed production instead of next year’s blooms.
What if I skip deadheading—will my irises still bloom?
Yes, but with a trade-off! Skipping deadheading won’t kill your irises, but they may produce seed pods that drain energy from future blooms. Over time, this can lead to fewer flowers. Think of deadheading as a quick investment in next season’s showstopper display!
How do I know if I’ve deadheaded too late?
If you see bulging seed pods (like tiny green beans) on your iris stems, you’ve missed the boat! Once seed pods form, the plant’s focus shifts to reproduction. Cutting then won’t help—just enjoy the pods as a quirky garden feature or let them dry for crafting!
Can I use the cut flowers from deadheading?
Deadheaded iris blooms make stunning cut flowers—just snip them at the base with clean shears. Remove the lower leaves to keep the vase water clean, and enjoy 5–7 days of fresh, fragrant beauty. Pro tip: Change the water every 2 days to prevent bacterial growth.
What if my iris leaves turn yellow after deadheading?
Yellowing leaves post-deadheading can signal over-pruning or nutrient stress. If only the lower leaves yellow, it’s normal as they age. But if it spreads, check for pests (like iris borers) or adjust your fertilizer. A balanced, iron-rich feed can help revive them for next season!
Wrapping up and next steps
Deadheading bearded irises is a simple yet powerful way to keep your garden vibrant and ensure stunning blooms year after year!
By removing spent flowers and following a few key steps, you’re not just tidying up—you’re investing in next season’s beauty. 🌸 Now that you’re equipped with the know-how, grab those pruners and give your irises the care they deserve.
Want to go the extra mile? Consider dividing your irises every 3-5 years—it’s another easy way to rejuvenate their growth and spread color throughout your garden. Happy gardening! 🌱