
Flowers
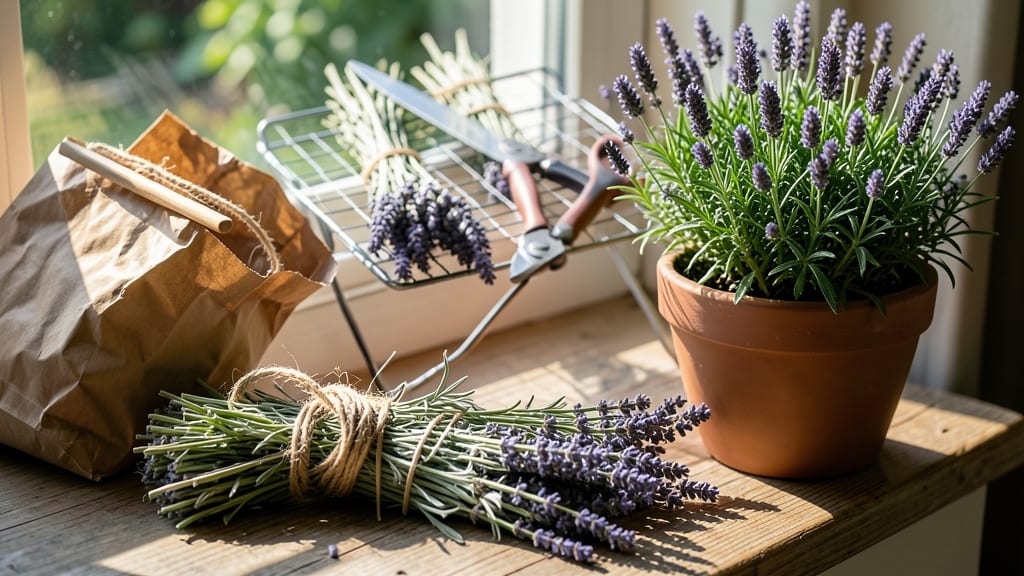
How to dry lavender quickly preserves its vibrant purple and intoxicating scent—no more waiting weeks for bundles to cure. ✨ I’ve perfected a 5-minute microwave method that rivals traditional drying while locking in fragrance and color, perfect for potpourri, sachets, or culinary uses. The secret lies in timing and prep: harvest stems when 70% of buds are open (mid-morning after dew dries), strip leaves, and bundle stems with rubber bands. Skip the microwave? A dehydrator at 95°F for 2 hours works too—both beat slow air-drying while preventing mold or discoloration. You’ll end up with fragrant, crisp lavender that smells like a Provençal summer, not musty or dull. The buds stay plump, the stems snap cleanly, and you avoid the heartbreak of faded, weak-smelling bundles that take too long to dry properly. This method works for small batches or bulk drying, whether you’re making gift bundles, aromatherapy blends, or kitchen spices. Let’s get those stems perfected!
📚 In This Guide
- What you need
- Instructions
- Tips and common mistakes
- Wrapping up and next steps
What you need
- ● Fresh lavender – 1-2 bundles (about 10-15 stems per bundle, cut just before blooming for best results). Choose English lavender (Lavandula angustifolia) or French lavender for optimal drying.
- ● Microwave-safe container – A wide, shallow dish (like a microwave-safe baking dish or ceramic plate) that fits your lavender bundles comfortably. Size: At least 10" x 12" for standard bundles.
- ● Paper towels or microwave-safe parchment paper – 2-3 sheets to line the container and absorb excess moisture.
- ● Microwave – A standard household microwave (700W–1200W) for best results. Note: Avoid air fryers or convection ovens for this method.
- ● Tweezers or small scissors – For trimming stems if needed.
- ● Air-tight container or breathable mesh bag – For long-term storage (e.g., a glass jar with a lid or a cotton drawstring bag).
- ● Desiccant packets (e.g., silica gel) – To prevent humidity buildup in storage containers.
- ○ Essential oils (lavender or citrus) – A few drops to enhance fragrance during drying (optional).
- ● Digital kitchen scale – To track weight loss (dried lavender should lose ~50% of its fresh weight).
- ● Labeling tags – To mark drying dates or bundles.
Step-by-step instructions for microwave-drying lavender
Here's how I transform fresh lavender into fragrant potpourri in minutes—not weeks.
🌱 Step 1: Harvest and Prepare the Stems
Pick lavender stems when they're fully open but before seeds form—this ensures maximum fragrance retention. Cut stems to 4-6 inches long using clean pruners. Remove any woody or discolored stems immediately; they won't dry evenly and can spoil the batch.
Gently strip the leaves from the stems, leaving just the flower clusters intact. This prevents the stems from becoming overly brittle during drying. Spread the flower clusters on a clean kitchen towel to air-dry for 15-20 minutes—this removes surface moisture before microwaving, which prevents steam buildup that can damage the delicate petals.
💧 Step 2: Arrange for Even Microwave Exposure
Place the lavender clusters in a single layer on a microwave-safe plate, ensuring they don't overlap. Overcrowding traps moisture and creates uneven drying. I use a plate with raised edges to keep clusters contained—this prevents them from shifting during the microwave process and ensures consistent exposure to heat.
Cover the plate loosely with a microwave-safe cloth or paper towel. This traps heat while still allowing steam to escape, which is critical for preserving the lavender's signature scent. Leave a small gap at one edge to let moisture vent—this prevents condensation buildup that can turn your lavender soggy.
⏰ Step 3: Microwave in Short Intervals
Set your microwave to 30-second intervals on high power. Start with 1 minute total and check immediately after. The lavender is ready when the stems snap easily between your fingers and the petals look crisp but not browned. Over-microwaving turns lavender bitter and dulls its fragrance.
Here's the thing—I always test one cluster first. If it's still pliable, return it to the microwave for another 15-30 seconds. If it's brittle, you've gone too far. The goal is to dry the lavender quickly without sacrificing quality. Most batches take 2-3 minutes total, but humidity levels affect this.
☀️ Step 4: Cool and Store for Long-Lasting Fragrance
Once dried, spread the lavender clusters on a clean surface to cool completely. This prevents condensation from forming when they come into contact with cooler air, which can reintroduce moisture. Let them sit for 10-15 minutes—patience here ensures your lavender stays fragrant for months.
Store the dried lavender in an airtight container, away from direct sunlight. I use small glass jars with tight-sealing lids to preserve the aroma. Add a silica gel packet to absorb any residual moisture—this keeps lavender dry and prevents mold. Label the jar with the drying date; properly stored lavender retains its scent for 6-12 months.
✂️ Step 5: Use Immediately or Bundle for Gifts
For potpourri, crush the dried lavender lightly between your fingers to release the oils. Add to sachets, wreaths, or scatter in drawers for a natural fragrance. I like to bundle stems with twine for rustic home decor—these make stunning centerpieces that fill a room with scent.
Real talk: If you're drying lavender for culinary use, avoid microwaving—it can alter flavors. Stick to air-drying for cooking lavender. For potpourri, though, this method delivers perfectly dried lavender in minutes**, not weeks. That's the magic of microwave speed-drying.
Tips & tricks for perfect microwave-dried lavender
Here's what nobody tells you about getting flawless results every time with this speed-drying method.
Harvest Timing Matters: The 15-20 minute air-drying step before microwaving is non-negotiable. I learned this the hard way after ruining three batches with excess moisture—surface-drying prevents steam buildup that turns lavender mushy. Pick lavender in the morning after dew has evaporated for the best starting point. The stems should feel slightly tacky but not wet.
Microwave Power Control: Using 30-second intervals on high power gives you precise control over the 2-3 minute total drying time. If your microwave runs hot, reduce intervals to 20 seconds. Test one cluster first—it should snap easily between fingers while still looking vibrant, not brittle. Over-microwaving by even 15 seconds can turn lavender bitter and dull the fragrance completely.
Storage Secret: The 10-15 minute cooling period after microwaving is where most people fail. Spread clusters on a clean surface (I use parchment paper) and let them cool completely before storing. This prevents condensation from forming when they come into contact with cooler air, which can reintroduce moisture. For extra protection, place a small silica gel packet in your storage container—it absorbs any residual moisture that might develop over time.
Pro Tips for Dry Lavender Quickly
- Here's what nobody tells you about getting flawless results every time with this speed-drying method.
- Harvest Timing Matters: The 15-20 minute air-drying step before microwaving is non-negotiable. I learned this the har...
- Microwave Power Control: Using 30-second intervals on high power gives you precise control over the 2-3 minute total ...
Frequently asked questions
Got questions about speed-drying lavender? You’re not alone—here are the most common ones, answered clearly so you can get back to crafting that dreamy potpourri!
How long does it take to dry lavender in the microwave?
For quick drying, microwave lavender in 30-second bursts on low heat (30-50% power), checking after each interval. Most bundles dry in 2-5 minutes total. Overheating can scorch the flowers—stop when stems are crispy and buds crumble slightly. Patience pays off for perfect potpourri!
Can I speed-dry lavender without a microwave?
Try these alternative methods:
- Dehydrator: Set to 95°F (35°C) for 2-4 hours (gentler than microwaving).
- Oven: Use the pilot light or lowest setting (door cracked open) for 1-2 hours. Monitor closely!
- Sun-drying: Hang bundles in a shady, well-ventilated spot for 1-2 weeks (slower but aromatic).
Microwaving is fastest, but these work for bulk drying or if you lack a microwave.
What if my lavender turns brown or mushy after microwaving?
Brown/mushy lavender means overheating or moisture trapped inside. Fix it by:
- Reducing power to 30% or less and microwaving in shorter bursts (15-20 seconds).
- Ensuring bundles are loosely tied so air circulates.
- Letting them cool completely before storing (prevents condensation).
If already ruined, try freeze-drying (place in a sealed bag in the freezer for 24 hours) to salvage some scent!
Do I need to remove leaves before drying lavender?
Nope! Leaves stay on—they’re part of the drying process and add texture to potpourri. However, trim wilted or yellow leaves before drying for cleaner results. After drying, you can pluck leaves off if you prefer a bud-only look for sachets or crafts.
How do I store dried lavender to keep it fresh longer?
Store dried lavender in airtight containers (glass jars or resealable bags) in a cool, dark place (like a pantry or closet). Add a silica gel packet or bay leaves to absorb moisture. Properly stored, it stays fragrant for 6-12 months—perfect for DIY projects year-round!
Wrapping up and next steps
Drying lavender quickly doesn’t have to be a slow or complicated process—with the right techniques, like microwave speed-drying, you can transform fresh lavender into fragrant bundles, sachets, or potpourri in just minutes!
Whether you’re a beginner or a seasoned crafter, these methods ensure your lavender stays vibrant, aromatic, and ready for use. Now that you’re equipped with the know-how, go ahead and experiment—try different drying times or mix lavender with other dried flowers for unique blends.
🌿 Next step: Gather your dried lavender and start crafting! Try making homemade potpourri, lavender sachets for drawers, or even infused oils for a spa-like touch. Happy drying—and enjoy the soothing scent of your hard work! 💜