
Succulent
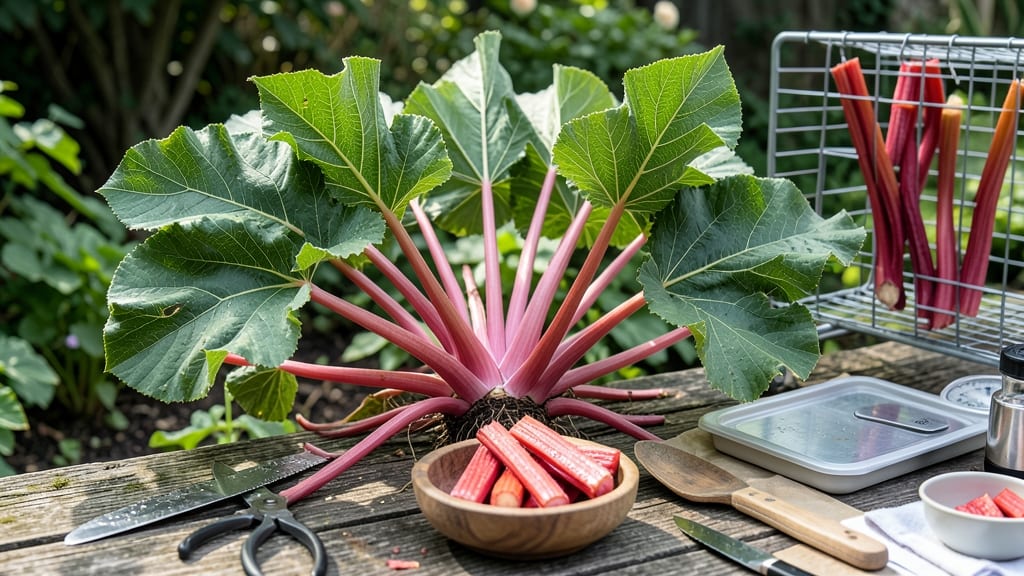
Spring’s tart harvest won’t last forever—but dried rhubarb keeps that bright flavor all year. 🌱 I’ve turned pounds of fresh stalks into a pantry staple that works in pies, teas, and sauces long after the last frost.
The key? Timing your harvest, prepping properly, and choosing the right drying method for even, mold-free results.
You’ll need just three simple tools: a sharp knife, a clean cutting board, and either a dehydrator, oven, or a sunny windowsill. Rhubarb’s peak season runs from late spring to early summer, so plan to harvest when stalks are thick and crisp—before they get woody.
Wash carefully (no soap residue!), trim the leafy tops, and slice into even strips for consistent drying.
Drying takes 8-12 hours in a dehydrator at 135°F, or 4-6 hours in a low oven with the door cracked. Air-drying on a mesh rack works too, but watch for humidity.
Store the dried pieces in airtight jars where they’ll keep for up to a year—ready to transform into jam, compote, or even rhubarb-infused tea when fresh harvests are a distant memory.
Here’s the secret to avoiding mold: never overcrowd the drying surface, and check slices daily for stickiness. Uneven drying? Lower the heat or extend the time. Once dry, the rhubarb shrinks to a deep red, fragrant bundle—proof that summer’s bounty can last through winter’s longest nights.
📚 In This Guide
- What you need
- Instructions
- Tips and common mistakes
- Wrapping up and next steps
What you need
- ● Fresh rhubarb stalks: 1–2 pounds (about 4–6 stalks, depending on size). Choose firm, vibrant stalks with no slimy or mushy spots.
- ● Sharp knife or kitchen shears: A clean, stainless-steel knife or shears for precise cutting (avoid dull blades to prevent crushing).
- ● Cutting board: A sturdy, non-slip board to keep your workspace safe.
- ● Colander or large bowl: For rinsing and draining the rhubarb.
- ● Paper towels or clean kitchen towel: To pat the stalks dry thoroughly.
- ● Dehydrator: A food-grade dehydrator with adjustable temperature settings (capacity should accommodate your rhubarb in a single layer). OR
- ● Oven: If no dehydrator, preheat to 145°F (63°C) or lower (use the lowest setting possible).
- ● Baking sheets: Two parchment-lined sheets (if using the oven method).
- ● Air-tight storage containers: Glass jars, vacuum-sealed bags, or food-grade plastic containers with lids (for long-term storage).
- ○ Citric acid or lemon juice: 1 tsp (optional) to enhance color retention and prevent browning.
- ● Food dehydrator trays with mesh screens: Allows better airflow for even drying.
- ● Digital kitchen scale: For precise measurements if following a specific recipe.
- ● Humidity absorber (e.g., silica gel packets): Place in storage containers to keep dried rhubarb extra crisp.
Step-by-Step instructions for drying rhubarb
Preserve that early-spring harvest with this foolproof method—perfect for pie fillings, compotes, and cocktails all year.
🌿 Step 1: Harvest and Prep the Stalks
Pick rhubarb stalks when they're firm and vibrant, typically in early spring before the leaves fully unfurl. Cut them into 1-inch thick slices—thicker pieces take longer to dry evenly and risk spoilage. I always remove the tough outer skin by peeling with a vegetable peeler, which also speeds up drying time.
Here's the thing—don't wash the slices yet. Any moisture on the surface will slow the drying process. Instead, pat them dry with a clean kitchen towel or paper towels to remove field dirt. Arrange the slices in a single layer on a clean baking sheet lined with parchment paper, leaving ½ inch between each slice for proper airflow.
💧 Step 2: Dehydrate Using Low Heat
Preheat your oven to 140°F—this is critical. Higher temperatures will cook the rhubarb instead of drying it properly, resulting in a mushy texture. Place the baking sheet in the oven and prop the door open slightly with a wooden spoon to allow moisture to escape. This gentle heat method preserves color and flavor far better than high-heat drying.
Check the rhubarb after 4-6 hours. It's ready when the slices feel leathery to the touch and no longer release moisture when squeezed gently. If you're unsure, leave them another hour—they won't over-dry if given enough time. I like to test by bending a slice; when it cracks but doesn't break, it's perfect.
⏰ Step 3: Cool and Store Properly
Remove the dried rhubarb from the oven and let it cool completely on a wire rack. This cooling step prevents condensation from forming in your storage containers, which can lead to mold. Once cool, transfer the slices to airtight containers or resealable plastic bags—glass jars work beautifully for gift-giving.
Store in a cool, dark place like a pantry or cupboard. Properly dried rhubarb will keep for 6-12 months if sealed tightly. I always label my containers with the date to track freshness. When rehydrating, simply soak the dried slices in warm water for 10-15 minutes until pliable—perfect for baking or stewing.
🌱 Step 4: Test for Quality Before Use
Before using your dried rhubarb, do a quick quality check. The slices should be dark reddish-brown, leathery but not brittle, and free of any white or fuzzy spots (a sign of mold). If you notice any off smells or unusual textures, discard that batch immediately—safety first.
For best results, rehydrate dried rhubarb in a 1:3 ratio of rhubarb to water (1 part dried rhubarb to 3 parts water). Simmer gently for 10-15 minutes until the liquid reduces slightly and the rhubarb softens. This makes a concentrated syrup perfect for drizzling over pancakes, yogurt, or desserts. The tartness intensifies during drying, so use it judiciously in recipes.
Tips & tricks for perfectly dried rhubarb
Here's what nobody tells you about transforming fresh rhubarb into shelf-stable gems—these tricks make all the difference.
The Blanch Factor: That 2-3 minute blanch in Step 2 isn't just about softening—it's about locking in color. For the most vibrant dried rhubarb, use a large pot of vigorously boiling water (not simmering) and work in small batches to maintain temperature. The moment the water returns to a full boil after adding rhubarb, start your timer. Overcooking by even 30 seconds will turn your beautiful pink rhubarb into a sad, mushy mess.
Slice Like a Pro: The diagonal cut at one end in Step 1 is a game-changer. It creates a flat surface that prevents curling during drying, ensuring even moisture loss. For extra efficiency, use a sharp chef's knife and cut all pieces to exactly 1-inch length—consistent size means consistent drying time. I've ruined batches by mixing different-sized pieces, leading to some over-dried and others still damp.
Airflow is Everything: When arranging your rhubarb pieces in Step 3, think "circulation." Leave that ¼-inch gap between pieces for proper airflow—this prevents steam buildup that can cause mold. If using an oven method, position your baking sheet on the middle rack where heat circulates most evenly. I learned this the hard way when my top rack rhubarb turned out chewy while the bottom pieces were perfectly dried.
Storage Wisdom: The 12-month shelf life mentioned in Step 4 assumes proper drying and airtight containers. For maximum freshness, consider adding a small packet of silica gel or a slice of bread to your storage jars—the bread absorbs any remaining moisture and keeps the rhubarb crisp. When rehydrating, use the 15-20 minute soak time as a guideline, but taste test your rhubarb—some recipes may need slightly longer soaking for optimal texture.
Pro Tips for Dry Rhubarb
- Here's what nobody tells you about transforming fresh rhubarb into shelf-stable gems—these tricks make all the differ...
- The Blanch Factor: That 2-3 minute blanch in Step 2 isn't just about softening—it's about locking in color. For the m...
- Slice Like a Pro: The diagonal cut at one end in Step 1 is a game-changer. It creates a flat surface that prevents cu...
Frequently asked questions
Got questions about drying rhubarb? You’re not alone! Here are answers to the most common concerns—from timing to troubleshooting—to help you preserve that perfect tart-sweet flavor for months to come.
How long does dried rhubarb last?
When stored properly in an airtight container in a cool, dark place, dried rhubarb can last 6–12 months. Check for moisture or mold (which smells funky!)—if you spot either, toss it. Freezing is another option for longer shelf life (up to 2 years!).
How do I know when rhubarb is fully dried?
Your rhubarb is ready when it’s completely brittle and crumbly—no moisture left! Test by snapping a piece: it should shatter like a dry chip, not bend. If it’s still slightly pliable, return it to the dehydrator or oven for another 1–2 hours.
Can I use dried rhubarb in place of fresh in recipes?
Yes! Swap dried rhubarb 1:1 by volume for fresh, but soak it first (1:3 ratio with warm water) for 10–15 minutes to rehydrate. It’s perfect for pies, compotes, or stews—just remember it’ll be more concentrated, so adjust sweetness as needed.
Why did my rhubarb turn brown or black while drying?
This happens when rhubarb oxidizes (exposes to air) or overheats. Prevent it by blanching stalks in boiling water for 2 minutes before drying, or use a dehydrator set to 135°F (57°C) max. If it’s already discolored, it’s still safe to use—just toss the dark spots!
Can I dry rhubarb in a regular oven instead of a dehydrator?
Preheat your oven to 170°F (77°C) (or the lowest setting), prop the door open slightly with a wooden spoon, and dry for 4–6 hours. Stir or flip pieces every hour for even drying. Line a baking sheet with parchment paper and leave space between stalks for airflow.
Wrapping up and next steps
Drying rhubarb is your ticket to enjoying its tangy-sweet flavor long after harvest season! Whether you’re slicing stalks for homemade compote, baking pies, or whipping up jams, proper drying techniques ensure vibrant color and rich taste.
With just a few simple steps—washing, blanching, slicing, and dehydrating—you’ll unlock a pantry staple that’s ready whenever inspiration strikes.
Now that you’re equipped with the know-how, roll up your sleeves and try it today! Start small with a batch of rhubarb, experiment with recipes, and soon you’ll be the go-to chef for year-round desserts. Happy drying—and happy baking! 🍓✨