
How To
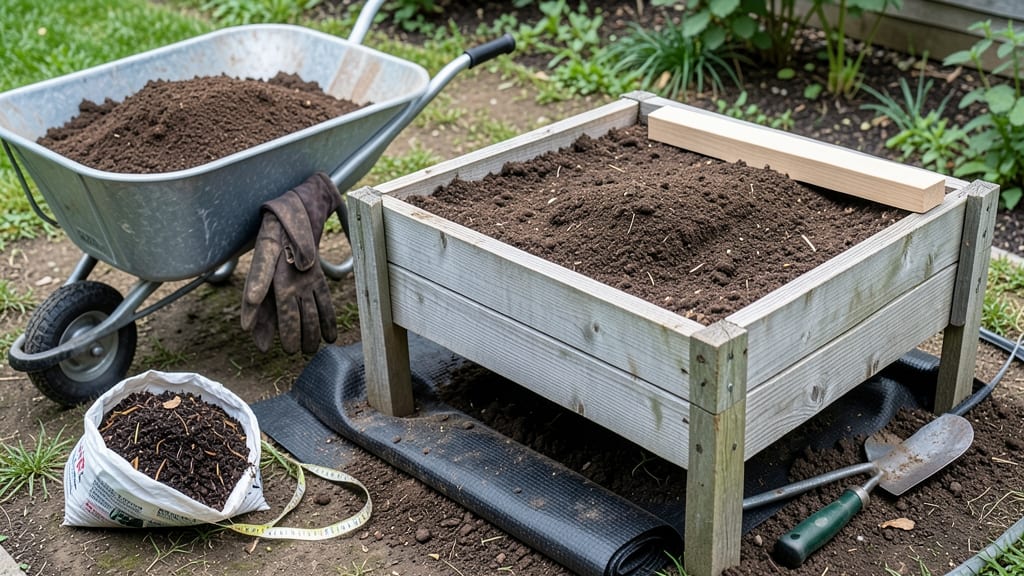
Learning how to fill a raised bed with soil transforms it from a wooden box into a thriving ecosystem. 🌱 The secret? A layered soil mix that mimics nature's perfect balance—drainage at the bottom, fertility in the middle, and fluffy topsoil where roots will grow.
My first attempt with just store-bought soil left plants struggling, but this method changed everything. Start with 2-3 inches of coarse material—gravel, broken bricks, or even pine cones—to prevent compaction and improve drainage.
Then layer equal parts compost and topsoil, mixing in a handful of worm castings for extra nutrients. This combo gives roots room to breathe while feeding them exactly what they need. By the time you're done, your bed will feel like a cloud—light, airy, and full of life.
Plants establish faster, retain moisture better, and resist diseases because the soil stays loose and fertile. The difference between this method and a simple dirt fill is night and day. Works for any raised bed size, from 4x8-foot plots to tiny 2x2 containers.
Here's how to build it layer by layer without breaking the bank.
📚 In This Guide
- What you need
- Instructions
- Tips and common mistakes
- Wrapping up and next steps
What you need
- ● Topsoil (Garden Soil): 6–12 inches deep (depending on bed height) – about 1–2 cubic yards for a 4’x8’ bed.
- ● Compost: 2–3 inches (enhances fertility and drainage).
- ● Perlite or Vermiculite: 1–2 inches (for aeration and moisture retention).
- ● Garden Gloves: A sturdy pair to protect your hands.
- ● Garden Rake or Hoe: For leveling and mixing layers.
- ● Wheelbarrow or Large Container: For hauling soil and amendments.
- ● Watering Can or Hose: To moisten layers as you go.
- ● Coco Coir or Peat Moss: 1–2 inches (improves moisture retention in sandy soil).
- ● Composted Manure (Cow, Chicken, or Horse): 1–2 inches (boosts nutrients).
- ● Biochar or Sand: 1 inch (for drainage in clay-heavy soil).
- ● Organic Mulch (Straw or Wood Chips): After filling, to retain moisture.
- ● pH Test Kit: To check soil acidity before planting.
- ● Knee Pads or Stool: For comfort during assembly!
Step-by-Step instructions for filling a raised bed with soil
Here's the foolproof method I use to create a rich, well-draining foundation that keeps roots happy for years.
🪴 Step 1: Prepare the Raised Bed Base
Start by lining the bottom of your 4-foot raised bed with 12 inches of untreated wood chips or straw—this improves drainage and prevents soil compaction. I like to use locally sourced wood chips because they break down slowly, adding organic matter over time. If your bed sits on grass, lay down cardboard or landscape fabric first to smother weeds and prevent their seeds from invading your new soil.
Press the wood chips lightly with your hands to settle them evenly. You want them to fill the bottom 25-30% of the bed's depth. This layer is your secret weapon against waterlogging, especially in rainy climates. If you're building on bare soil, skip the cardboard and just use the wood chips—they'll create a natural barrier over time.
🌱 Step 2: Build the Soil Layers From Bottom to Top
Next, add 6 inches of coarse material—I use a mix of 3 inches of gravel or decomposed granite followed by 3 inches of coarse sand. This creates a drainage layer that prevents root rot. Spread it evenly across the wood chips, then top with 4 inches of compost—this is your nutrient-rich foundation. I always use well-aged compost (no fresh manure) to avoid burning tender roots with high nitrogen.
For the top 8 inches, blend 50% high-quality potting mix with 50% compost—this gives you the perfect balance of nutrients and aeration. Tap the sides of the bed gently to settle each layer without compacting. You'll see the soil settle about 1-2 inches once watered, so don't fill it completely yet. This layered approach mimics natural forest soil, giving roots both air and moisture exactly where they need it.
✂️ Step 3: Blend and Level the Final Soil Mix
Use a garden rake to gently mix the top 8 inches of soil until it looks uniform—no visible layers remain. This ensures even moisture distribution and prevents plants from settling at different depths. I like to work in small sections, raking from the center outward to eliminate air pockets. The finished soil should feel light and crumbly, like a damp sponge that holds its shape but doesn't stick to your hands.
Smooth the surface with the back of your rake until it's level—no high spots that'll collect water or low spots that'll dry out. Press down lightly with your hands to firm the soil slightly, then water it deeply until moisture reaches 6 inches down. This helps the layers settle naturally. If the soil shrinks after watering, add more of your top mix to bring it back to the original level.
☀️ Step 4: Test and Adjust for Plant Success
Stick your finger 2 inches into the soil—it should feel moist but not soggy. If it's too dry after a week, add a 1-inch layer of compost and mix it in lightly. The goal is 60% moisture retention with good drainage. I always test by squeezing a handful—if water drips out slowly, you're golden. If it forms a tight clump, add more coarse sand or perlite to improve aeration.
Here's the thing—your bed isn't "done" after one season. Every spring, I top-dress with 1-2 inches of compost and mix it in lightly. This maintains fertility without overwhelming new plants. The layered system means you'll never need to replace all the soil—just refresh the top few inches annually. That's the beauty of this method: it builds soil health over time, not just for one planting season.
Tips & tricks for perfect raised bed soil mix
Let me save you from the common pitfalls that turn a great raised bed into a soggy mess. These are the tricks I've learned after years of trial and error—your future plants will thank you.
Drainage Layer Depth: That 12 inches of wood chips in Step 1 is non-negotiable for most climates, but in extremely dry areas, you can reduce it to 8 inches while adding an extra 2 inches of coarse sand on top. The key is maintaining that 25-30% depth ratio—this prevents waterlogging while still allowing roots to explore downward. I've seen beds with insufficient drainage turn into mud pits after heavy rains.
Layer Settlement Strategy: When building your 6-inch coarse layer in Step 2, work in 1-inch increments rather than dumping everything at once. This prevents compaction and lets you adjust each layer's depth more precisely. After adding each inch, gently tap the sides of the bed with a board—this helps distribute the material evenly without packing it down too tightly.
Soil Texture Test: The "damp sponge" test in Step 3 is crucial, but here's how to refine it: After mixing your top 8 inches, grab a handful and roll it between your palms. If it holds shape but crumbles easily when poked, you're perfect. If it sticks together like clay, add 1-2 inches of coarse sand and remix. This simple test prevents both waterlogging and overly dry conditions that stunt root growth.
Seasonal Adjustments: In winter, I reduce the 1-inch compost top-dressing to ½ inch—less organic matter breaks down slower in cold soil. For summer planting, you can increase it to 2 inches to replenish nutrients lost from heat stress. The 60% moisture retention goal stays the same, but how you achieve it changes with seasons.
Pro Tips for Fill A Raised Bed With Soil
- Let me save you from the common pitfalls that turn a great raised bed into a soggy mess. These are the tricks I've le...
- Drainage Layer Depth: That 12 inches of wood chips in Step 1 is non-negotiable for most climates, but in extremely dr...
- Layer Settlement Strategy: When building your 6-inch coarse layer in Step 2, work in 1-inch increments rather than du...
Frequently asked questions
Got questions about filling your raised bed? You’re not alone! Here are answers to the most common concerns—so you can get growing with confidence.
What’s the best soil mix ratio for a raised bed?
A balanced mix typically includes 60% topsoil, 30% compost, and 10% perlite or sand for drainage. Adjust based on your plants: heavy feeders (like tomatoes) need more compost, while succulents thrive in gritty mixes. Test your soil’s pH too—most veggies prefer 6.0–7.0.
When is the best time to fill a raised bed?
Fill your bed 4–6 weeks before planting to let the soil settle and microbes activate. For spring crops, aim for early spring; for fall/winter veggies, prep in late summer. Avoid filling in freezing temps—it can compact the soil and disrupt root growth.
Can I use regular garden soil instead of raised bed mix?
Not ideal! Regular garden soil compacts easily, drains poorly, and lacks nutrients. Raised beds need loose, airy soil with organic matter. If you’re on a budget, blend topsoil with yard waste compost or leaf mold—just avoid clay-heavy or sandy soils alone.
How do I keep pests out after filling the bed?
Prevent pests with a mulch layer (2–3 inches) of straw or shredded leaves. Add diatomaceous earth (food-grade) to deter crawling insects. Plant repellent companions like marigolds or basil, and avoid over-watering, which attracts slugs and fungus gnats.
What if my soil smells bad after filling the bed?
A slightly earthy smell is normal, but a rotten or sulfur-like odor means too much fresh manure or anaerobic (waterlogged) conditions. Fluff the soil with a fork, add dry amendments (like coconut coir), and avoid overwatering. Let it “cure” for 2–4 weeks before planting.
Wrapping up and next steps
Filling your raised bed with the right soil mix is the foundation for a thriving garden—literally! 🌱 By layering high-quality materials like compost, topsoil, and organic matter, you’ve created a nutrient-rich haven where roots can stretch, breathe, and grow strong.
Don’t forget to mulch that top layer to lock in moisture and keep weeds at bay.
Now that your raised bed is ready, it’s time to plant with confidence! Start with your favorite veggies, herbs, or flowers, and watch your garden flourish. Need inspiration? Check out our guide on planning your first raised bed layout to maximize space and productivity. Happy gardening! 🌿