
Tools
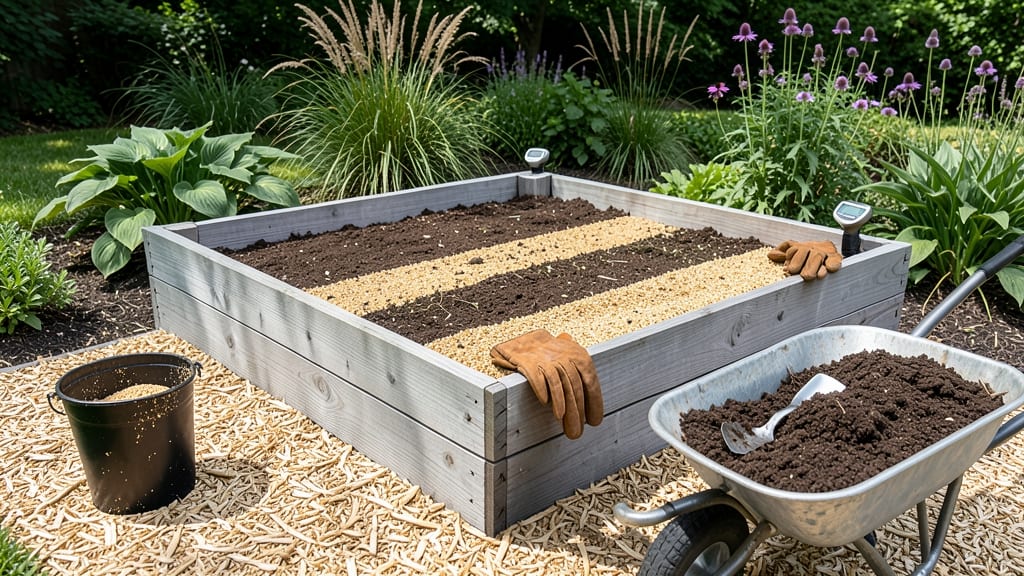
Filling a raised garden bed isn’t just dumping dirt—it’s building a root-friendly ecosystem that keeps plants thriving for years. 🌱 I’ve learned the hard way that cheap soil and poor layering lead to compacted messes where roots suffocate.
The right mix of organic matter, drainage, and structure creates a fertile foundation that outperforms store-bought bags every time.
Start with cardboard or landscape fabric to block weeds, then layer compost, topsoil, and coarse materials like straw or wood chips. Most beds need 6–12 inches of depth—enough for deep-rooted veggies like tomatoes while keeping shallow plants like lettuce happy.
The key? Avoid heavy clay or sand-heavy mixes that drain too fast or stay soggy.
By the end, you’ll have loose, nutrient-rich soil that holds moisture without drowning roots. Plants grow faster, diseases fade, and you’ll never stress over poor drainage again. This method works for vegetables, flowers, or herbs—just adjust the layers based on what you’re planting.
Pro tip: Test your soil’s drainage by filling a jar with your mix, adding water, and timing how long it takes to drain. If it’s slower than 10 minutes, add perlite or coarse sand. For compacted beds, aerate with a garden fork before planting—your roots will thank you.
📚 In This Guide
- What you need
- Instructions
- Tips and common mistakes
- Wrapping up and next steps
What you need
- ● Soil: 60% topsoil (2-3 inches per layer, ~12-18 inches total for a standard 6-inch-deep bed)
- ● 30% compost (well-aged, 2-3 inches per layer)
- ○ 10% permaculture mix or sand/peat (optional, for drainage—skip if using high-quality soil blends)
- ● Tools: Garden rake (for leveling)
- ● Garden gloves (to keep your hands happy)
- ● Wheelbarrow or large bucket (for hauling soil)
- ● Shovel or spade (for digging and layering)
- ● Soil test kit (to check pH/nutrients before filling)
- ● Landscape fabric (if lining the bed to block weeds)
- ● Wood chips or mulch (for top layer to retain moisture)
- ● Slow-release fertilizer (mix into soil for a nutrient boost)
- ● Knee pads (because gardening is hard on the joints!)
Step-by-Step instructions for building a root-friendly raised garden bed
Here’s how to create the perfect layered soil structure for deep roots and thriving plants.
🪴 Step 1: Start With a Sturdy Base Layer
Begin by lining the bottom of your raised bed with 2-3 inches of coarse material—I use cardboard or landscape fabric to block weeds and grass. This prevents invasive roots from competing with your crops and keeps soil from leaking out. If your bed has drainage holes, add a 1-inch layer of gravel at the very bottom to improve water flow.
Press the cardboard or fabric firmly against the sides, then cut it to fit snugly. For beds without drainage holes, skip the gravel and focus on creating a weed barrier. The goal here is to create a clean, stable foundation that won’t break down quickly or invite pests.
🌱 Step 2: Build the Structural Framework in Layers
Add a 4-6 inch layer of bulky organic matter first—this is where I use chopped leaves, straw, or wood chips to create air pockets for roots. This "roughage" layer prevents compaction and encourages microbial activity. Avoid fresh grass clippings, as they can mat down and create anaerobic zones.
Next, top this with 2-3 inches of compost—this is your nutrient-rich base. I like to mix in a handful of worm castings here for extra microbial diversity. The compost should be dark and crumbly, not chunky or still decomposing. This layer ensures your plants get immediate food while the lower organic matter breaks down slowly.
💧 Step 3: Add the Topsoil Mix for Planting
Fill the remaining 6-8 inches of the bed with a custom topsoil blend. I combine 50% high-quality garden soil, 30% compost, and 20% perlite or vermiculite for drainage. This ratio keeps the soil loose enough for roots to penetrate while retaining moisture. Avoid using pure garden soil—it compacts easily and lacks the organic matter needed for long-term fertility.
Rake the top layer gently to create a fine, even surface. Press down lightly with your hands to eliminate air pockets, but don’t compact it. You want the soil to feel like a well-worn sponge—firm enough to hold shape but still light enough for roots to grow through easily.
☀️ Step 4: Water and Settle Before Planting
Give the bed a deep watering right after filling it. This helps the layers settle and eliminates air gaps. Water until it drains from the bottom if your bed has drainage, or until the top 2 inches feel moist if it doesn’t. Let it sit for 24-48 hours before planting—this gives the soil time to compact naturally and prevents root disturbance when you add plants.
After settling, the bed should feel firm but not hard when pressed. If it’s too loose, add a thin layer of topsoil and water again. If it’s too compacted, mix in an extra 1-2 inches of compost and aerate with a garden fork. This final check ensures your plants have the ideal growing medium from day one.
✂️ Step 5: Maintain Soil Health Long-Term
Once planted, top-dress with 1-2 inches of compost every spring and fall. This replenishes nutrients without disturbing roots. I also mulch with straw or shredded leaves to retain moisture and suppress weeds. Avoid piling mulch directly against stems—keep it 2-3 inches away to prevent rot.
Test soil moisture weekly by sticking your finger 1-2 inches deep. If it feels dry, water deeply until moisture reaches 6 inches down. Over time, your layered approach will create a self-sustaining ecosystem where roots thrive and plants flourish with minimal extra effort.
Tips & tricks for perfect raised garden bed soil layers
Creating the ideal layered soil structure takes a little extra effort upfront, but these pro tips will help you avoid common pitfalls and create a thriving garden ecosystem.
Weed Barrier Wisdom: For Step 1, use cardboard with ink-free labels if possible—it breaks down faster than plastic and adds carbon to your soil. If using landscape fabric, opt for biodegradable versions that won't become long-term waste. I've found that pressing the edges firmly against the sides prevents weeds from creeping up later, saving me hours of weeding. The 2-3 inch thickness is critical—any less and weeds will find their way through.
Organic Matter Selection: In Step 2, avoid using wood chips from treated lumber or painted wood—these can leach chemicals into your soil. For the 4-6 inch layer of bulky organic matter, I prefer shredded leaves or straw because they break down more evenly than whole wood chips. If using wood chips, choose hardwood varieties like oak or maple—they decompose slower and provide long-term structure. The key is creating that perfect air-to-soil ratio that roots love.
Compost Quality Control: That 2-3 inch compost layer in Step 2 should smell earthy, not rotten. If your compost has large chunks, sift it first to create a fine, crumbly texture. I like to add a handful of worm castings here because they introduce beneficial microbes that help break down the organic matter faster. This layer acts like a nutrient reservoir—think of it as the plant's first meal when you plant.
Soil Texture Troubleshooting: After adding your 6-8 inch topsoil blend in Step 3, do the "sponge test"—press your hand into the soil. It should hold its shape when you remove your hand but still feel light. If it's too compacted, mix in an extra 10% perlite or vermiculite. For drainage issues, you can increase the perlite to 30% of the topsoil blend, but don't exceed that or you'll create a desert environment for your plants.
Pro Tips for Fill A Raised Garden Bed With Soil
- Creating the ideal layered soil structure takes a little extra effort upfront, but these pro tips will help you avoid...
- Weed Barrier Wisdom: For Step 1, use cardboard with ink-free labels if possible—it breaks down faster than plastic an...
- Organic Matter Selection: In Step 2, avoid using wood chips from treated lumber or painted wood—these can leach chemi...
Frequently asked questions
Got questions about filling your raised garden bed? You’re not alone! Here are answers to the most common concerns—so you can get planting with confidence.
What’s the best soil mix for a raised garden bed?
Aim for a balanced blend of 60% topsoil, 30% compost, and 10% perlite or coarse sand. This combo improves drainage, retains moisture, and feeds plants long-term. Avoid pure garden soil—it compacts easily and may lack nutrients.
When is the best time to fill a raised bed?
Fill your bed before planting season (early spring or fall) to let the soil settle and decompose. If you’re planting immediately, layer soil in stages (e.g., 4–6 inches at a time) to prevent erosion. Pro tip: Water the layers lightly as you go!
Can I use cheap fill dirt instead of garden soil?
Fill dirt is not ideal—it’s often clay-heavy, lacks nutrients, and drains poorly. For a budget-friendly alternative, mix topsoil with composted manure or leaf mold. If fill dirt is your only option, amend it heavily with compost (at least 50% of the mix).
How deep should the soil be in a raised bed?
Ideal depth is 12–18 inches to accommodate root growth. For deeper beds (24+ inches), add a 4–6 inch layer of wood chips or straw at the bottom to improve drainage. Shallow beds (<6 inches) work for shallow-rooted plants like lettuce or herbs but limit options.
Why is my soil sinking or compacting after filling?
This happens when soil isn’t fluffy enough or gets waterlogged. Fix it by adding compost or coconut coir to loosen compaction, and avoid walking on the bed. For new beds, fill in layers (3–4 inches at a time) to prevent settling. A fork can aerate compacted spots too!
Wrapping up and next steps
Filling your raised garden bed with the right soil mix is the foundation for a thriving garden—literally! 🌱 By layering nutrient-rich materials and ensuring proper depth, you’ve given your plants the perfect home to grow strong and healthy.
Now that your bed is prepped, it’s time to roll up your sleeves and start planting!
Ready to watch your garden flourish? Pick your first plants—whether it’s vibrant veggies, fragrant herbs, or colorful flowers—and enjoy the rewarding journey of gardening! 🌿