
How To
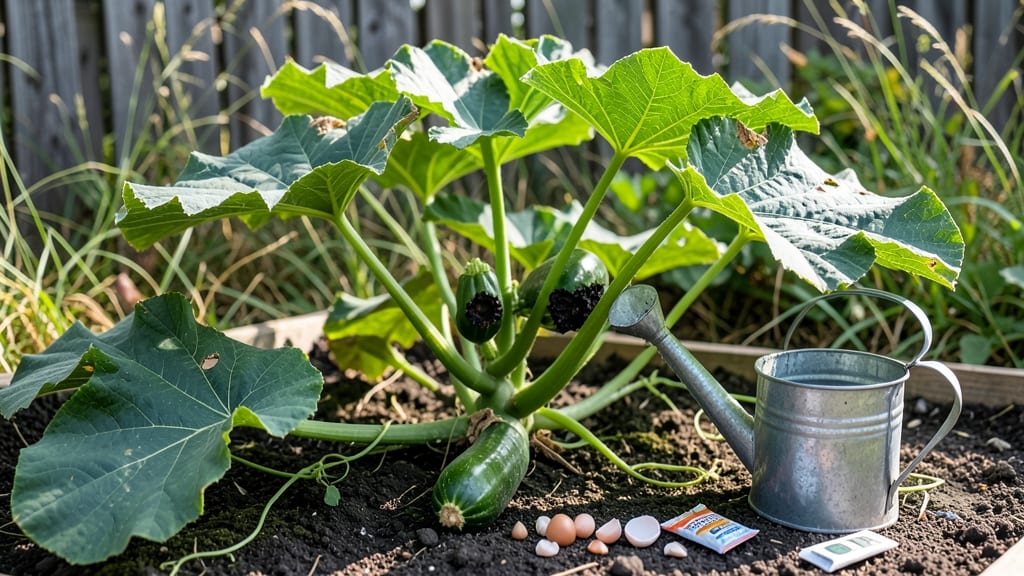
How to fix that first ugly brown spot on your squash sent me digging for answers. 🌱 Blossom end rot turns crisp harvests into sad, shriveled messes—but it’s fixable with the right calcium boost and watering tweaks. I’ve saved dozens of plants using these exact steps after my own garden disaster.
The culprit is usually inconsistent moisture or calcium deficiency, not just poor soil. My squash thrived after I switched to drip irrigation and added crushed eggshells to the soil. Even store-bought calcium supplements work in a pinch when you’re desperate for results.
You’ll see improvement within days: new growth stays firm, and existing spots stop spreading. The key is keeping soil evenly moist and calcium available—no more guessing games. My 3-step rescue plan turns wilted plants into productive vines again.
Works for zucchini, yellow squash, and pumpkins alike, even in hot climates. Let’s get those plants back on track—your dinner table will thank you.
Root Causes Of Squash Rot
Blossom end rot isn’t just a random squash tragedy—it’s a clear cry for help from your plants, often tied to calcium deficiency or environmental stress. Understanding the why behind this common garden woe is the first step to preventing it.
Let’s break down the science-backed culprits turning your squash into a sad, shriveled mess.
---
Calcium is the structural backbone of plant cell walls, especially in fast-growing fruits like squash. When your plants can’t deliver enough calcium to the blossom end (the opposite end of the stem), the cells collapse, leading to those telltale black, sunken spots.
Why does this happen? - Poor soil calcium levels: If your soil is sandy, acidic, or lacks organic matter, calcium binds tightly to soil particles and becomes unavailable to roots. Even if your soil has calcium, the plant can’t access it. - Uneven watering: Calcium moves through the plant via water. Inconsistent moisture—like deep watering followed by drought—disrupts this transport. The blossom end, being the farthest from the stem, gets starved first. - Rapid growth spurts: Squash plants bolt from flowers to fruit in days. If they’re fed too much nitrogen (the "green growth" nutrient) without enough potassium or calcium, the plant prioritizes leafy growth over fruit development, leaving the blossom end vulnerable.
💡 Pro Tip: Test your soil’s calcium-to-magnesium ratio (ideal is 4:1 or higher). If magnesium is too high, it blocks calcium uptake—like a traffic jam in the plant’s vascular system.
---
Soil pH acts like a gatekeeper for nutrients. If it’s too acidic (below 6.0) or alkaline (above 7.5), calcium becomes trapped in the soil or leaches away, leaving your squash high and dry.
The science: - Acidic soil (pH < 6.0): Protons (H+ ions) outcompete calcium ions for root uptake sites. Even if calcium is present, the plant can’t grab it. - Alkaline soil (pH > 7.5): Calcium binds to phosphate and other anions, forming insoluble compounds. Your plant might as well be trying to drink through a straw clogged with cement. - Sodium or potassium overload: Excessive fertilizers (especially those high in potassium) can displace calcium in the soil solution, making it unavailable.
🌡️ Quick Check: Use a soil pH test kit (or vinegar/baking soda test for DIYers). Aim for 6.2–6.8—the "goldilocks zone" for calcium availability.
---
Even if your soil has calcium, root health determines whether it reaches the fruit. Stressors like compaction, poor drainage, or temperature swings can strangle the plant’s nutrient pipeline.
Common root-related triggers: - Compacted soil: Roots can’t spread or absorb water/nutrients efficiently. Think of it like a kinked hose—calcium gets stuck mid-transit. - Flooding or drought: Both extremes disrupt root respiration. Waterlogged roots suffocate; parched roots can’t pump nutrients upward. - Temperature extremes: Cold soil (<50°F) slows root activity, while heat (>90°F) can "cook" roots, reducing their ability to uptake calcium. - Root damage: Overzealous weeding, gophers, or even aggressive pruning can sever roots, cutting off the calcium supply line.
✨ Fix It Fast: Loosen soil around roots (without damaging them), mulch to regulate temperature, and avoid overwatering—consistency is key.
--- Blossom end rot loves to party when conditions are hot, dry, and unpredictable. Here’s how climate conspires against your squash:
- High daytime temps (above 85°F): Accelerates fruit growth but outpaces calcium transport.
The plant can’t keep up, and the blossom end pays the price. - Low humidity: Transpiration (water loss through leaves) speeds up, but calcium can’t "catch up" to the fruit’s rapid expansion. - Sudden weather shifts: A scorching afternoon followed by a cold night stresses the plant, disrupting nutrient flow.
🎯 Prevention Hack: Provide shade cloth during peak heat and drip irrigation (not overhead) to keep moisture—and calcium—steady.
--- Too much nitrogen (the "leafy green" nutrient) is like giving your squash a sugar rush—it grows fast but neglects fruit development. The plant diverts energy to leaves, starving the blossom end of calcium.
The domino effect: 1. Excess nitrogen → Lush foliage (but weak roots). 2. Weak roots → Poor calcium uptake. 3. Fast fruit growth → Calcium can’t keep pace. 4. Blossom end rot → Your sad squash.
🔥 Balance Act: Use a balanced fertilizer (e.g., 5-5-5 or 10-10-10) and side-dress with compost to boost calcium naturally. Avoid "quick-fix" high-nitrogen fertilizers like blood meal.
--- If you start squash indoors or buy transplants, the stress of moving can temporarily halt calcium uptake, leaving new fruits vulnerable.
Why it happens: - Root disturbance: Digging up seedlings damages fine root hairs, which are calcium’s main entry points. - Adjustment period: Plants need 7–14 days to reestablish root systems after transplanting. During this time, calcium delivery is spotty. - Environmental mismatch: Moving from a controlled indoor space to harsh outdoor conditions (wind, sun, temp swings) adds stress.
👨🍳 Solution: Hardening off seedlings gradually (acclimating them to outdoor conditions over 5–7 days) and watering deeply post-transplant helps roots recover faster.
--- Some squash varieties are genetically predisposed to blossom end rot due to: - Fast growth rates (e.g., zucchini, yellow squash). - Thin skins (less natural calcium storage). - High water content (dilutes available calcium).
📊 Data Note: Hybrid varieties like ‘Defender’ or ‘Gold Rush’ are bred for calcium efficiency, while heirlooms (e.g., ‘Straightneck’) may need extra care.
--- Blossom end rot is rarely a single issue—it’s usually a perfect storm of poor calcium availability, root stress, and environmental factors. The good news? Knowing the cause lets you fix it fast. Next up: How to Rescue Your Squash (and keep future harvests crisp and rot-free).
Quick Fixes for Blossom End Rot
Blossom end rot may seem like a hopeless case, but with the right approach, your squash can still thrive—and even bounce back from early signs of this calcium deficiency. The key is acting fast and addressing the root cause (literally!).
Below, we’ve mapped out practical, step-by-step solutions tailored to the most common triggers, plus prevention tips to keep future harvests rot-free.
---
If your squash is showing dark, sunken spots at the blossom end, calcium is the missing link. Plants need this mineral to develop strong cell walls, and a sudden calcium shortage (even if soil tests show enough) can cause rot.
How to restore calcium fast: - 🍳 Calcium Boost Spray (Emergency Treatment) Mix 1 tablespoon of calcium chloride or calcium nitrate in 1 gallon of water (or use a liquid calcium supplement like Cal-Mag). Spray the leaves and soil around the plant at dusk or dawn to avoid leaf burn. Repeat every 3–5 days until new growth appears healthy. > Pro Tip: 💡 Avoid over-fertilizing with nitrogen-heavy feeds—this can worsen calcium uptake by overstimulating leafy growth at the expense of fruit development.
- 👨🍳 Soil Remedy for Long-Term Fix Amend the soil with crushed eggshells, oyster shell grit, or bonemeal (rich in calcium). Work it into the top 2–3 inches of soil around the plant’s base.
For potted squash, add 1–2 tablespoons of eggshell powder per plant and water thoroughly. > ✨ Prevention Hack: Prep your garden beds 4–6 weeks before planting with gypsum (calcium sulfate)—it’s slow-release and won’t alter soil pH.
---
Fluctuating water levels are a top culprit for blossom end rot. Squash roots need consistent hydration to absorb calcium efficiently.
How to stabilize watering: - 💧 Drip Irrigation or Soaker Hoses (Best Method) Water slowly and deeply at the base of the plant (avoid wetting leaves to prevent disease). Aim for 1–1.5 inches of water per week, adjusting for heat or rain. Morning watering is ideal—it gives roots time to soak up moisture before evening. > 🎯 Critical Tip: Never let soil dry out completely between waterings. Use your finger to check moisture 1–2 inches deep; if it’s dry, water immediately.
- 🌱 Mulch Like a Pro Apply 2–3 inches of organic mulch (straw, grass clippings, or shredded leaves) around plants to retain moisture and regulate soil temperature. This reduces the risk of sudden drought stress that triggers rot.
---
Soil pH affects how well plants take up calcium. If your soil is too acidic (below 6.0) or alkaline (above 7.5), calcium becomes locked away.
How to test and fix pH: - 📊 Quick pH Test Use a soil test kit (available at garden centers) or send a sample to your local Cooperative Extension Service. Ideal pH for squash: 6.0–6.8. - 🔄 Adjusting pH - For acidic soil (pH < 6.0): Sprinkle lime (calcium carbonate) or wood ash and water in. Re-test in 2–4 weeks. - For alkaline soil (pH > 7.5): Mix in sulfur or peat moss and re-test after 4–6 weeks.
---
Once you’ve treated the current issue, proactive steps will keep your squash healthy:
- 🍅 Balanced Fertilizer Routine Use a low-nitrogen, high-potassium fertilizer (like 5-10-10) to encourage root and fruit development over leafy growth.
Avoid high-nitrogen feeds (like fresh manure or blood meal) early in the season. - 🌱 Companion Planting Plant basil, marigolds, or nasturtiums nearby—they repel pests that stress squash and improve soil structure. - 🔪 Prune Wisely Remove overly crowded vines or yellowing leaves to redirect the plant’s energy to healthy fruit production.
--- Final Thought: Blossom end rot is manageable—don’t toss those squash just yet! With these fixes, you’ll see new growth in 7–10 days, and your plants will reward you with crisp, rot-free harvests. 🎉
Frequently asked questions
Can I still use squash with blossom end rot?
Yes, but cut off the affected area! The rot only affects the blossom end, so simply slice off the dark, sunken spot and use the rest. Just avoid fruits with large or spreading rot patches. For future harvests, fix the underlying calcium or watering issues to prevent recurrence.
How quickly will my squash recover after treatment?
You should see improvement within 7-10 days if you address both calcium levels and watering consistency. New growth will appear firmer, and existing spots will stop spreading. For severe cases, it may take 2-3 weeks to see fully healthy fruit.
What's the best organic calcium source for squash?
Crushed eggshells are the easiest DIY option! Dry and grind eggshells, then mix into soil or make a tea by steeping in water for 24 hours. Other organic sources include composted manure, bone meal, or kelp meal. Apply these at planting time and again when flowers appear.
Will fixing blossom end rot help my tomatoes too?
The same calcium deficiency causes blossom end rot in tomatoes, peppers, and melons. The same solutions—consistent watering, calcium amendments, and proper pH—will work for all these crops. Just adjust application rates based on plant size and soil type.
Can I use too much calcium for my squash?
While calcium toxicity is rare, excessive amounts can disrupt nutrient balance by blocking uptake of other essential minerals like magnesium and potassium. Stick to recommended rates and monitor plant health. A soil test every 2-3 years helps maintain proper mineral ratios.