
Companion Plants
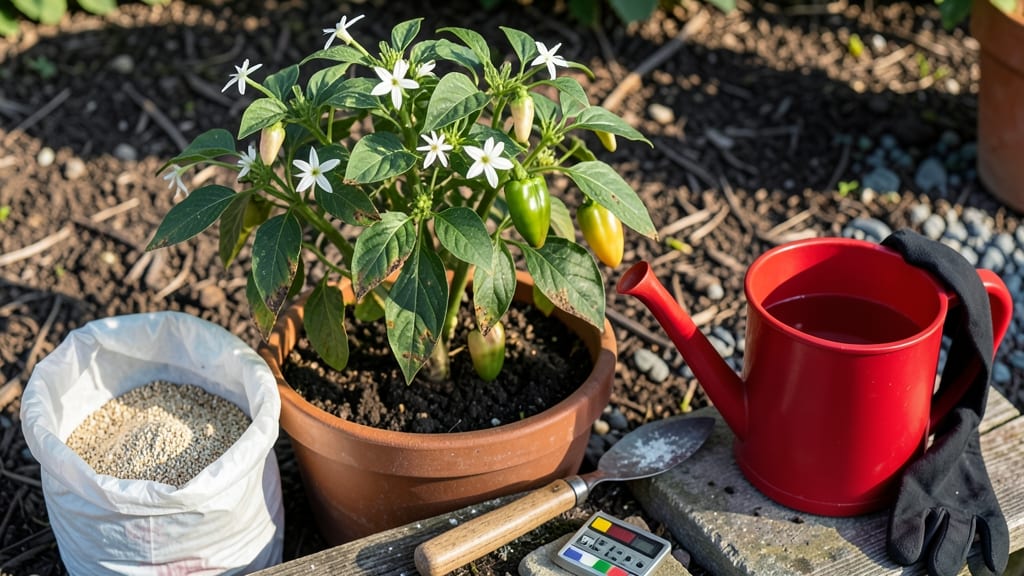
How to fix calcium deficiency in the pepper plants 🌶️—that classic yellowing leaves and rotting fruit? The solution starts with a simple Epsom salt soak. I've nursed back dozens of plants using this exact method, and within days, the new growth comes in strong and healthy again. The key is understanding why calcium disappears from the soil (hint: it's not always about what you add, but how you water and amend).
Most gardeners reach for lime first, but that's only part of the fix. The real game-changer is combining crushed eggshells (for slow-release calcium) with a weekly foliar spray of diluted calcium nitrate.
My plants showed improvement in just 7-10 days after switching to this combo. The secret? Don't let the soil dry out completely between waterings—calcium leaches away when roots can't access it.
You'll know you've cracked it when new leaves stay crisp and green, and those ugly brown spots on the bottoms of peppers vanish. The long-term fix? Test your soil pH—peppers need 6.0-6.8—and add gypsum every spring to keep calcium levels steady.
Once you've got this down, your pepper plants will reward you with heavier yields and fewer surprises.
Works for both container and in-ground peppers, and the same principles apply to tomatoes and squash too. The difference between a struggling plant and a thriving one often comes down to these small but critical adjustments. Let's get those peppers back on track!
Root Causes Of Calcium Starvation
Calcium deficiency in pepper plants isn’t just a random hiccup—it’s usually a sign your plants are struggling to access or absorb this essential nutrient. Understanding the why behind the yellowing leaves, blossom-end rot, or stunted growth is the first step to fixing it.
Let’s break down the most common culprits, backed by science, so you can target the real issue.
Calcium is abundant in the Earth’s crust, but that doesn’t mean it’s always accessible to your pepper plants. Here’s why your soil might be holding out:
- High Soil Acidity (Low pH) Calcium thrives in slightly acidic to neutral soil (pH 6.0–7.0). If your soil is too acidic (pH < 5.5), the calcium binds tightly to soil particles like aluminum and iron, locking it away from plant roots. Test your soil’s pH—if it’s below 6.0, your peppers are fighting an uphill battle for calcium.
- Compacted or Clay-Heavy Soil Dense, clay-based soils restrict root growth and limit calcium mobility. Roots can’t spread easily, and water pools around them, creating anaerobic (low-oxygen) zones where calcium uptake plummets. Even if calcium is present, your plants can’t access it.
- Excessive Potassium or Magnesium These nutrients compete with calcium for uptake. If you’ve been heavy-handed with potassium-rich fertilizers (like banana peels or wood ash) or magnesium (Epsom salt overuse), your peppers may be starving calcium out. Think of it like a crowded subway—calcium gets shoved aside!
Calcium moves through the plant via the transpiration stream (water evaporation through leaves). If water management is off, calcium delivery grinds to a halt.
- Inconsistent Watering Pepper plants need steady moisture—drought stress or soggy roots both disrupt calcium absorption. Dry spells cause roots to struggle, while overwatering leads to oxygen deprivation, weakening root function.
- High Salt or Sodium Buildup Salty soil (from tap water, fertilizers, or poor drainage) creates an osmotic imbalance, making it harder for roots to absorb calcium. Symptoms? Crispy leaf edges and stunted growth—classic signs of nutrient lockout.
- Cold or Waterlogged Roots Calcium uptake drops dramatically in temperatures below 50°F (10°C). If your peppers are in containers or cool climates, roots may be too chilled to absorb nutrients efficiently. Waterlogged soil also triggers anaerobic conditions, suffocating roots.
Too much of a "good thing" can backfire. Here’s how overdoing it creates calcium deficits:
- Excess Nitrogen Lush green leaves? Great—but if nitrogen (N) dominates, calcium gets sidelined. High N promotes fast leafy growth, but calcium (needed for cell wall strength) can’t keep up. Result: Weak stems, yellowing between veins, and blossom-end rot.
- Phosphorus Overload Phosphorus (P) and calcium compete for uptake. If your soil tests high in P (common with bone meal or synthetic fertilizers), calcium levels drop. Think of it like a traffic jam—phosphorus hogs the "nutrient highway."
- Micronutrient Deficiencies Boron and sulfur play roles in calcium metabolism. Without them, even if calcium is present, the plant can’t activate or transport it properly. A boron deficiency, for example, mimics calcium deficiency—so test for multiple nutrients!
Physical root issues directly impact calcium absorption:
- Root Rot (Fungal/Bacterial) Waterlogged soil or over-fertilization can lead to Phytophthora or Pythium infections, rotting roots. Since calcium enters through root hairs, damaged roots = zero uptake.
- Pest Damage (Grubs, Nematodes) Underground pests like root-knot nematodes or grubs chew on roots, reducing surface area for nutrient absorption. Even minor damage adds up over time.
- Transplant Shock Pepper plants stressed by repotting or moving to the garden may temporarily halt calcium uptake while roots adjust. This is why new transplants often show deficiency symptoms early on.
Sometimes, it’s not the soil—it’s the conditions:
- Extreme Heat or Cold Calcium uptake slows in temperatures above 90°F (32°C) or below 50°F (10°C). Heat-stressed plants also transpire faster, but calcium can’t keep up with the demand.
- High Humidity or Poor Airflow While humidity helps peppers, excessive moisture in the air (without airflow) can lead to fungal issues, weakening roots and reducing calcium absorption.
- Wind or Physical Damage Wind-battered plants or those bruised during handling may have damaged cell walls, making calcium distribution inefficient. Think of it like a leaky pipe—calcium can’t reach where it’s needed.
Not sure which cause fits your peppers? Use this cheat sheet:
| Symptom | Likely Cause | Quick Fix |
|---|---|---|
| Yellowing new leaves | Nitrogen toxicity or pH imbalance | Flush soil, add lime (if pH < 6.0) |
| Blossom-end rot | Calcium deficiency + inconsistent watering | Epsom salt soak + mulch |
| Stunted growth | Compacted soil or root damage | Aerate soil, check for pests |
| Crispy leaf edges | Salt buildup or over-fertilizing | Leach soil with rainwater |
| Weak stems | Nitrogen excess or boron deficiency | Balance fertilizer, add boron |
Pro Tip: 💡 If you’re still stumped, grab a soil test kit! Many deficiencies (like calcium) look like others—soil testing cuts through the guesswork.
Quick Fixes for Calcium-Hungry Peppers
Now that you know the why behind calcium deficiency in your pepper plants, let’s roll up our sleeves and get to the how. The good news? Most fixes are simple, cost-effective, and can be done with items you may already have in your garden shed or kitchen.
Below, we’ve broken down solutions by cause, so you can target the root of the problem—no guesswork required.
If your peppers are struggling because the soil lacks calcium, here’s how to boost their intake fast:
🔥 Add Calcium-Rich Amendments
Calcium isn’t just about Epsom salt—it’s also hiding in plain sight in other garden supplies. Try these: - Crushed eggshells: The ultimate freebie! Rinse and bake eggshells at 200°F (93°C) for 10 minutes to kill bacteria, then grind into a fine powder.
Sprinkle 1–2 tablespoons around the base of each plant and lightly water in. Pro tip: 💡 Mix with compost to avoid clumping near roots. - Gypsum (calcium sulfate): A slow-release option that also improves soil structure.
Apply 1–2 pounds per 100 square feet of garden bed and water thoroughly. - Lime (calcium carbonate): Use sparingly—too much can raise soil pH too high. Test your soil first (aim for a pH of 6.0–6.8 for peppers).
If needed, apply 5–10 pounds per 100 square feet and re-test in 2–3 months.
🍳 DIY Calcium Tea for a Quick Boost
For an immediate fix, brew a calcium-rich tea using:
- 1 quart warm water
- 1/4 cup crushed eggshells or gypsum
- 1 tbsp molasses (optional, feeds beneficial microbes)
Steep for 24 hours, strain, and use as a foliar spray or soil drench. Repeat weekly until leaves perk up.
🌡️ Prevent Future Soil Issues
- Test your soil every 2–3 years to monitor calcium and pH levels.
- Rotate crops: Avoid planting peppers (or other heavy calcium users like tomatoes) in the same spot yearly.
- Mulch with compost: A 2–3 inch layer retains moisture and slowly releases calcium over time.
If your peppers are suffering from calcium leaching or magnesium competition, adjust your watering habits:
👨🍳 Use Soft or Rainwater
Hard water (high in magnesium and sodium) can block calcium uptake.
Switch to: - Rainwater (collect in barrels—it’s naturally soft and free!). - Filtered or distilled water (if rainwater isn’t an option). - Avoid tap water if your area has hard water—test with a simple [hardness test kit](https://www.amazon.com/s?k=water+hardness+test+kit).
🥘 Water Deeply and Consistently
Calcium deficiency often flares up when plants experience drought stress or uneven moisture.
Follow this rule: - Water deeply 1–2 times per week (instead of daily shallow watering) to encourage deep root growth. - Water in the morning to reduce evaporation and fungal risks. - Use drip irrigation to deliver water directly to the roots, minimizing leaf wetness.
⏰ Flush the Soil (If Over-Fertilized)
If you’ve overused synthetic fertilizers (especially high in nitrogen or potassium), flush the soil to reset the balance:
- Water the plant thoroughly for 10–15 minutes.
- Let it drain completely.
- Repeat 2–3 times over a week to leach excess salts.
Newly transplanted peppers or those with root damage (from pests, pruning, or disease) struggle to absorb calcium. Here’s how to help them recover:
🔪 Root Stimulator Soak
Give struggling plants a calcium + root-boosting soak:
- Mix 1 tbsp calcium nitrate or gypsum with 1 gallon of water.
- Add 1 tsp molasses (feeds beneficial microbes).
- Soak the root zone for 15–20 minutes. Do this every 2 weeks until leaves regain color.
🌿 Companion Planting for Calcium Support
Some plants naturally improve calcium availability in the soil. Pair your peppers with:
- Clovers (fix nitrogen and improve soil structure).
- Comfrey (deep roots mine calcium from subsoil).
- Marigolds (repel pests that stress roots).
✨ Prevent Transplant Shock
- Hardening off seedlings: Acclimate them to outdoor conditions over 7–10 days before planting.
- Plant at the right time: Wait until soil temps are above 60°F (15°C) to avoid cold stress.
- Use root stimulators (like mycorrhizal fungi) when transplanting to jumpstart root growth.
Once you’ve applied fixes, keep an eye on progress with these steps:
| Symptom | Fix Applied? | Improvement Timeline | Next Steps |
|---|---|---|---|
| New growth is green | ✅ Calcium added | 7–14 days | Reduce applications, monitor |
| Yellowing persists | ❌ Reapply fix | 14–21 days | Check pH, water quality |
| Blossom end rot returns | ✅ Soil amended | 3–4 weeks | Increase mulch, test soil again |
- 💡 Pro Tip: If leaves continue yellowing, rule out magnesium deficiency (look for yellow between veins) or iron chlorosis (yellow new leaves). Adjust with Epsom salt (magnesium sulfate) or chelated iron if needed.
Remember: Calcium deficiency is rarely a one-time fix—it’s about consistent soil health. With these solutions, your peppers should bounce back in 2–4 weeks, and you’ll be harvesting juicy, crisp peppers in no time! 🌶️🔥
Frequently asked questions
Why do my pepper plants get yellow leaves even after adding calcium?
Yellowing leaves after adding calcium often means another nutrient is blocking uptake. Check for magnesium deficiency (yellow between veins) or iron chlorosis (new leaves yellowing). Also verify your soil pH—if it's below 6.0, calcium can't be absorbed. Try a foliar spray with chelated iron or Epsom salt while re-testing pH.
How often should I apply crushed eggshells to my pepper plants?
Apply crushed eggshells every 4-6 weeks during growing season. Sprinkle 1-2 tablespoons around each plant and lightly water in. For fast results, mix with compost or use as a weekly foliar spray (1 tbsp crushed eggshells steeped in 1 quart water). Stop applications when new growth stays green for 2-3 weeks.
Can I use too much calcium for my pepper plants?
Yes, overdoing calcium can disrupt nutrient balance. Symptoms include leaf browning or stunted growth. For peppers, aim for 1-2 pounds of gypsum per 100 sq ft annually. Monitor soil pH—calcium excess raises pH above 7.0, locking out other nutrients. Always test soil before reapplying calcium amendments.
Will rainwater help prevent calcium deficiency in my container peppers?
Rainwater is naturally soft and free of minerals that block calcium uptake. Use it exclusively for watering container peppers. For extra protection, collect rainwater in barrels and add 1 tbsp calcium nitrate per gallon monthly. This combo prevents leaching while providing steady calcium—ideal for potted plants where soil volume is limited.
How do I know if my pepper plants need calcium or magnesium?
Check leaf patterns: Calcium deficiency causes yellowing at leaf edges or blossom-end rot on fruit. Magnesium deficiency shows as yellow between veins while keeping green edges. Test both by doing a foliar spray—calcium nitrate for calcium, Epsom salt for magnesium. Apply one at a time to identify which works.