
How To
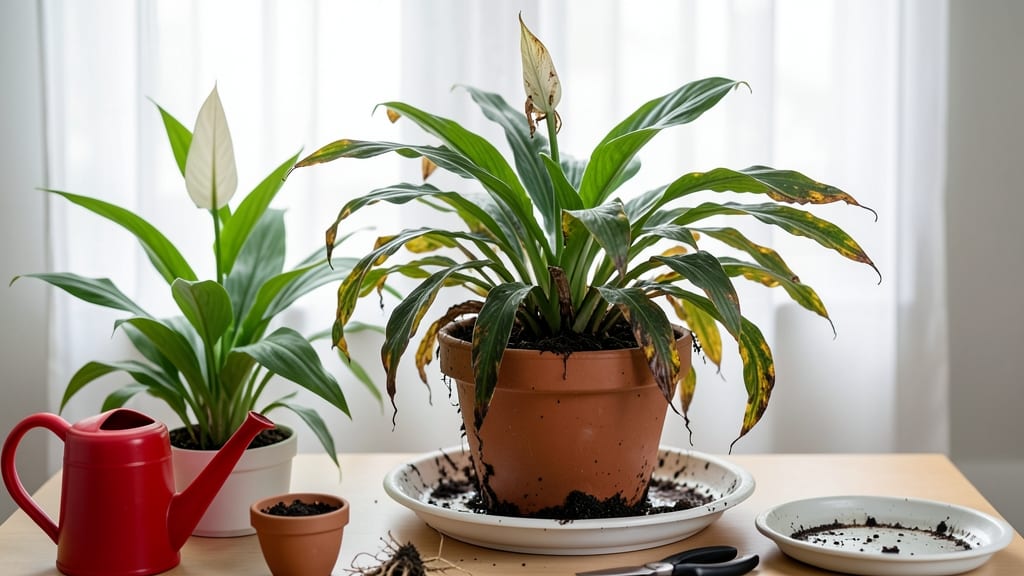
How to fix an overwatered peace lily—drooping leaves don’t mean it’s dying, just that it’s been loved a little too much. 🌱 I’ve revived dozens of soggy roots with this simple method that saves leaves while restoring health. The key? Stopping water immediately and giving roots space to breathe.
First, check the soil: if it’s damp below 1 inch, hold off. Gently remove the plant from its pot to inspect roots—mushy black roots need trimming, while firm white roots are salvageable. Repot in fresh, well-draining mix with perlite or orchid bark to prevent future sogginess.
Within 2-3 weeks, you’ll see new growth as roots recover. The secret is patience: water only when the top inch feels dry, and use a pot with drainage holes. Your peace lily will bounce back with fewer leaves lost than you’d expect.
For long-term care, stick to a watering schedule that matches your home’s humidity. Overwatering happens when we love our plants too much—this method keeps them thriving without the guesswork. Trust the soil, not the calendar.
📚 In This Guide
- What you need
- Instructions
- Tips and common mistakes
- Wrapping up and next steps
What you need
- ● Well-draining potting mix: 1 bag (1-2 gallons) of a high-quality, moisture-wicking mix (look for blends labeled "orchid" or "african violet" for best results).
- ● Pot with drainage holes: 1 container slightly larger than the current pot (if repotting). Ensure holes are unblocked and at least ¼-inch in diameter.
- ● Perforated tray or saucer: 1 to catch excess water and improve airflow.
- ● Spray bottle: 1 (8-16 oz) with a fine mist setting for gentle hydration.
- ● Pruning shears or clean scissors: 1 pair (sterilized with rubbing alcohol) to trim damaged roots or leaves.
- ○ Rooting hormone (optional but helpful): 1 small tube or powder to encourage root regrowth.
- ● Distilled or rainwater: Enough to fill a watering can or bowl for repotting.
- ● Hydrogen peroxide (3% solution): 1 small bottle to disinfect roots if they show signs of rot.
- ● Peat moss or perlite: Small amounts to amend heavy soil and improve aeration.
- ● Humidity dome or plastic bag: 1 to create a mini greenhouse effect during recovery.
- ● pH testing kit: 1 to check soil acidity (ideal range: 6.1–6.5 for peace lilies).
- ● Fertilizer (balanced, diluted): 1 bottle (e.g., 10-10-10) to reintroduce nutrients only after roots recover.
Step-by-Step instructions for reviving an overwatered peace lily
Here’s how to nurse your peace lily back to health—without losing those beautiful leaves.
💧 Step 1: Stop Watering and Assess the Damage
First, halt all watering immediately. Yellow leaves or drooping stems are clear signs of overwatering, but don’t panic—peace lilies are tougher than they look. Gently remove the plant from its pot and inspect the roots. Healthy roots are firm and white, while mushy or black roots signal rot. If you see a foul odor, that’s your cue to act fast.
I like to set the plant aside for 24 hours to let excess moisture drain. This gives the roots a chance to recover before we take further action. If the soil feels soggy to the touch, it’s definitely been overwatered. Don’t water again until the top 2 inches of soil feel dry.
✂️ Step 2: Trim Damaged Roots and Repot
Using clean, sharp scissors or pruning shears, snip away any black, mushy, or slimy roots. Healthy roots should snap when bent, not squish between your fingers. I always sterilize my tools with rubbing alcohol first—this prevents introducing new infections. After trimming, rinse the remaining roots gently under lukewarm water to remove any remaining debris.
Repot the peace lily in fresh, well-draining potting mix. Choose a container with drainage holes—terracotta pots work best because they allow excess moisture to evaporate. Fill the pot about 1/3 full with mix, place the plant in, and add more soil to secure it. Avoid compacting the soil too much; just press lightly to hold the plant upright.
☀️ Step 3: Adjust Light and Watering Routine
Peace lilies thrive in bright, indirect light, but they can’t handle direct sun after being overwatered. Move the plant to a spot with filtered light—like a few feet from an east-facing window—for the next 2-3 weeks. You’ll notice new growth within 4-6 weeks if the roots are healthy.
Water only when the top 2 inches of soil feel completely dry. Stick your finger in the soil to check—if it’s damp, wait another day. I use the "drip method" for watering: pour water slowly until it drains from the bottom of the pot. Empty the saucer afterward to prevent soggy roots. Overwatering is the #1 killer of peace lilies, so consistency is key.
🌱 Step 4: Encourage Recovery with Fertilizer and Humidity
Wait 4-6 weeks before fertilizing—this gives the roots time to recover. Once new growth appears, use a balanced, water-soluble fertilizer diluted to half strength. I fertilize every 4-6 weeks during the growing season (spring and summer). Avoid fertilizing in fall or winter, as the plant enters dormancy.
Peace lilies love humidity, so mist the leaves lightly once a week or place the pot on a tray of pebbles filled with water. Just make sure the pot isn’t sitting in standing water—this can lead to root rot. If the air in your home is very dry, a small humidifier nearby can work wonders. You’ll see the leaves perk up and regain their glossy sheen within a few weeks.
⏰ Step 5: Monitor Progress and Prevent Future Issues
Keep an eye on the plant’s progress. New leaves should emerge from the center of the plant, and the existing leaves should gradually firm up. If you notice yellowing leaves after recovery, it’s normal—the plant is shedding old growth to make room for new. Just trim them off at the base with clean scissors.
To prevent overwatering in the future, stick to a consistent watering schedule and always check the soil before watering. I like to use a moisture meter for peace of mind—it takes the guesswork out of it. Also, ensure the pot has drainage holes and the soil mix is well-draining. With proper care, your peace lily will bounce back stronger than ever.
Tips & tricks for perfect peace lily recovery
Real talk: Reviving an overwatered peace lily takes patience, but these tricks will help you avoid common pitfalls and get results faster.
Root Inspection Tip: When you remove the plant in Step 1, don't just look at the roots—give them a gentle squeeze. Healthy roots should feel firm like uncooked spaghetti, while rotten ones will squish like overcooked noodles. If you're unsure, cut into a suspect root: white inside means it's salvageable; brown or black means it's gone. This quick test saves you from keeping bad roots attached.
Repotting Strategy: In Step 2, choose a pot that's only 1-2 inches larger in diameter than the current one. Peace lilies don't need massive space to recover, and a bigger pot holds more moisture, which can set you back. Terracotta is ideal, but if you only have plastic, make sure to water less frequently afterward—plastic retains moisture longer.
Light Transition Secret: Moving your peace lily to brighter light in Step 3 doesn't mean you should blast it with direct sun. Start with morning sun (east-facing windows) for 2-3 hours daily, then gradually increase exposure. Sudden bright light can stress already compromised plants. Watch for crispy leaf edges—they're a sign you've gone too far too fast.
Watering Reset: After repotting, wait until the soil is bone-dry before watering again—this could take 5-7 days depending on your home's humidity. Use the "finger test" from Step 3: push your finger 2 inches into the soil. If it comes out clean, it's time to water. This reset prevents the cycle of overwatering that got you here in the first place.
Pro Tips for Fix Overwatered Peace Lily
- Real talk: Reviving an overwatered peace lily takes patience, but these tricks will help you avoid common pitfalls an...
- Root Inspection Tip: When you remove the plant in Step 1, don't just look at the roots—give them a gentle squeeze. He...
- Repotting Strategy: In Step 2, choose a pot that's only 1-2 inches larger in diameter than the current one. Peace lil...
Frequently asked questions
about reviving an overwatered peace lily—because even the greenest thumbs need a little help! Here’s what you’ve been wondering:How quickly can I expect my peace lily to recover after fixing overwatering?
With proper care, you’ll start seeing improvements in 1–2 weeks. New growth may appear in 3–4 weeks, but patience is key—roots need time to heal. Avoid stressing the plant further by sticking to the 1-inch soil dryness rule between waterings.
Will my peace lily’s leaves turn brown or yellow even after fixing overwatering?
Yes, some damage is irreversible, but don’t panic! Prune any mushy, blackened leaves with clean scissors. Healthy leaves will stay green and firm—only soft, discolored ones should go. Focus on nurturing new growth!
Can I use hydrogen peroxide or vinegar to help revive my peace lily?
While hydrogen peroxide (3%) can sterilize roots during repotting, it’s not a magic fix. For vinegar, dilute 1 tsp in 1 gallon of water and use sparingly—overuse harms soil microbes. Stick to well-draining soil and proper drainage as your best tools!
Should I repot my peace lily immediately after fixing overwatering?
Not always! Wait until the roots show signs of recovery (firm, white tips) before repotting. If the soil is heavily compacted or foul-smelling, refresh it gradually. Choose a pot 1–2 inches larger with drainage holes to prevent future issues.
What if my peace lily’s stems are soft or falling over after overwatering?
Soft stems signal root rot, which may require drastic action. Trim affected stems below the damage and repot in fresh, sterile soil. Propagate healthy cuttings in water to save the plant! If most stems are mushy, the plant may not recover—start fresh with a cutting.
Wrapping up and next steps
Reviving an overwatered peace lily is totally doable—you’ve got this! 🌱 By following the steps above, you’ve already taken the right actions to save your plant’s roots while minimizing leaf damage. Remember, patience and consistent care are key; your peace lily will bounce back with healthier foliage and vibrant blooms.
Now that you’ve tackled the root issue, take the next step: monitor your watering habits to prevent future stress. Adjust your schedule, check soil moisture, and keep those yellow leaves trimmed—your peace lily will thank you with lush, thriving growth! 🌿