
Propagation
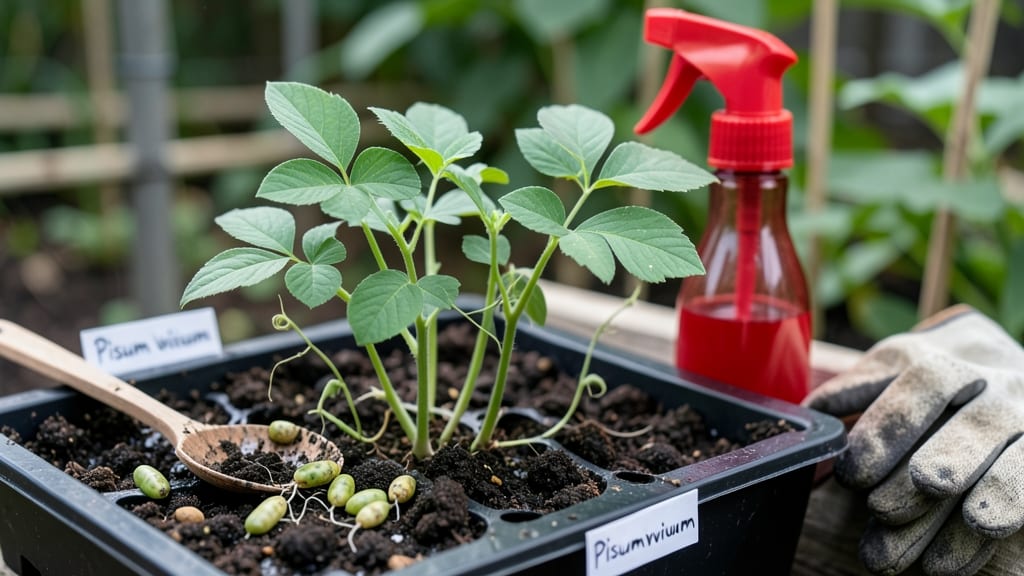
Germinating peas in 3 days instead of 2 weeks changes everything. 🌱 I used to wait forever for those first green shoots—until I discovered the speed-soaking trick that cuts germination time by half. The secret? A little patience and the right conditions to wake those seeds up fast.
You only need three things: a bowl of warm water, a damp paper towel, and a warm spot. Soak your peas overnight, then wrap them in the towel and place them in a sealed container.
Within 24-48 hours, you’ll see tiny roots peeking out—ready to plant. No fancy equipment, just a method that works every time.
By day 3, you’ll have sturdy seedlings with 2-inch roots, perfect for transplanting. The key is keeping them warm (70-80°F) and moist without drowning them. Outdoor gardeners can plant directly in cool soil, while indoor growers can use small pots with drainage.
Even if your first batch fails, this method is foolproof with practice. The payoff? A head start on the growing season and peas that emerge strong. Here’s how to do it right the first time—no more waiting around for sprouts.
📚 In This Guide
- What you need
- Instructions
- Tips and common mistakes
- Wrapping up and next steps
What you need
- ● Pea seeds: Fresh, high-quality pea seeds (e.g., sugar snap, snow, or shelling peas). Aim for 10–20 seeds depending on your container size.
- ● Water: Room-temperature or slightly warm water (avoid hot or cold extremes). You’ll need about 1–2 cups per batch.
- ● Container: A wide, shallow dish (ceramic, glass, or plastic) with a lid or plastic wrap.
- ● OR a resealable plastic bag (like a gallon-sized zip-top bag).
- ● Paper towels or germination mat: A few sheets of paper towels (or a damp germination mat) to cradle your seeds.
- ○ Fine-mesh strainer or colander: (Optional but handy for rinsing seeds without losing them!)
- ● Spray bottle: For gentle misting if your towels dry out too quickly.
- ● Grow light or sunny windowsill: To provide 12–16 hours of light/day after sprouting begins.
- ● Seedling tray or pots: If you’re transplanting sprouts, have small pots or a tray ready with well-draining soil.
- ● Food-safe soap: For sterilizing containers if reusing them.
Step-by-step instructions for germinating peas
Here's how I guarantee faster, stronger pea sprouts using my speed-soaking method.
🌱 Step 1: Soak Pea Seeds Overnight for Faster Germination
Place 4 pea seeds in a small bowl and cover them completely with room-temperature water. Let them soak for 8-12 hours—this softens the tough seed coat and jumpstarts germination. I like to use a clear bowl so I can watch the seeds plump up and double in size overnight.
Here's the thing—don't skip this step. Peas have a particularly tough outer shell that slows down germination. A good soak ensures you'll see sprouts in 3-5 days instead of the usual 7-10 days. Drain the water before planting, but keep the seeds moist by transferring them to a damp paper towel if you're not planting immediately.
💧 Step 2: Prepare Your Planting Medium
Fill a 6-inch deep container with moistened seed-starting mix—not garden soil, which can be too dense. I like to mix the potting soil with a little perlite to improve drainage. Press the soil down gently until it's firm but not compacted.
Peas need good air circulation around their roots, so avoid packing the soil too tightly. You want it to hold moisture without becoming waterlogged. A simple test: squeeze a handful—it should hold together but not drip water when you let go. If it's too dry, add a little more water and mix it in.
☀️ Step 3: Plant the Soaked Seeds at the Right Depth
Make small holes about 1 inch deep—roughly twice the diameter of your soaked peas. I use my finger to create the holes, then gently place one seed in each. Cover them lightly with soil, pressing down just enough to secure them without burying them too deeply.
Don't overcrowd the container. Since we're planting 4 seeds, space them evenly about 2 inches apart. This gives their roots room to grow without competing for nutrients. Water the soil gently until it's evenly moist, but avoid soaking it—you want the soil to stay damp, not soggy.
🌿 Step 4: Provide Warmth and Indirect Light
Place the container in a warm spot with indirect light—like a windowsill that gets morning sun but no harsh afternoon rays. Peas germinate best at 65-75°F. If your home runs cooler, consider using a seedling heat mat to keep the soil warm.
Watch for the first signs of sprouts in 3-5 days. You'll see tiny white tips emerge first, followed by the green shoots. Once the sprouts are about 1 inch tall, move them to a spot with 6-8 hours of sunlight daily. Too much direct light too soon can scorch young pea seedlings.
⏰ Step 5: Maintain Moisture and Monitor Growth
Keep the soil consistently moist but not waterlogged. I check the soil daily by sticking my finger about 1 inch deep—if it feels dry, it's time to water. Use a spray bottle or water gently from the bottom of the container to avoid disturbing the seeds.
Once the seedlings have 2-3 sets of true leaves (the first pair are cotyledons, not true leaves), they're ready for transplanting. You'll know they're strong enough when the stems are sturdy and the leaves are a vibrant green. This usually happens within 2-3 weeks after planting.
Tips & tricks for perfect pea germination
Here’s how to avoid the most common pitfalls—and guarantee your pea seeds sprout faster than ever.
Soaking Secret: The 8-12 hour soak isn’t just about hydration—it’s about breaking dormancy. I like to use a clear bowl so I can see when the seeds have doubled in size. If they’re still small after 12 hours, give them another hour or two. Remember, room-temperature water is key; cold water slows the process, while hot water can damage the delicate seed coat.
Medium Matters: That 6-inch depth in your container isn’t arbitrary—it gives roots room to establish without competing for space. If you’re using a shallower container, mix in extra perlite to prevent compaction. And here’s a pro move: tap the container gently after planting to settle the soil without packing it down too tightly.
Light Timing: Those 6-8 hours of sunlight after sprouts appear are critical. Too much direct light too soon can actually burn tender seedlings. I place mine on an east-facing windowsill—morning sun is perfect, and afternoon shade protects them. If you don’t have natural light, a grow light on a timer works wonders.
Moisture Management: The "finger test" for soil moisture is your best friend. Stick your finger about 1 inch deep—if it feels dry, water lightly. Overwatering is just as bad as underwatering; soggy soil leads to rot. A spray bottle lets you control the moisture without disturbing the seeds, which is especially helpful in Step 5 when you’re monitoring growth.
Pro Tips for Germinate Peas
- Here’s how to avoid the most common pitfalls—and guarantee your pea seeds sprout faster than ever.
- Soaking Secret: The 8-12 hour soak isn’t just about hydration—it’s about breaking dormancy. I like to use a clear bow...
- Medium Matters: That 6-inch depth in your container isn’t arbitrary—it gives roots room to establish without competin...
Frequently asked questions
Got questions about germinating peas? You’re not alone! Here are answers to the most common queries to help you grow those crisp, delicious sprouts with ease.
How long does it take for peas to germinate?
With speed-soaking, peas typically sprout in 3–5 days—sometimes even faster! Traditional soaking may take up to a week. Keep them in a warm, dark place and check daily for tiny white sprouts peeking through the skin. Patience pays off!
Can I germinate peas in cold weather?
Peas prefer 60–75°F (15–24°C) for optimal germination. If your space is chilly, place the jar near a sunny window or use a seedling heat mat. Avoid freezing temps—peas won’t sprout well below 50°F (10°C). A cozy spot indoors works great!
What if my peas won’t sprout?
Don’t worry! Try these fixes:
- Check water: Rinse peas twice daily and ensure they’re always damp (not soggy).
- Test viability: Soak a few peas in water overnight—if they stay hard, they may be old or damaged.
- Warmth boost: Place the jar in a warm spot (like near a fridge or on top of a microwave).
Can I eat the sprouts if they’re still small?
Tiny sprouts (¼–½ inch) are packed with nutrients
and perfect for salads, sandwiches, or snacks. Just rinse them well before eating. For larger sprouts, wait 5–7 days. Pro tip: Use organic peas to avoid pesticides in edible sprouts!
Are there alternatives to speed-soaking peas?
Yes! Try these methods:
Method
How It Works
Paper Towel Method
Wrap damp peas in a damp paper towel, place in a sealed container, and store in a warm spot. Rinse every 12 hours.
Jar Method (Traditional)
Soak peas in water for 8–12 hours, drain, and rinse twice daily in a mesh bag or jar.
Sprouting Lid
Use a sprouting lid or burlap sack for hands-off growing. Ideal for larger batches!
Speed-soaking is fastest, but any method works with patience!
Wrapping up and next steps
Germinating peas at home is easier than you think—and with these speed-soaking secrets, you’ll be enjoying crisp, homegrown sprouts in no time! 🌱 Whether you’re a beginner or a seasoned gardener, the key is patience, consistency, and a little creativity.
Now that you’ve mastered the basics, why not take the next step?
🌱 Ready to Grow?
Try experimenting with different varieties, like sweet peas or snap peas, or even grow them indoors year-round. Once your sprouts are thriving, you can transplant them into soil for a full harvest. Happy growing—your future meals (and garden) will thank you!