
Blooming
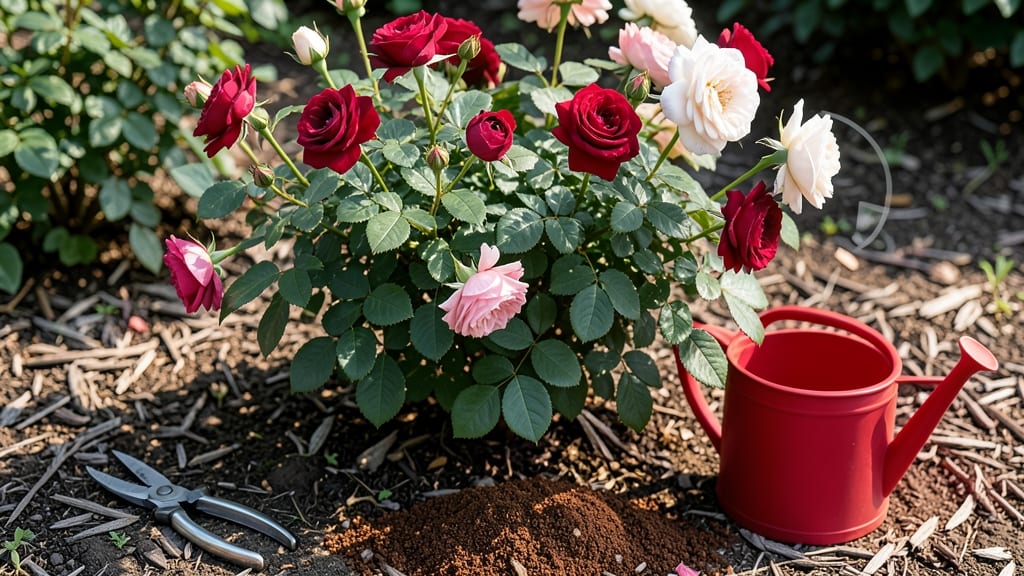
How to get more blooms on roses—your bushes could be covered in flowers by next summer if you prune, feed, and hydrate them the right way. 🌹 I’ve turned my once-sparse bushes into nonstop color factories by focusing on three key areas that most gardeners overlook. The secret isn’t complicated: prune correctly to encourage new growth, feed with the right nutrients (organic or inorganic), and water deeply but consistently. Most roses get over-pruned in winter or underfed in spring—both mistakes rob them of their blooming potential. By following these steps, you’ll see stronger canes, more buds, and flowers that last weeks longer. The best part? These methods work for hybrid teas, floribundas, and even old-fashioned climbers. Here’s how to make it happen without guesswork—no more struggling with leggy stems or sparse blooms.
📚 In This Guide
- What you need
- Instructions
- Tips and common mistakes
- Wrapping up and next steps
What you need
- ● Pruning shears or bypass pruners – Sharp, clean, and disinfected (70% rubbing alcohol or bleach solution). Quantity: 1 pair.
- ● Garden gloves – Heavy-duty to protect from thorns. Recommended: Nitrile-coated for grip.
- ● Rose fertilizer – Balanced (e.g., 10-10-10) or high-phosphorus (e.g., 5-10-5) for blooms. Quantity: 1–2 lbs per 100 sq ft.
- ● Organic mulch – Shredded bark, straw, or compost (2–4 inches thick) to retain moisture and regulate soil temp.
- ● Drip irrigation or soaker hose – For deep, consistent watering (avoid overhead sprinklers to prevent disease). Length: Adjust to garden size.
- ○ pH test kit – To check soil acidity (roses thrive in 6.0–6.5 pH). Optional but helpful: Lime (to raise pH) or sulfur (to lower it).
- ● Compost or well-aged manure – Improves soil fertility. Quantity: 2–3 inches mixed into topsoil.
- ● Epsom salt (magnesium sulfate) – 1 tbsp per gallon of water as a foliar spray for greener leaves and stronger blooms.
- ● Copper fungicide – Prevents black spot and powdery mildew (spray proactively in humid climates).
- ● Rose-specific bloom booster – Products like Fish emulsion or seaweed extract for extra nutrients.
- ● Stakes or cages – Supports climbing roses and protects blooms from wind damage.
- ● Weatherproof storage bin – Keeps tools and fertilizers organized and dry.
Step-by-Step instructions for pruning, feeding, and hydrating roses
Here’s how I transform my roses from occasional bloomers to nonstop floral displays—no secret formulas, just precise timing and care.
✂️ Step 1: Prune for Airflow and Energy Focus
Start pruning in late winter or early spring before new growth begins. Use clean, sharp pruners to make 45-degree cuts just above an outward-facing bud. I remove dead, diseased, or crossing branches first—these steal energy from blooms. Cut back last year’s growth by one-third, targeting stems that are thinner than a pencil.
Watch for five-leaf clusters on remaining stems—these signal strong growth points. Prune just above the fifth leaf to encourage branching, which leads to more blooms. Avoid leaving stubs; a clean cut heals faster and reduces rot risk. If your roses bloom on old wood (like some heirlooms), prune lightly in early spring and again after flowering.
💧 Step 2: Water Deeply at the Root Zone
Roses need 1–2 inches of water weekly, but shallow watering stresses roots. I water early in the morning at the base, avoiding leaves to prevent fungal diseases. Use a soaker hose or drip irrigation to deliver moisture slowly—this mimics natural rainfall and encourages deep root growth.
Check soil moisture by sticking your finger 2 inches down; if it’s dry, water again. Overhead sprinklers waste water and promote mildew. Mulch with 2–3 inches of organic mulch (like shredded bark) to retain moisture and regulate soil temperature. This step alone cuts my watering time in half while boosting bloom production.
☀️ Step 3: Feed with Balanced Fertilizer in Stages
Apply a balanced rose fertilizer (10-10-10 or 5-10-5) in three doses: early spring, mid-summer, and late summer. I mix fertilizer into the soil at the drip line—never on leaves—to avoid burns. For organic options, use composted manure or fish emulsion every 4–6 weeks.
Watch for new leaf growth after feeding—this means the plant is absorbing nutrients. Too much nitrogen (the first number) leads to lush foliage but fewer blooms. If your roses produce lots of leaves but few flowers, reduce nitrogen and increase phosphorus (the second number). Always water after fertilizing to activate nutrients in the soil.
🌿 Step 4: Deadhead and Encourage Reblooming
Deadhead spent blooms weekly by cutting back to the first five-leaf cluster below the flower. This redirects energy to new buds instead of seed production. Use clean pruners to avoid tearing stems. I also trim weak or leggy growth in summer to maintain a bushy shape—this prevents overcrowding and improves airflow.
If your roses bloom once and stop, they’re likely once-blooming varieties. For these, prune lightly in spring and remove only dead wood. Reblooming types (like hybrid teas) need regular deadheading and mid-summer pruning to keep producing flowers until frost. A quick pinch of new growth with your fingers can also encourage branching and more blooms.
⏰ Step 5: Adjust Care for Seasonal Changes
In fall, reduce watering as temperatures drop but keep soil moist. Apply a slow-release fertilizer or bone meal to build root strength for next year. I also add 2–3 inches of mulch to insulate roots from winter cold. For winter protection, wrap bare-root roses with burlap or use rose cones to shield canes from freezing winds.
Spring is the time to inspect for pests like aphids or Japanese beetles. Spray with neem oil if needed, but avoid harsh chemicals that can damage blooms. Monitor soil moisture—spring rains can lead to overwatering, while summer heat demands consistent hydration. Adjust your routine based on what you see: drooping leaves mean water; yellow leaves mean less nitrogen; no blooms mean more phosphorus.
Tips & tricks for encouraging nonstop rose blooms
These game-changing insights will help you transform your roses into blooming powerhouses—no fancy tools required.
Pruning Precision: When you're trimming back last year's blooms in Step 1, focus on making cuts just below the first 5-leaflet leaf—this is where new growth emerges. I've found that using clean, sharp pruners prevents tearing, which can introduce disease. The ¼ inch above the bud guideline ensures you're not cutting too close, which can damage the growth point. Remember, this isn't about drastic cuts—think of it as sculpting to let light and air reach the center of the plant.
Hydration Strategy: The key to deep watering in Step 2 is patience. Don't rush—let the water soak in gradually to reach those 12 inches deep. I've seen roses wilt dramatically when watered superficially, only to perk up beautifully after proper deep watering. For a visual cue, imagine a long screwdriver inserted vertically—water should reach that depth. And that 2-3 inch mulch layer? It's not just decoration—it's insulation that keeps roots cool in summer and warm in winter.
Fertilizer Timing: The switch from balanced (10-10-10) to low-nitrogen (5-10-5) in Step 3 is crucial for blooming. I've learned this the hard way—too much nitrogen makes roses grow lush foliage but few flowers. Apply that 1 tablespoon of Epsom salt per gallon monthly, but don't exceed it—magnesium overload causes leaf scorch. The 4-6 week feeding schedule keeps roses blooming consistently without overwhelming them.
Deadheading Discipline: That 2 minutes per bush you spend deadheading in Step 4 pays off exponentially. I've timed myself—it's a small investment for dramatic results. The trick is consistency: make it a morning habit. When you cut back to that 5-leaflet leaf, you're telling the plant to redirect energy into new blooms rather than seed production. This simple act is what transforms occasional bloomers into nonstop color machines.
Pro Tips for Get More Blooms On Roses
- These game-changing insights will help you transform your roses into blooming powerhouses—no fancy tools required.
- Pruning Precision: When you're trimming back last year's blooms in Step 1, focus on making cuts just below the first ...
- Hydration Strategy: The key to deep watering in Step 2 is patience. Don't rush—let the water soak in gradually to rea...
Frequently asked questions
Got questions about maximizing those stunning rose blooms? You’re not alone—here are the answers to the most common ones!
Why aren’t my roses blooming this year?
Lack of blooms often stems from over-pruning (cutting back too late or too much), poor nutrition (not enough phosphorus/potassium), or stress (drought, extreme heat, or pests). Check your pruning timing (late winter/early spring) and soil health—roses need well-draining, nutrient-rich soil to thrive!
When is the best time to fertilize roses for more blooms?
Feed roses 3 times a year: early spring (for new growth), late spring (as buds form), and early summer (to sustain blooms). Use a balanced rose fertilizer (like 10-10-10) or a bloom booster (higher in phosphorus, like 5-10-5). Avoid fertilizing in fall—it encourages tender new growth that won’t survive winter.
How often should I water roses to encourage blooming?
Roses need 1–2 inches of water per week, either from rain or deep watering. Shallow watering stresses roots, while overwatering can rot them. Water early in the morning to reduce evaporation and fungal risks. Mulch around the base to retain moisture and keep roots cool.
Can I use coffee grounds or eggshells to help roses bloom?
Yes! Coffee grounds add nitrogen (for foliage) and acidity, while crushed eggshells provide calcium. However, they’re supplements, not replacements for balanced fertilizer. Mix a thin layer (1 inch) of coffee grounds into the soil or sprinkle eggshells around the base. Avoid overdoing it—too much can harm soil pH!
What should I do if my roses bloom but then stop?
If blooms fizzle out, it’s likely due to exhaustion (old canes) or nutrient depletion. Deadhead spent blooms to redirect energy to new growth, and prune back 1/3 of the oldest canes in late winter. Also, check for pests (aphids, spider mites) or diseases (black spot)—they sap energy. A foliar spray or soil drench with neem oil can help!
Wrapping up and next steps
Transforming your roses into a bloom bonanza is totally within reach! By mastering pruning, feeding, and hydration, you’ll coax those vibrant buds into action—season after season. 🌸 Start small: pick one technique to refine this week, then build your rose-care routine like a pro.
Ready to see your garden burst with color? Grab those shears and get growing—your roses (and future neighbors!) will thank you. 👉 Next up: Troubleshoot common blooming roadblocks.