
Pests
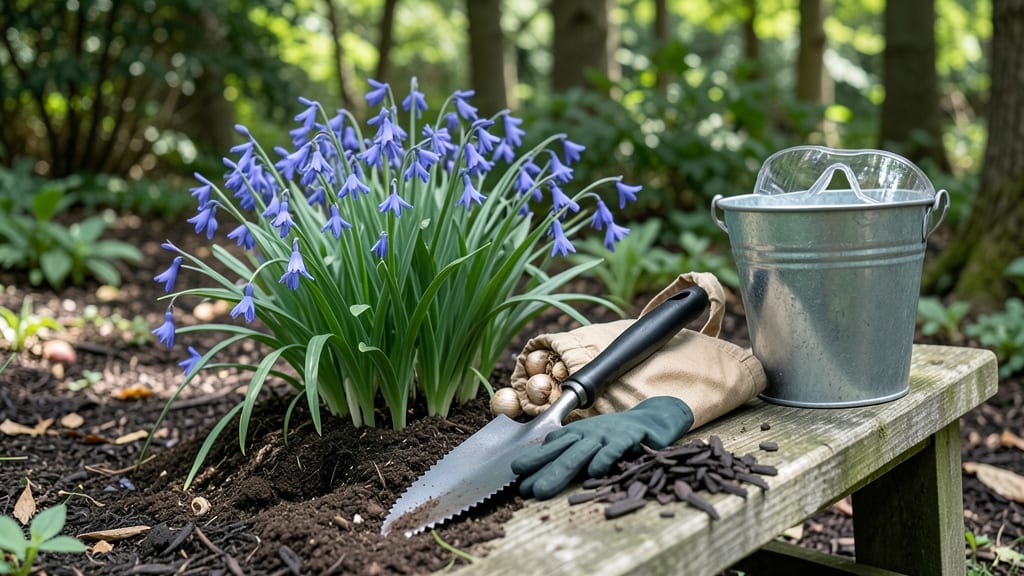
How to get rid of bluebells choking your garden? 🌱 Their delicate blooms hide a stubborn root system that spreads like wildfire. I’ve battled these invasive beauties for years, and boiling water isn’t just a last resort—it’s the permanent solution that actually works when nothing else does. The key is timing: attack after flowering when energy drains into roots, making them vulnerable. Grab a kettle, some gloves, and a small shovel. Pour 2 quarts of boiling water directly onto the base of each clump, then smother with cardboard or thick mulch to block regrowth. It’s brutal but effective—no chemicals, no guesswork. By late summer, you’ll see zero regrowth where bluebells once ruled. The soil stays usable, and your garden reclaims space for plants you actually want. Just don’t let them take root again—prevention means vigilant weeding and dense ground covers. Works best in temperate climates where bluebells thrive aggressively. For native species, consider relocating instead of eradicating—ecosystems need balance too. Let’s tackle this together!
📚 In This Guide
- What you need
- Instructions
- Tips and common mistakes
- Wrapping up and next steps
What you need
- ● Boiling water: At least 1 gallon per 2–3 feet of bluebell patch. Use freshly boiled water (never microwaved or reheated) for maximum effectiveness.
- ● Heavy-duty gloves: 1 pair (nitrile or rubber, waterproof) to protect your hands from burns and sap.
- ● Long-sleeve clothing: 1 set (preferably old or water-resistant) to shield your skin.
- ● Knee pads or a small stool: 1–2 for comfort during prolonged kneeling.
- ● Garden trowel or spade: 1 (5–7 inches wide) for digging up stubborn roots.
- ● Plastic sheeting or thick cardboard: Enough to cover the area (at least 2–3 feet beyond the bluebell patch). Use 10–15 mil thickness for durability.
- ● Heavy rocks or bricks: 5–10 (or a garden roller if available) to weigh down the barrier.
- ○ Rake: 1 (optional but helpful for smoothing soil after treatment).
- ● Vinegar (white, 20% acetic acid): 1 gallon mixed with boiling water (1:1 ratio) for extra root-killing power.
- ● Salt: 1–2 cups (sprinkled around the base of plants before boiling water treatment for added toxicity).
- ● Garden hose with nozzle: 1 for rinsing tools and washing hands post-treatment.
- ● Disposable trash bags: 2–3 for collecting uprooted plants and debris.
- ● Hand sanitizer or soap: 1 bottle to clean up after handling bluebells (their sap can irritate skin).
Step-by-Step instructions for eliminating bluebells with boiling water
Here's the straightforward method I've used to permanently remove stubborn bluebells from lawns and garden edges.
🌱 Step 1: Identify and Mark the Bluebell Clumps
Start by locating all bluebell clusters in your yard. These plants spread aggressively through underground rhizomes, so you'll need to treat the entire area where they appear. Walk around your property and mark the outer edges of each clump with small stakes or spray paint. This helps you visualize the full treatment zone and prevents accidental missed patches.
Look for the characteristic bell-shaped flowers and long, grass-like leaves. Bluebells often form dense mats, so trace the entire perimeter carefully. I like to work on a dry day when the ground is firm—this makes marking easier and helps prevent soil disturbance before treatment.
💧 Step 2: Prepare the Boiling Water Treatment
Fill a large watering can or heavy-duty kettle with water and bring it to a full rolling boil. The water must be truly boiling to effectively kill the rhizomes. I use a 3-gallon capacity container because bluebells have deep root systems that need thorough treatment. Have a heat-resistant glove or thick towel ready to protect your hands.
While the water heats, clear the area of any flammable materials or pets. Boiling water can cause steam burns, so keep children and animals at a safe distance. The treatment works best when applied directly to the soil surface where the bluebell leaves emerge—this ensures the heat penetrates the rhizomes below.
✂️ Step 3: Apply the Boiling Water Barrier
Pour the boiling water directly over the marked bluebell clumps, starting at the outer edges and working inward. Apply enough to thoroughly saturate the soil and leaves—you should see steam rising from the ground. I like to work in small sections about 2 feet wide to ensure complete coverage. The water should penetrate at least 2-3 inches deep to kill the rhizomes.
Watch for the leaves to wilt and turn brown immediately after treatment—that's your confirmation the heat is working. Repeat the process every 3-5 days for 2-3 weeks to ensure all new growth and dormant rhizomes are destroyed. Consistency is key here; skipping treatments allows the bluebells to regenerate.
🌿 Step 4: Monitor and Maintain the Treated Area
After completing the boiling water treatments, monitor the area closely for any new bluebell growth. It may take several weeks for all signs of the plants to disappear completely. During this time, avoid planting grass or other vegetation in the treated area—new bluebell shoots can emerge from even small fragments of rhizome.
Once the area is completely clear (typically 4-6 weeks after final treatment), you can reseed with your desired grass type or plant ground cover. I recommend overseeding with a dense grass variety like creeping red fescue to prevent future bluebell invasion. Water the new plants regularly to establish a strong root system that outcompetes any remaining rhizomes.
☀️ Step 5: Prevent Future Bluebell Spread
To keep bluebells from returning, create a physical barrier around treated areas using landscape fabric or edging. Bluebells spread through underground rhizomes, so even a small piece left behind can regrow. I like to install a 6-inch deep edging barrier made of plastic or metal to block any remaining rhizomes from spreading.
Regularly inspect the edges of your garden beds and lawn for any new bluebell shoots, especially after rain when conditions favor their growth. Early detection makes removal much easier. With consistent monitoring and these steps, you'll have a bluebell-free yard in no time.
Tips & tricks for eliminating bluebells effectively
Here's what I've learned after dealing with bluebell invasions for years—these tricks make all the difference.
Timing is Everything: The 3-5 day treatment schedule in Step 3 is non-negotiable. Bluebell rhizomes can regenerate from even tiny fragments, so consistency is key. I set a phone reminder every 4 days to ensure I don't miss a treatment—this has saved me from multiple regrowth battles. The first week is the most critical as you're targeting active growth, but the second week catches any new shoots from dormant rhizomes.
Equipment Upgrade: While a standard kettle works, I've found that a 3-gallon watering can with a narrow spout gives me better control over the boiling water application. The narrow spout helps direct the water precisely to the rhizome zones without wasting heat or water. If you don't have one, a heavy-duty plastic jug with holes punched in the lid works too—just be extra careful with the steam.
Visual Confirmation: In Step 3, when you see those leaves wilt and turn brown immediately after treatment, that's your success signal. If you don't see this reaction within minutes, you might need to apply more water or check that it's truly boiling. I've learned to watch for this visual cue rather than just following the schedule blindly—it tells me the treatment is working at the rhizome level.
Post-Treatment Strategy: The 4-6 week monitoring period in Step 4 is when most people give up and see regrowth. I recommend marking treated areas with small flags or stakes during this time so you can spot any new shoots immediately. The first sign of regrowth is usually a single leaf poking through—catch it early, and you can treat it before it becomes a full plant again.
Pro Tips for Get Rid Of Bluebells
- Here's what I've learned after dealing with bluebell invasions for years—these tricks make all the difference.
- Timing is Everything: The 3-5 day treatment schedule in Step 3 is non-negotiable.
- Equipment Upgrade: While a standard kettle works, I've found that a 3-gallon watering can with a narrow spout gives me better control over the boiling water application.
Frequently asked questions
Got questions about tackling bluebells? You’re not alone! Here are answers to the most common concerns—from timing to troubleshooting—so you can reclaim your garden with confidence.
When is the best time to apply boiling water to bluebells?
Apply boiling water after bluebells have bloomed but before they’ve gone to seed—typically late spring to early summer. This ensures you kill the roots while avoiding the spread of seeds. Avoid treating in winter, as the method relies on active root systems.
Is boiling water safe for nearby plants or soil?
Boiling water can harm nearby plants, so use caution! Apply it only to the bluebell roots and avoid overspray. For delicate plants, create a physical barrier (like cardboard) to shield them. The method is soil-safe long-term but may temporarily alter soil microbes—replenish with compost afterward.
What if bluebells keep coming back after treatment?
Persistent bluebells often mean missed roots or seeds. Reapply boiling water to any regrowth, and check for hidden patches. For stubborn cases, combine with preventive measures like mulching or vinegar sprays (1:1 ratio with water). Patience is key—roots may take 2–3 treatments to fully die.
Are there chemical-free alternatives to boiling water?
Yes! Try these non-toxic options:
- Vinegar solution: Mix equal parts white vinegar and water, spray directly on leaves (reapply weekly).
- Salt barrier: Sprinkle rock salt around the base (avoid overuse—it harms soil).
- Manual removal: Dig up roots in early spring before blooming (wear gloves!).
How long until bluebells are completely gone?
With boiling water, you’ll see wilting within days, but full eradication takes weeks to months. Monitor the area for 1–2 growing seasons to confirm no regrowth. Combine with preventive steps (like smothering with mulch) to keep them away for good.
Can I use this method in my lawn or garden beds?
Yes, but adjust based on your space:
Location
Notes
Lawn
Spot-treat with boiling water, then reseed grass afterward.
Garden beds
Ideal for targeted removal—boiling water won’t harm most perennials if applied carefully.
Paved areas
Avoid—boiling water can crack concrete or damage hardscaping.
Wrapping up and next steps
Getting rid of stubborn bluebells doesn’t have to be a losing battle—with the right approach, you can reclaim your garden for good! 🌱 By using a boiling water barrier, you’re not just removing the flowers but also targeting their deep roots for a permanent solution.
Remember, consistency and patience are key, so don’t hesitate to revisit treated areas if needed.
Now that you’re armed with the know-how, grab your tools and take action! Start small—clear a patch of bluebells today—and soon, your garden will be free of those pesky blooms. Happy gardening! 🌿