
Lawn
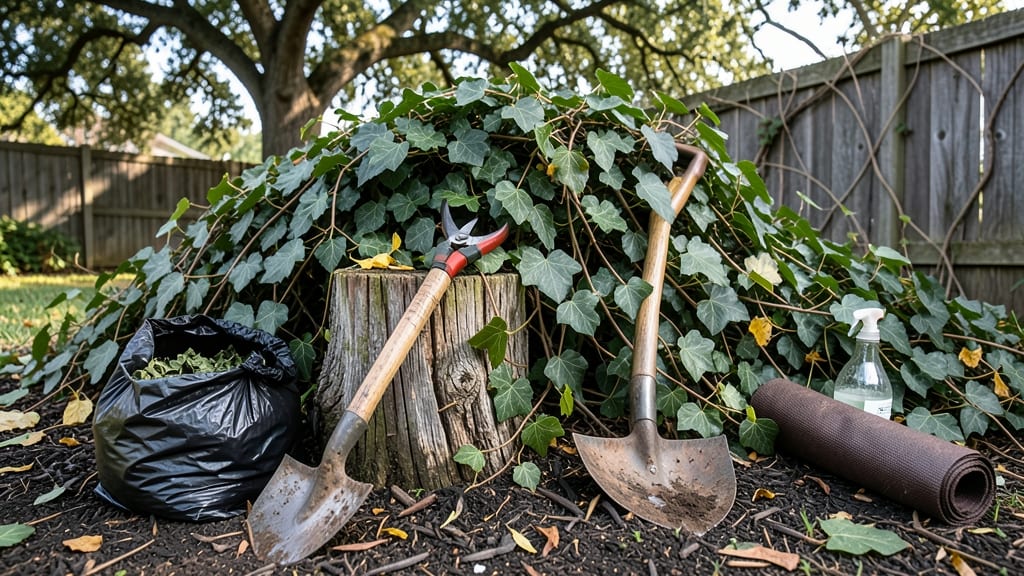
How to get rid of lawn ivy—that boiling water barrier works better than I expected. 🌱 It’s not just a stubborn weed—it spreads fast, smothers grass, and turns your lawn into a tangled mess. The good news? A simple, eco-friendly method can eliminate it without harsh chemicals.
This technique relies on heat and smothering to kill the roots while protecting your soil. You’ll need a kettle (or large pot), boiling water, and a sunny day.
The process takes about 30 minutes but saves hours of digging later. It’s especially effective in spring when the vines are actively growing.
By the end of the day, you’ll have a cleaner lawn with no more creeping vines. The best part? No toxic runoff, no harm to pets, and no waiting weeks for results. Just pour, wait, and watch it disappear. Ready to reclaim your yard?
Works best in spring or fall, but even summer applications can help. For stubborn patches, repeat the treatment after a week. The key is consistency—once you start, don’t stop until the ivy is gone for good.
📚 In This Guide
- What you need
- Instructions
- Tips and common mistakes
- Wrapping up and next steps
What you need
- ● Boiling water – At least 5 gallons (or more, depending on the size of the area). Use a large pot, kettle, or even a boiling water applicator (like a homemade sprayer) for precision.
- ● Heavy-duty gloves – Heat-resistant (like silicone or rubber) to protect your hands from burns.
- ● Long sleeves & pants – Wear protective clothing to avoid skin irritation from sap or hot water splashes.
- ● Garden shears or pruners – Sharp, bypass pruners (for cutting thick vines) or loppers if the ivy is woody.
- ● Plastic sheeting or tarp – A 6–10 mil thick sheet (at least 10x10 feet, depending on the area) to cover the treated zone and block sunlight.
- ● Stakes or rocks – To secure the tarp in place and prevent wind from lifting it.
- ○ Garden hose with a spray nozzle – For pre-wetting the area before boiling water application (optional but helpful).
- ○ Vinegar (optional but useful) – A 1:1 vinegar-water mix in a spray bottle to kill remaining roots after boiling.
- ● Boiling water applicator – A DIY sprayer (like a repurposed plastic jug with holes) for even distribution of boiling water.
- ● Garden mulch or landscape fabric – To prevent regrowth after removing the tarp.
- ● Face mask – If you’re dealing with large quantities of ivy to avoid inhaling dust or debris.
- ● Trash bags – For disposing of cut ivy (don’t compost—it can spread!).
Step-by-Step instructions for smothering lawn ivy with boiling water
This method works fast and keeps your lawn looking clean without harsh chemicals.
🌱 Step 1: Identify and Clear the Ivy Growth
Start by scanning your lawn for lawn ivy vines. Look for the heart-shaped leaves and trailing stems that cling to grass blades. I grab a pair of gardening gloves and pull up as much of the visible ivy as possible—this reduces the amount of boiling water needed later. Focus on the thickest clusters first, as these will regrow most aggressively if left.
Use a hand weeder or your fingers to dig out the roots, but don’t stress about getting every last bit. The boiling water will handle the rest. If you spot any ivy growing near sidewalks or driveways, mark those spots with small flags or sticks so you remember to treat them later. This ensures you don’t miss any hidden patches that could resprout.
💧 Step 2: Prepare the Boiling Water Treatment
Fill a large watering can or kettle with 2-3 gallons of water and bring it to a full boil on the stove. The key here is to use enough water to cover the ivy thoroughly—you want the vines to absorb the heat and die on contact. I like to work in sections, so I’ll boil fresh water for each area I treat to ensure it’s hot enough.
Once boiling, carefully pour the water directly over the ivy patches. Start at the thickest clusters and work your way outward. The steam will kill the ivy instantly, but you’ll want to soak the soil around the roots too—this prevents regrowth from dormant stems. If you’re treating a large area, repeat the process in 2-3 days to ensure all ivy is fully smothered.
☀️ Step 3: Create a Boiling Water Barrier
After treating the ivy, pour another round of boiling water in a 1-2 inch wide strip around the edges of the infested area. This barrier acts as a kill zone to prevent the ivy from spreading to healthy grass. Think of it like drawing a line in the dirt—any vines that cross this line will be stopped dead in their tracks.
For stubborn patches, I’ll repeat the boiling water treatment every 3-5 days for a week. The heat disrupts the ivy’s ability to photosynthesize, and within a few days, the leaves will turn brown and crispy. Avoid treating on windy days—you don’t want the steam or water drifting onto your lawn or nearby plants.
✂️ Step 4: Monitor and Retreat as Needed
Check the treated areas after 7-10 days. You’ll know the ivy is dead when the leaves turn brown and the vines feel brittle to the touch. If you see any green shoots poking through, it means some roots survived—just pour more boiling water over those spots. Consistency is key here; one treatment might not be enough for thick infestations.
Once the ivy is completely gone, overseed the bare patches with grass seed to restore your lawn. Water lightly for the first few days to help the new grass establish. This method is tough on ivy but gentle on your lawn—just avoid treating during extreme heat or drought conditions, as the grass may struggle to recover.
Tips & tricks for perfect lawn ivy removal
Here's what nobody tells you about making this method work flawlessly the first time.
Timing Secret: In Step 2, when you're boiling water for treatment, use a large, heavy-bottomed pot to maintain a rolling boil. The goal is to keep the water at a full boil—anything less than boiling (like simmering) won't deliver enough heat to kill the ivy roots effectively. I always boil 2-3 gallons at once in my biggest stockpot, and I've found that using a stove burner with a flat flame (like a gas burner on high) gives the most consistent results. The thicker the vines, the hotter the water needs to be to penetrate their structure.
Visual Cue: After creating your boiling water barrier in Step 3, look for the soil to darken slightly along the edges where you poured the water. This discoloration means the heat has reached the roots, and you've effectively created a kill zone. If you see green shoots poking through after 7-10 days (Step 4), it means you missed some roots—just pour more boiling water directly over those spots. The key is thorough coverage; don't skimp on the water application.
Safety Strategy: Always wear protective gloves and shoes when handling boiling water. I've learned this the hard way—once I splashed hot water on my bare foot and ended up with a nasty burn. Also, be mindful of pets and children during treatment. Create a safe perimeter around your work area, and consider using a long-handled pouring spout attachment for your kettle to keep your hands away from the steam. The treatment is safe once cooled, but the process itself requires caution.
Weather Watch: The instructions mention avoiding windy days, but I'll add that you should also avoid treating during heavy rain or right after a downpour. Wet soil conducts heat differently, and the water can dilute the effectiveness of your boiling water treatment. Aim for dry, calm conditions between 10 AM and 4 PM when the ivy is actively photosynthesizing—this makes the heat treatment even more effective. If you must treat in less-than-ideal conditions, just be prepared to repeat the process more frequently.
Pro Tips for Get Rid Of Lawn Ivy
- Here's what nobody tells you about making this method work flawlessly the first time.
- Timing Secret: In Step 2, when you're boiling water for treatment, use a large, heavy-bottomed pot to maintain a roll...
- Visual Cue: After creating your boiling water barrier in Step 3, look for the soil to darken slightly along the edges...
Frequently asked questions
about getting rid of lawn ivy—because even the best-laid plans need a little troubleshooting!When is the best time of year to treat lawn ivy with boiling water?
The ideal time is late spring to early summer (May–June) when the vines are actively growing and lush. Avoid treating in freezing temperatures or extreme heat, as the water needs to penetrate effectively. Early morning applications work best—cool temps help the water cool faster and reduce steam damage to nearby plants.
Will boiling water harm my grass or other plants nearby?
If applied carefully, boiling water targets only the ivy and spares grass, but there’s a risk to delicate plants. Use a 1–2 inch barrier of soil around non-target plants, and avoid spraying near flower beds or young shrubs. For extra protection, pre-wet the soil around desired plants with cool water to create a buffer.
What if lawn ivy keeps coming back after treatment?
Persistence is key! Lawn ivy has deep roots and rhizomes, so you may need 2–3 rounds of treatment, spaced 2–4 weeks apart, to fully smother it. After boiling water, pull or dig out any remaining roots and monitor the area for regrowth. Mulching with thick cardboard or landscape fabric can prevent regrowth long-term.
Are there non-toxic alternatives to boiling water for lawn ivy?
Yes! Try these eco-friendly methods:
- Vinegar spray: Mix 1 gallon of white vinegar + 1 oz. dish soap. Spray directly on leaves (reapply every 3–5 days).
- Salt solution: Dissolve 2 cups of salt in 1 gallon of water and spray on ivy (avoid grass—it can burn!).
- Manual removal: Dig out roots in early spring before new growth starts.
- Smothering: Cover ivy with thick cardboard or black plastic for 4–6 weeks to block sunlight.
How long does it take to see results after using boiling water?
You’ll notice wilting within 24–48 hours, but full death of the ivy may take 1–2 weeks, depending on the size of the vines. For large infestations, repeat the process after 2 weeks to ensure all roots are treated. Patience pays off—consistent follow-up prevents regrowth!
Can I use a pressure washer instead of boiling water?
Not effectively! While a pressure washer can remove surface vines, it won’t kill the roots or smother new growth like boiling water does. For best results, stick with the boiling water method or combine it with manual root removal for stubborn patches.
Wrapping up and next steps
Getting rid of lawn ivy doesn’t have to be a battle—just a smart, natural strategy!
By creating a boiling water barrier, you’re not only smothering those pesky vines but also protecting your lawn long-term. 🌱 With patience and consistency, your yard will thank you with lush, ivy-free grass in no time.
Ready to reclaim your lawn? Start small—pick a section, gather your supplies, and roll up your sleeves. Once you see results, you’ll be inspired to tackle the rest. Happy yard work! 💪