
Propagation
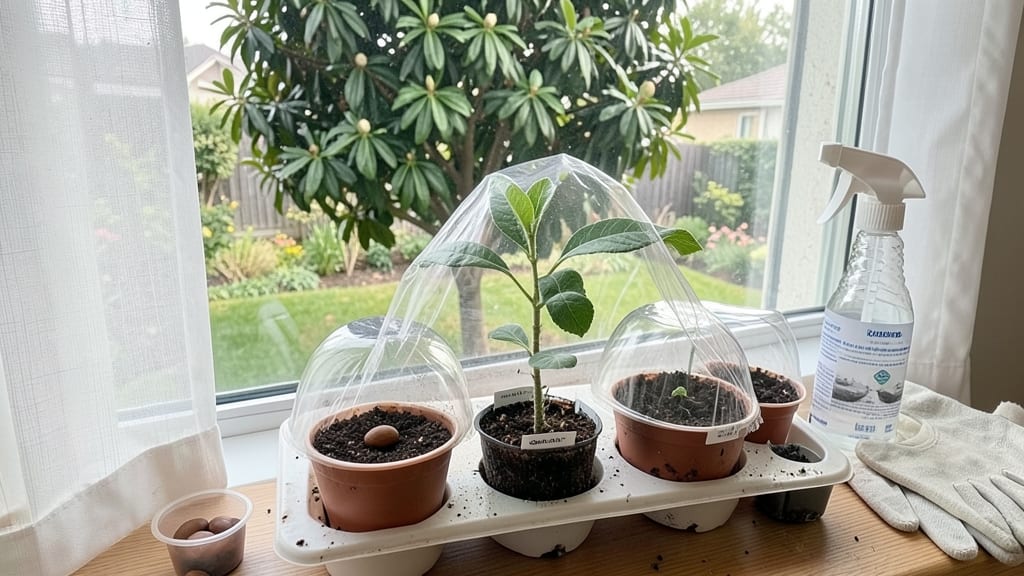
How to grow a guava tree from seed starts with that first green sprout poking through the soil—proof you’re on your way to tropical fruit. 🌱 Growing a guava tree from seed is slower than buying a sapling, but the reward—a fragrant, shade-giving tree with sweet fruit—makes it worth the wait. My first attempt took three years to bear fruit, but now I’ve got a reliable method that works even in warmer climates.
The secret starts with proper seed selection: choose plump, fresh guava seeds from ripe fruit, and soak them for 24 hours to speed up germination. Plant them just below the soil surface in well-draining potting mix, keeping it consistently moist but never soggy.
Most seeds sprout within 2-4 weeks, though some take longer—patience is key here.
Once seedlings appear, move them to individual pots and place them in bright, indirect light. After a few months, when roots fill the pot, transplant them outdoors in a spot with full sun and rich, slightly acidic soil.
With proper care, your young tree will grow 3-5 feet per year, reaching fruiting size in about three years.
Common pitfalls include overwatering (which causes root rot) and transplant shock. To avoid these, harden off seedlings gradually and choose a permanent spot with well-draining soil. With the right approach, you’ll end up with a thriving guava tree that keeps giving for decades.
📚 In This Guide
- What you need
- Instructions
- Tips and common mistakes
- Wrapping up and next steps
What you need
- ● Guava seeds: 3–5 fresh, plump seeds (harvested from ripe guava fruit—avoid overripe or fermented seeds).
- ● Small pots or seed trays: 2–3 (4–6 inches in diameter) with drainage holes. Plastic or biodegradable pots work best.
- ● Well-draining potting mix: 2–3 cups of a light, airy blend (e.g., 50% coco coir, 30% perlite, 20% compost). Avoid heavy garden soil!
- ● Spray bottle: For gentle watering (avoid over-saturating seeds).
- ● Plastic wrap or humidity dome: To create a mini greenhouse effect.
- ● Grow lights or sunny windowsill: A spot with 6–8 hours of indirect light daily (south-facing window or LED grow lights).
- ● Larger container or garden plot: For transplanting seedlings (1-gallon pot or 12-inch-deep hole in warm, tropical climates).
- ● Seed germination aid: A tiny amount of cinnamon powder (1/4 tsp) to prevent mold.
- ● Fertilizer: Balanced 5-5-5 or 10-10-10 organic fertilizer (diluted to half-strength) for transplanting.
- ● Mulch: Straw or wood chips to retain moisture and regulate soil temperature.
- ● Pruning shears: For shaping young trees (once they’re 1–2 feet tall).
- ● Soil moisture meter: To monitor water levels—guava seeds hate soggy soil!
Step-by-Step instructions for growing guava trees from seed
Here’s how I’ve grown healthy guava trees from seed—no fancy equipment needed.
🌱 Step 1: Extract and Prepare the Seeds
Start with ripe guavas—look for deep yellow or pink skin and a slightly soft feel. Cut open the fruit and scoop out the seeds, which are embedded in the jelly-like pulp. Rinse them under cool water to remove the sticky residue, then let them dry for 24 hours on a paper towel.
Once dry, place the seeds in a small container with damp paper towels, fold the towel over them, and store in a sealed plastic bag. Keep the bag in a warm spot (75-80°F)—a sunny windowsill or near a heat source works. Check daily and mist with water if the towels dry out. You’ll see sprouts in 7-14 days.
🪴 Step 2: Plant Sprouted Seeds in Small Pots
Fill small pots (3-4 inches deep) with a mix of 50% potting soil and 50% perlite for drainage. Plant each seed ½ inch deep, spacing them 1 inch apart in the pot. Water lightly until the soil feels moist but not soggy.
Place the pots in a warm, bright spot with indirect light—direct sun can scorch young seedlings. Keep the soil consistently moist but never waterlogged. You’ll notice the first true leaves (not the initial seed leaves) appear in 4-6 weeks. Once they do, you can transplant them into individual pots.
☀️ Step 3: Transplant and Gradually Acclimate to Sun
When seedlings have 4-5 true leaves and are about 6 inches tall, move them to slightly larger pots (6-inch diameter). Use the same soil mix and plant them at the same depth they were growing before. Water thoroughly after transplanting.
Start introducing them to direct sunlight gradually—begin with 2-3 hours of morning sun daily and increase by 1 hour every 3 days. Full sun exposure (6+ hours) should only happen after 2-3 weeks of acclimation. Overwatering at this stage can cause root rot, so let the top inch of soil dry out between waterings.
✂️ Step 4: Prune and Fertilize for Strong Growth
Once your guava seedlings are 12-18 inches tall, it’s time to prune. Pinch off the top set of leaves to encourage bushier growth. Use clean, sharp scissors to cut just above a leaf node. This step helps prevent leggy growth and strengthens the stem for future fruit production.
Start fertilizing lightly with a balanced 10-10-10 fertilizer every 4-6 weeks during the growing season. Dilute it to half-strength to avoid burning young roots. Guava trees thrive in well-draining soil, so always water at the base and avoid wetting the leaves to prevent fungal diseases.
🌿 Step 5: Transplant Outdoors After Frost Risk Passes
After the last frost date in your area, choose a sunny spot with well-draining soil for your guava tree. Dig a hole twice as wide as the pot but no deeper. Gently remove the seedling from its pot, loosen the roots if they’re circling, and place it in the hole at the same depth it was growing before.
Backfill with soil, water deeply, and add a 2-inch layer of mulch around the base to retain moisture and regulate soil temperature. Guava trees love warmth and can handle heat well, but they need protection from strong winds. Stake the tree if necessary and keep it consistently moist for the first 2 months after transplanting.
Tips & tricks for growing guava trees from seed
Here's what nobody tells you about nurturing guava seedlings from the ground up.
Seedling Success: In Step 1, when you're drying seeds for 24 hours, spread them out in a single layer on the paper towel. Crowding seeds can create condensation that promotes mold growth. After drying, store them in a sealed bag with a damp paper towel—this maintains consistent moisture without drowning the seeds.
Light Management: During Step 3's sun acclimation, I've found that morning sun is gentler than afternoon sun. If you notice leaves curling or turning yellow, move the pots to a shadier spot immediately. The gradual increase of 1 hour every 3 days gives seedlings time to adjust their chlorophyll production—this prevents sunburn while building resilience.
Pruning Technique: When you're ready to prune in Step 4, make your cuts just above a leaf node where new growth will emerge. Use clean scissors to avoid introducing bacteria. I always prune on a dry day to prevent fungal spores from spreading through open wounds. This encourages bushier growth and stronger stems for future fruit production.
Outdoor Transition: Before transplanting outdoors in Step 5, harden off your seedlings by placing them outside for progressively longer periods during the day. Start with just 30 minutes in the shade, then gradually increase exposure. This mimics natural conditions and prevents transplant shock, which is especially important for tropical plants like guavas.
Pro Tips for Grow Guava Tree From Seed
- Here's what nobody tells you about nurturing guava seedlings from the ground up.
- Seedling Success: In Step 1, when you're drying seeds for 24 hours, spread them out in a single layer on the paper to...
- Light Management: During Step 3's sun acclimation, I've found that morning sun is gentler than afternoon sun. If you ...
Frequently asked questions
Got questions about growing guava from seed?
You’re not alone! Here are answers to the most common concerns—from timing to troubleshooting—to help your tropical fruit adventure go smoothly.
How long does it take for a guava seed to germinate?
Guava seeds typically sprout within 14 to 30 days if kept in warm, moist conditions. Place them in a seedling tray with a heating mat (70–85°F) to speed things up. Patience is key—some seeds take longer, especially if stored or dried out.
Can I grow a guava tree indoors?
While possible, guava trees thrive outdoors in warm climates (USDA zones 9–11). If you’re indoors, place it near a sunny window and supplement with grow lights for 12+ hours daily. Expect slower growth and smaller fruit compared to outdoor trees.
Will my seedling produce fruit in the first year?
Nope! Guava trees grown from seed usually take 3 to 5 years to bear fruit. For faster results, consider grafting a fruiting branch onto your seedling (though this requires more expertise). Focus on nurturing strong roots and branches first!
What should I do if my guava seedling’s leaves turn yellow?
Yellow leaves often signal overwatering, nutrient deficiency, or pests. Check the soil—it should be moist but not soggy. Test for pests (like spider mites) on the undersides of leaves. Adjust care: water deeply but less frequently, and fertilize with a balanced citrus/fruit tree mix.
Can I plant guava seeds directly in the ground?
Direct sowing is risky—seeds may rot or fail to germinate without controlled conditions. Start indoors in pots (as outlined earlier) for 3–6 months before transplanting. Harden off seedlings gradually to avoid shock when moving them outdoors.
How cold can a guava tree tolerate?
Young guava trees are sensitive to frost (below 32°F). If you live in a cooler climate, grow them in containers and move them indoors during winter. Mature trees can handle brief dips to 28°F but may drop leaves or fruit.
Wrapping up and next steps
Growing a guava tree from seed is a rewarding journey—one that turns patience into a lush, fruiting tropical treasure! 🌱 With the right soil, sunlight, and care, you’ll watch your tiny seed sprout into a thriving tree in just three years.
Remember, consistency is key: water wisely, protect from pests, and give it time to flourish.
Now that you’re armed with knowledge, take that first step—plant your seeds today and enjoy the sweet satisfaction of nurturing life from scratch. Happy growing! 🌟