
Picking
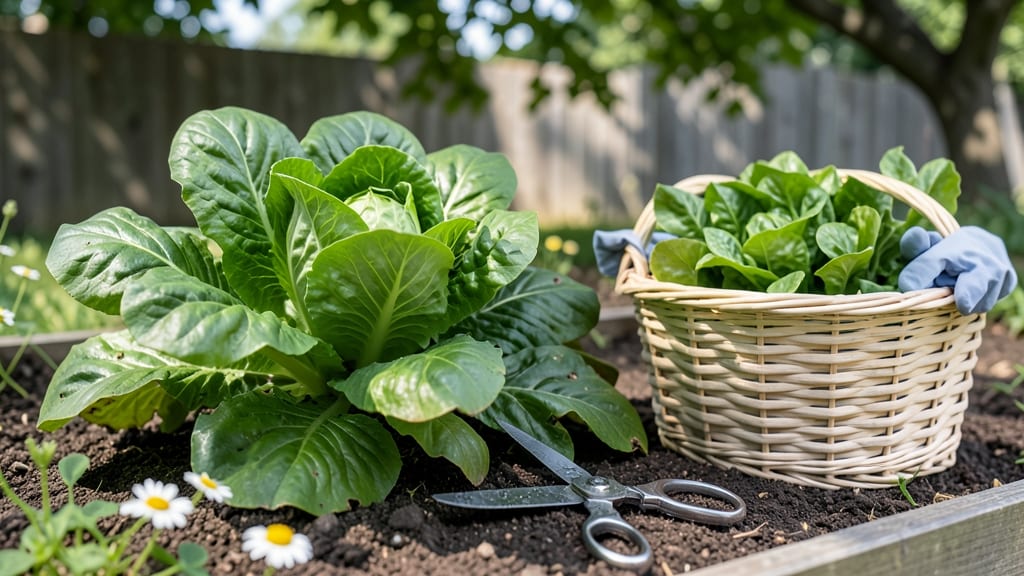
That first crisp bite of homegrown salad greens changes everything. 🌿 The secret to keeping your lettuce, spinach, and arugula producing week after week isn't complicated—it's about knowing exactly when and how to harvest without killing the plant.
Most people wait until the leaves are fully mature before cutting, but that's the fastest way to bolt your greens. Instead, harvest outer leaves when they're 4-6 inches tall, leaving the inner growth to keep producing.
For herbs like basil, snip just above a leaf node to encourage bushier regrowth.
You'll end up with a steady supply of fresh greens for months, not just one big harvest. The plants stay compact, keep their crisp texture, and resist bitterness that comes with over-maturity. Even my neighbor's "wild" garden patch looks better after this method.
Works for spring plantings that bolt fast or fall crops that thrive in cooler weather. The same technique extends harvests by 30-50% compared to traditional methods. Here's how to do it right the first time—no more sad, wilted bunches from the garden.
📚 In This Guide
- What you need
- Instructions
- Tips and common mistakes
- Wrapping up and next steps
What you need
- ● Sharp pruning shears or garden scissors – A pair with clean, stainless steel blades (e.g., Felco or Fiskars) to avoid damaging plants or spreading disease. Size: 5-7 inches.
- ○ Gloves (optional but recommended) – Nitrile or cotton gloves to protect your hands from thorns (e.g., arugula) or dirt. Tip: Wear them if you have sensitive skin!
- ● Harvesting basket or tray – A sturdy, shallow container (plastic or woven) to collect greens without bruising. Size: At least 12x12 inches.
- ○ Water spray bottle (optional) – A 16-ounce misting bottle to dampen leaves before harvesting for easier cutting and transport.
- ● Labeling tags or notebook – If harvesting multiple varieties, waterproof tags or a small notebook to track what you’ve picked.
- ● Knee pad or small stool – For comfort if harvesting in a large garden bed.
- ● Portable cooler or insulated bag – To keep greens crisp if transporting long distances.
- ● Disinfectant spray (e.g., 1:9 hydrogen peroxide solution) – To clean tools between harvests and prevent bacterial spread.
- ● Sharp knife or harvesting knife – For larger plants like romaine or kale (blade should be 3-4 inches).
Step-by-step instructions for harvesting salad greens
Here's how to keep your greens thriving while gathering fresh, crisp leaves for weeks.
🌿 Step 1: Identify the Right Time to Harvest
Harvest salad greens when they reach 3-4 inches tall—this is when they're tender and packed with flavor. Look for bright green leaves with no yellowing or wilted edges. The best time of day is early morning after dew has dried but before the sun gets too intense, ensuring crispness and maximum nutrients.
If you're growing varieties like spinach or arugula, you can start harvesting outer leaves first when they reach about 2 inches. This prevents overcrowding and encourages the plant to produce more leaves. I always check the undersides of leaves for pests before harvesting—sometimes aphids hide there, and you don't want them on your salad!
✂️ Step 2: Use the Proper Tools and Technique
Use a clean, sharp pair of scissors or pruning shears to avoid damaging the plant. Snip leaves just above a leaf node (the point where leaves grow from the stem)—this encourages new growth from that spot. Never pull leaves off by hand, as this can tear the stem and stress the plant.
For cut-and-come-again harvesting, cut the outer 1/3 of the plant at a 45-degree angle to allow water to run off and prevent rot. This method keeps the plant producing new leaves for weeks or even months. If you're harvesting individual leaves, like with butter lettuce, pinch them off at the base where they meet the stem.
💧 Step 3: Maintain Moisture and Soil After Harvesting
After harvesting, water the plants deeply to replenish moisture lost during cutting. The soil should feel damp but not soggy—stick your finger 1 inch deep to check. Overwatering now can lead to root rot, while underwatering stresses the plant and slows regrowth.
Add a light layer of compost or organic mulch around the base to retain moisture and provide nutrients. I like to use fish emulsion or seaweed fertilizer (diluted to half strength) every 2-3 weeks to keep the greens growing strong. Avoid heavy fertilizers right after harvesting—they can burn tender new growth.
☀️ Step 4: Monitor Light and Space for Continued Growth
Ensure your greens get 4-6 hours of sunlight daily—too little light makes leaves leggy and bitter. If they're stretching toward the light, move them to a sunnier spot or supplement with a grow light for 12-14 hours a day. Leggy greens are a sign of insufficient light, and they won’t recover their crisp texture.
Thin crowded plants if needed—space them 6-8 inches apart to allow air circulation and reduce disease risk. If you're growing in containers, make sure they have drainage holes and aren’t sitting in standing water. Healthy spacing keeps leaves dry, preventing fungal issues like powdery mildew.
🌱 Step 5: Know When to Stop Harvesting for the Season
Most salad greens bolt (go to seed) in hot weather (above 75°F) or when days get too long. You’ll notice bitter-tasting leaves or flower stalks shooting up—this is your cue to either harvest everything at once or switch to heat-tolerant varieties like Swiss chard or malabar spinach.
In cooler climates, you can extend the season by covering plants with floating row covers or cold frames to protect them from frost. Harvest right before the first hard freeze, and you’ll get one last flush of tender greens. Store harvested leaves in the fridge for up to 5 days in a damp paper towel-lined container to keep them crisp.
Tips & tricks for perfect salad green harvesting
These little details make all the difference between a handful of leaves and a continuous harvest of crisp, flavorful greens.
Timing is Everything: The early morning window between dew drying and midday heat is your sweet spot for harvesting. I've learned this the hard way—greens harvested after 10 AM often wilt faster, even if they're crisp at first. For varieties like arugula that bolt quickly, harvest in the morning when they're still cool and hydrated from the night's moisture. This preserves that signature crunch for hours after picking.
Cut-and-Come-Again Technique: When you're harvesting that outer third of the plant, remember the 45-degree angle isn't just for looks—it's a water management system. That sloped cut prevents water from pooling at the stem, which would otherwise lead to rot. I've seen beginners make straight cuts and watch their plants develop brown spots within days. For butter lettuce, that gentle pinch at the base actually encourages the plant to branch out and produce more leaves—it's like giving your salad garden a little nudge to keep growing.
Light and Space Management: The 4-6 hours of sunlight rule is non-negotiable for crisp texture, but here's what nobody tells you: if your greens start stretching toward light sources (that's called bolting), you're already too late to fix the texture. Instead, prevent it by rotating containers every few days so all sides get even light exposure. And that 6-8 inch spacing? It's not just about air circulation—it's about giving each plant room to photosynthesize efficiently. Crowded plants compete for light and nutrients, resulting in smaller, less flavorful leaves.
Pro Tips for Harvest Salad Greens
- These little details make all the difference between a handful of leaves and a continuous harvest of crisp, flavorful...
- Timing is Everything: The early morning window between dew drying and midday heat is your sweet spot for harvesting. ...
- Cut-and-Come-Again Technique: When you're harvesting that outer third of the plant, remember the 45-degree angle isn'...
Frequently asked questions
Got questions about harvesting your salad greens? You’re not alone! Here are some of the most common concerns—and quick, practical answers to keep your garden thriving.
When is the best time to harvest salad greens?
Harvest leafy greens like lettuce, spinach, or arugula in the early morning when they’re crisp and hydrated. Avoid harvesting after heavy rain or late in the day, as moisture can make leaves wilt faster. For baby greens, cut when leaves are 3–4 inches tall; for mature heads, wait until fully formed but still tender.
How do I harvest without killing the plant?
Use the cut-and-come-again method for regrowth: Snip outer leaves just above a set of lower leaves (about 1–2 inches from the base). For bolt-resistant varieties like Swiss chard, leave the center crown intact. Avoid pulling entire plants—this stresses roots and reduces future harvests.
What if my greens taste bitter or tough?
Bitter flavors often mean it’s time to harvest younger leaves or adjust growing conditions. For heat-sensitive greens like lettuce, provide afternoon shade in hot climates. Tough stems? Thin plants early to reduce competition, or harvest before they mature. Overcrowding and stress trigger bitterness—so keep soil moist and mulch to retain coolness.
Can I harvest salad greens if they’re bolted?
Bolting (sending up flowers) doesn’t always mean the end—harvest leaves before seed stalks form for the best flavor. If flowers appear, pick the youngest, tender leaves near the base. For next year, choose bolt-resistant varieties or plant in fall/winter when days are shorter. Some greens (like arugula) even taste peppery when bolted!
How do I store harvested greens to keep them fresh?
Rinse greens gently in cold water, pat dry, and store in an airtight container lined with a paper towel to absorb moisture. Keep them in the crisper drawer of your fridge (35–40°F) for up to 5–7 days. For longer storage, try freezing blanched greens in ice cube trays with water or olive oil.
Wrapping up and next steps
Harvesting salad greens doesn’t have to be intimidating—with the right tools and techniques, you can enjoy a bountiful, homegrown harvest all season long! Whether you’re snipping leaves for fresh salads or cutting-and-coming for regrowth, the key is consistency and care.
Now that you’re equipped with the know-how, get out there and savor the rewards of your green thumb!
🌱 Next step? Try harvesting a small batch today and experiment with flavors—pair your greens with your favorite vinaigrette or blend them into smoothies. Your garden (and taste buds) will thank you!