
How To
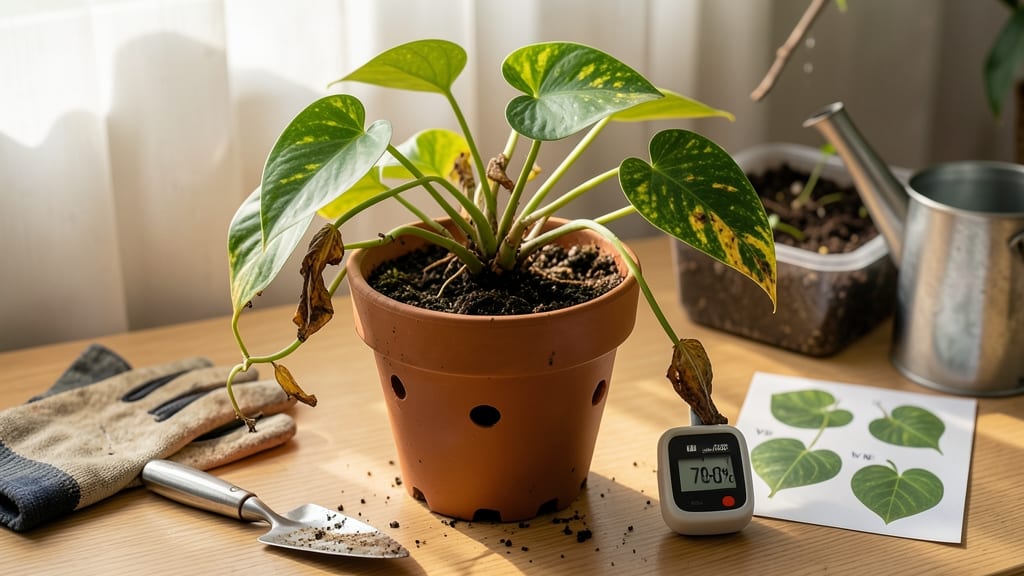
Your plant's drooping leaves and mushy stems aren’t a death sentence—how to help an overwatered plant can make all the difference in just 48 hours. 🌱 I've rescued more plants from root rot than I'd like to admit, and the key always starts with stopping the water.
The moment you notice yellowing leaves or soil that smells like a swamp, action is your best friend. Here's how to turn things around before it's too late.
First, drain the excess water—gently tip the pot to let it empty, then place it in a shallow tray to catch any remaining moisture. If the soil feels sopping wet, hold off on watering for at least 24 hours.
The goal is to let roots breathe again, not suffocate in soggy conditions. For houseplants, this might mean moving them to a drier spot, while outdoor crops need better-draining soil or raised beds to prevent future soggy roots.
By day two, you'll see the first signs of recovery—firm stems, slightly crispy leaf edges (a good thing!), and roots that smell fresh instead of rotten. Reviving overwatered plants is all about patience and consistency: adjust your watering schedule, use well-draining pots, and always check the top inch of soil before adding more water.
The right balance means lush, thriving plants instead of a sad, wilting mess.
Now, here's the secret weapon: root health checks. After 48 hours, gently remove the plant from its pot and inspect the roots. Healthy roots are firm and white; mushy or black roots need trimming before repotting in fresh, dry soil.
This step makes the difference between a temporary fix and a plant that stays strong for seasons. Trust me—your greenery will thank you.
📚 In This Guide
- What you need
- Instructions
- Tips and common mistakes
- Wrapping up and next steps
What you need
- ● Well-draining container or pot – Slightly larger than the plant’s current pot (if repotting is needed). Ensure it has drainage holes (or drill them if necessary!).
- ● Fresh potting mix – A lightweight, well-aerated blend (e.g., cactus/succulent mix or a 50/50 soil/perlite mix). Avoid heavy garden soil.
- ● Perlite or vermiculite – 1–2 cups to improve drainage and aeration in the soil.
- ● Watering can or spray bottle – With a fine-mist setting for gentle watering.
- ● Trowel or small shovel – For gently removing the plant and loosening soil.
- ● Paper towels or clean rags – To blot excess moisture from roots.
- ● Pruning shears or scissors – Sterilized (rubbing alcohol wipe) to trim rotted or mushy roots.
- ○ Rooting hormone (optional but helpful) – A powder or gel to encourage healthy regrowth after trimming.
- ● Hydrogen peroxide (3%) – 1–2 tablespoons per gallon of water to disinfect roots and promote healing.
- ● Fungicide spray – If roots show signs of fungal infection (e.g., black/mushy spots).
- ● Humidity dome or plastic bag – To create a mini greenhouse for recovery (remove once new growth appears).
- ● Moisture meter – To check soil moisture levels before watering again.
- ● New pot saucer or tray – If the old one is warped or retains too much water.
Step-by-Step instructions for reviving an overwatered plant
Here's how I rescue soggy roots and bring plants back to life—fast.
💧 Step 1: Stop Watering and Remove the Plant from Its Pot
First, halt all watering immediately. The plant can't recover if you keep adding moisture. Gently squeeze the pot sides to loosen the root ball, then tip it out. You'll see the problem right away: a dense, waterlogged clump that smells musty or looks grayish. This is root rot starting, and it spreads fast.
If the plant is heavy, it’s a clear sign of overwatering. Don’t force it—let gravity help. Tap the pot’s bottom on a flat surface to release the root ball without tearing roots. Work quickly but carefully; damaged roots heal slower. Once out, you’ll see the extent of the damage: black, mushy roots are dead and must be trimmed away.
✂️ Step 2: Trim Damaged Roots and Inspect the Root Ball
Use clean, sharp scissors or pruning shears to cut away any black, brown, or mushy roots. Healthy roots are firm, white, or light tan. Snip just above the healthy section—don’t leave stubs, as they’ll rot too. You might be tempted to save every root, but dead roots hold moisture and prevent recovery.
After trimming, rinse the remaining roots under lukewarm water to remove excess soil and debris. This helps you spot any hidden rot and washes away harmful bacteria. Pat the roots dry with a paper towel or clean cloth. If the root ball feels slimy or smells foul, soak it in a 1:10 hydrogen peroxide solution (1 part 3% peroxide to 10 parts water) for 5 minutes to disinfect before proceeding.
🪴 Step 3: Repot in Fresh, Well-Draining Soil
Choose a pot with drainage holes—no exceptions. Overwatering happens because water can’t escape, so fix that first. Fill the bottom 1 inch with a mix of perlite or coarse sand to improve drainage. This layer ensures excess water flows out instead of pooling around roots.
Add a fresh potting mix designed for your plant type (cactus mix for succulents, regular mix for houseplants). Avoid garden soil—it compacts and holds moisture too long. Fill the pot about halfway, then place the trimmed root ball in the center. The top of the root ball should sit ½ inch below the pot’s rim to allow for watering without overflow.
☀️ Step 4: Adjust Watering and Light Conditions
Water lightly only if the soil feels completely dry to the touch. Stick your finger 1 inch deep—if it’s damp, wait. Overwatered plants need time to dry out. Use a spray bottle for misting if the leaves are drooping from dehydration, but avoid soaking the soil. You’re aiming for moist but not soggy conditions.
Move the plant to bright, indirect light for the next 48 hours. Direct sun can stress already weakened plants, while dim light slows recovery. If your plant is tropical (like a peace lily), keep it in medium light. For succulents or cacti, return them to their usual bright spot after a few days. Watch for new growth—this is your sign the roots are healing.
⏰ Step 5: Monitor and Maintain Recovery for 2 Weeks
Check the soil every 2-3 days and water only when the top inch is bone dry. Overwatering is a habit, so resist the urge to "check on" the plant by watering it. Yellow leaves may drop, but don’t panic—this is the plant shedding damaged foliage to focus energy on new growth.
After 7 days, fertilize lightly with a balanced, water-soluble fertilizer diluted to half strength. Healthy roots need nutrients to regrow, but too much fertilizer now can burn weakened roots. By day 14, you should see new leaves or stems—this means the plant is recovering. If not, repeat the root trimming process, as rot may still be active.
Tips & tricks for reviving overwatered plants
Real talk: I've lost more plants to soggy roots than I care to admit. These tricks will help you rescue your leafy friends—and keep them thriving long after the crisis.
The Root Inspection: When you're checking those roots in Step 1, shine a flashlight into the pot or soil. Healthy roots should glow slightly translucent, while dead roots appear opaque and mushy. This visual check helps you see exactly where to trim—don't hesitate to cut back more than you think you need. The goal is to remove every last bit of compromised tissue that could spread rot.
Drying Strategy: In Step 3, if you don't have a drying rack, create one with a wire cooling rack or even a layer of window screen over a tray. For severe cases, you can actually place the entire pot in a paper bag with holes punched in it—this creates a humid environment that speeds up evaporation while still allowing airflow. Check soil moisture daily by sticking your finger in; if it feels damp beyond 1 inch deep, extend the drying period by another 24 hours.
Soil Upgrade: For Step 4, if you're repotting, consider mixing in 10% coconut coir along with the perlite or vermiculite. Coconut coir holds moisture without compacting like peat moss, giving your plant a better chance to recover. For in-ground plants, you can create a "drainage trench" by mixing 1-2 inches of coarse sand into the top 6 inches of soil around the plant—this creates a natural barrier against future waterlogging.
Recovery Signs: After following all steps, watch for these signs of revival in Step 5: New growth should appear within 7-14 days, and leaves should stop yellowing at the edges. If you see tiny white buds forming at the leaf joints, that's a great sign—your plant is starting to rebuild its energy reserves. For particularly stressed plants, you might notice leaves curling slightly as they adjust to their new environment; this is normal and will straighten out as the plant stabilizes.
Pro Tips for Help Overwatered Plant
- Real talk: I've lost more plants to soggy roots than I care to admit. These tricks will help you rescue your leafy fr...
- The Root Inspection: When you're checking those roots in Step 1, shine a flashlight into the pot or soil. Healthy roo...
- Drying Strategy: In Step 3, if you don't have a drying rack, create one with a wire cooling rack or even a layer of w...
Frequently asked questions
Got questions about saving your soggy plant? You’re not alone! Here are some of the most common concerns—and straightforward answers to get your green friend back on track.
How do I know if my plant is truly overwatered?
Check for these signs: yellowing leaves, mushy stems, root rot (black, smelly roots), or wilting despite wet soil. Tap the soil—if it’s damp after 24+ hours, it’s overwatered. Pro tip: Drop a toothpick in the soil; if it comes out clean, you’re good!
Can I save a plant that’s been overwatered for a week?
It depends! If the roots are still firm (not mushy or black), act fast: repot in dry soil, trim dead roots, and adjust watering. But if the plant is completely limp or has a foul odor, it may be too late. Prevention is key—always check moisture before watering again!
Should I use paper towels or a fan to dry the roots?
Both work! Paper towels gently absorb excess moisture around roots, while a fan on low speeds up evaporation. For best results, combine both: Wrap roots in towels for 10–15 mins, then place the plant near a fan (but not in direct airflow). Avoid heat sources—they can stress the plant further.
What if my plant’s leaves are still drooping after fixing root rot?
Drooping can linger even after roots recover. Trim damaged leaves to redirect energy, and place the plant in bright, indirect light (no harsh sun!). Mist lightly if the air is dry, but avoid soggy soil. Patience is key—new growth should appear in 1–2 weeks.
How often should I water after reviving an overwatered plant?
Wait until the top 1–2 inches of soil are dry before watering again—usually every 7–10 days for most houseplants. Stick your finger in the soil to test! Overwatering is the #1 killer, so err on the side of underwatering until you’re confident the roots are stable.
What if my plant is a succulent or cactus?
These plants hate moisture—act immediately! Remove from soil, let roots dry for 24–48 hours, then repot in cactus mix with perlite. Water only when soil is bone-dry (every 3–4 weeks). No mercy for soggy soil—succulents need drastic changes to survive!
Wrapping up and next steps
Reviving an overwatered plant isn’t just possible—it’s a rewarding challenge! 🌱 By acting fast with proper drainage, root aeration, and a little patience, you can bring your green friend back to life in just 48 hours. Remember, even the most soggy roots can bounce back with the right care.
Now that you’re armed with the know-how, put your skills to the test! Check your plant’s progress daily, adjust your watering routine, and celebrate every small sign of recovery. Your green thumb is growing stronger—one rescue at a time. 💚