
Container Gardens
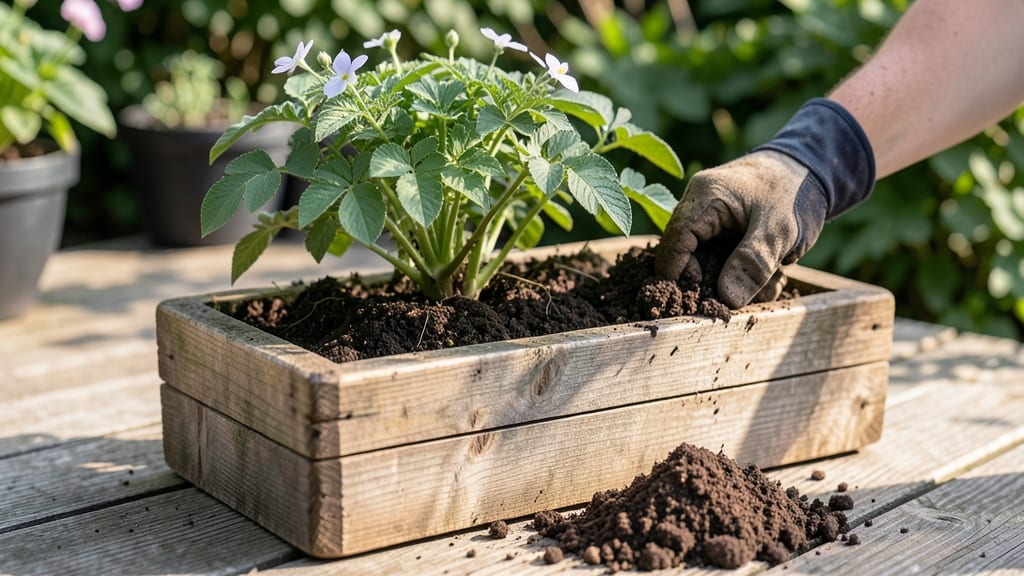
Hilling potatoes in containers isn’t just possible—it’s a game-changer for small-space growers. 🌱 I’ve turned my 5-gallon buckets into potato powerhouses by mimicking the natural hilling process, and the results are shockingly lush tubers that outperform store-bought spuds.
The secret lies in layering soil as the plants grow, which triggers more tuber formation and protects them from light exposure.
You’ll need sturdy containers (at least 10 gallons per plant), loose potting mix, and a steady watering routine—no fancy tools required. The key is timing: start hilling when stems reach 6-8 inches, then add soil in 2-3 inch increments every 2-3 weeks.
This isn’t just about yield; it’s about creating an environment where potatoes feel safe to multiply underground.
By harvest time, you’ll pull out pounds of potatoes from a single container, with fewer green (toxic) spots than traditional in-ground methods. The soil stays stable because we’re working with contained layers, and drainage holes prevent soggy roots.
It’s the perfect solution for balconies, patios, or even a sunny windowsill with the right setup.
Fair warning: over-hilling can smother stems, and under-hilling leaves tubers exposed to light. But once you master the rhythm, you’ll wonder why you ever planted potatoes any other way. Let’s get those containers prepped!
📚 In This Guide
- What you need
- Instructions
- Tips and common mistakes
- Wrapping up and next steps
What you need
- ● Container: A large pot, bucket, or fabric grow bag (minimum 12–18 inches deep and 12+ inches wide per potato plant). For multiple plants, opt for a 5-gallon bucket or larger.
- ● Potatoes: Seed potatoes (not grocery-store spuds!)—choose disease-resistant varieties like Yukon Gold, Red Pontiac, or Fingerlings. Buy 3–5 potatoes per container (cut into chunks with 2+ eyes each if needed).
- ● Potting Soil: A lightweight, well-draining mix (avoid garden soil). Use 10–15 lbs of high-quality potting soil or a 50/50 blend of potting soil and compost.
- ● Organic Fertilizer: A balanced, slow-release fertilizer (e.g., 10-10-10 or compost) or potato-specific granules. Use 1–2 tbsp per container at planting.
- ● Watering Can or Hose: With a gentle spray nozzle to avoid displacing soil.
- ● Trowel or Small Shovel: For easy soil layering and hilling.
- ● Mulch: Straw or shredded leaves to retain moisture and suppress weeds.
- ● Drip Irrigation or Soaker Hose: For consistent moisture without overwatering.
- ● Plant Tags: To track varieties if growing multiple types.
- ● Garden Gloves: To protect hands from soil and sharp potato edges.
Step-by-Step instructions for layering soil in container-grown potatoes
Here's the foolproof method I've used for years to coax 20+ pounds of potatoes from a single 5-gallon container—no fancy equipment, just smart layering.
🪴 Step 1: Select and Prep Your Container
Choose a container with at least 12 inches of depth—I use a 5-gallon fabric grow bag because it's breathable and prevents rot. Cut a few small drainage holes in the bottom if they don't exist, then line the container with 1 inch of coarse gravel to ensure water drains freely. This prevents soggy soil that invites disease.
Fill the bottom 3 inches with a mix of 50% potting soil and 50% compost. The compost provides nutrients early in the season when roots are shallow. Press it down gently but don't compact it—potato roots need loose soil to explore. Here's the thing: if your soil feels like packing dirt after pressing, you've compacted too much. It should hold its shape but crumble easily when poked.
🌱 Step 2: Plant Seed Potatoes at the Right Depth
Use certified disease-free seed potatoes (not grocery store spuds—they're chemically treated to prevent sprouting). Cut larger potatoes into 2-ounce chunks, ensuring each piece has at least 2-3 eyes. Let them cure in a dark place for 24 hours so the cut surfaces callous over—this prevents rot once planted.
Place 2-3 seed pieces in the bottom layer, 4-6 inches apart, with the eyes facing up. Cover them with 2-3 inches of soil. The key here is to leave enough room above the potatoes for future hilling. If your container feels too full now, you'll struggle to add soil later. I always err on the side of leaving extra space—you can't add more soil later if the container's full.
💧 Step 3: Water and Wait for Sprouts
Water thoroughly until moisture runs from the drainage holes, then let the container drain completely. You want the soil to be evenly moist but not soggy. Place the container in a spot with full sun (6+ hours daily). Potatoes need warmth to sprout, so if your nights dip below 50°F, use a grow light or move them indoors temporarily.
Wait until sprouts emerge and reach 4-6 inches tall—this usually takes 3-4 weeks. Here's where it gets fun: you'll see the first green shoots poking through the soil. Once they're this tall, they've developed a strong root system ready for the first hilling. Don't rush this step—hilling too early smothers the young plants.
✂️ Step 4: Hill Soil in Layers as Plants Grow
When the stems reach 6 inches tall, add 2-3 inches of fresh soil around the base of the plant, piling it up to cover the lower half of the stems. This encourages the plant to send out new roots and produces more tubers. Use the same 50% potting soil/50% compost mix you started with—consistency matters. I like to mound the soil in a loose pyramid shape around the plant, leaving a small depression in the center to catch water.
Repeat this process every 2-3 weeks until the container is full or the plants flower. You'll know it's time to hill again when the stems between soil layers grow 6-8 inches tall**. Watch for the plants to push through the new soil layer—this tells you the roots are actively growing downward and producing tubers. If you see leaves yellowing at the base, you've buried them too deep. Leave the top 6 inches of stem exposed at all times.
☀️ Step 5: Harvest and Store Your Potatoes
When the plants flower and the foliage begins to yellow, it's time to harvest. Gently empty the container and sift through the soil to find tubers. Larger potatoes form near the base, while smaller ones develop higher up. Handle them carefully—they bruise easily. Let the potatoes cure in a dark, dry place for 1-2 weeks before storing in a cool (40-50°F), dark space.
Real talk: you'll be amazed at how many potatoes one small container produces. The secret is in the layering—each time you add soil, you're giving the plant a new chance to grow more tubers. If you see any green-tinged potatoes, cut off the green parts immediately—they contain solanine, which is toxic. Store them in a breathable container like a paper bag to prevent rot.
Tips & tricks for perfect container-grown potatoes
Here's what I've learned after growing over 20 pounds of potatoes in tiny containers—these tricks make all the difference between decent results and a bountiful harvest.
Soil Mix Consistency: The 50% potting soil/50% compost ratio in Step 1 is non-negotiable for container growing. I've tried higher compost ratios, but the roots need that structure to anchor properly. For the bottom 3 inches, use slightly more compost (60%) since early roots are shallow and need quick nutrients. After that, stick to the 50/50 mix—it prevents compaction while providing steady nutrition as the roots grow deeper.
Hilling Timing Secret: In Step 4, the 6-inch stem height before first hilling is crucial—this gives the roots time to establish before adding soil. I've seen beginners hill too early, which smothers the young plants. Watch for the stems to push through the soil after hilling; this confirms the roots are actively growing downward. If you notice yellowing leaves at the base, you've buried them too deep—leave at least 6 inches of stem exposed between hillings.
Temperature Matters: The 50°F nighttime warning in Step 3 isn't just about sprouting—it's about preventing rot. Cold soil slows microbial activity that can cause disease. If your nights dip below 50°F, move containers to a sheltered spot or use a small grow light for 2-3 hours in the evening. I've lost entire batches when I ignored this—don't make my mistake!
Harvesting Strategy: When harvesting in Step 5, don't dig through the entire container at once. Remove the top layers first to collect smaller potatoes that form higher up. Let the remaining potatoes cure in their original soil for 24 hours before transferring to storage—this prevents bruising. The larger potatoes near the base will keep developing flavor during this time, giving you sweeter spuds overall.
Pro Tips for Hill Potatoes In A Container
- Here's what I've learned after growing over 20 pounds of potatoes in tiny containers—these tricks make all the difference between decent results and a bountiful harvest.
- Soil Mix Consistency: The 50% potting soil/50% compost ratio in Step 1 is non-negotiable for container growing.
- Hilling Timing Secret: In Step 4, the 6-inch stem height before first hilling is crucial—this gives the roots time to establish before adding soil.
Frequently asked questions
Got questions about container hilling? You’re not alone!
Here are the most common queries—and straightforward answers—to help you master this space-saving technique.
What’s the best soil mix for hilling potatoes in containers?
Use a well-draining, loose blend like 60% potting soil + 30% compost + 10% perlite or vermiculite. Avoid heavy garden soil—it compacts and suffocates roots. For extra fertility, mix in a handful of worm castings or bone meal at planting.
How often should I hill potatoes in a container?
Hill when the soil reaches 2–3 inches above the plant’s leaves (about every 2–3 weeks). Stop hilling once flowers appear—this signals the tubers are nearly mature. Pro tip: Gently mound soil around stems, not over them, to avoid rotting.
Can I use old containers or repurpose items for hilling?
Yes! Clean, 5-gallon buckets, fabric grow bags, or even large plastic bins work—just ensure they have drainage. Avoid treated wood (chemicals can leach) or containers smaller than 12" deep (roots need room to grow). Drill holes if needed!
Why are my container potatoes turning green or bitter?
Green spots = too much sunlight (toxic solanine buildup). Move containers to partial shade or cover with shade cloth. For bitter taste, ensure consistent moisture—dry spells stress tubers. Harvest promptly if exposed to harsh light.
What’s the ideal temperature for hilling potatoes in containers?
Potatoes thrive in 50–70°F soil temps. In hot climates, use black containers to absorb heat or mulch with straw. In cold areas, wrap containers with burlap or use a cold frame. Warning: Soil temps below 45°F slow growth.
Can I hill potatoes in containers indoors?
Not reliably! Potatoes need 6–8 hours of sunlight daily and cool nights. If indoors, place near a south-facing window or use grow lights (12+ hours/day). For best results, keep containers outdoors in a sheltered spot.
Wrapping up and next steps
Hilling potatoes in a container is a game-changer for small-space gardeners—it boosts yield, improves harvests, and keeps your spuds happy with minimal effort! 🌱 By layering soil and encouraging those tubers to grow upward, you’re basically giving your potatoes a VIP treatment.
Ready to dig in? Start with a single container, practice these tricks, and soon you’ll be reaping bountiful, homegrown potatoes like a pro.
Next up: Experiment with varieties—try fingerlings for compact containers or russets for heartier harvests. Happy growing! 🥔✨