
Container Gardens
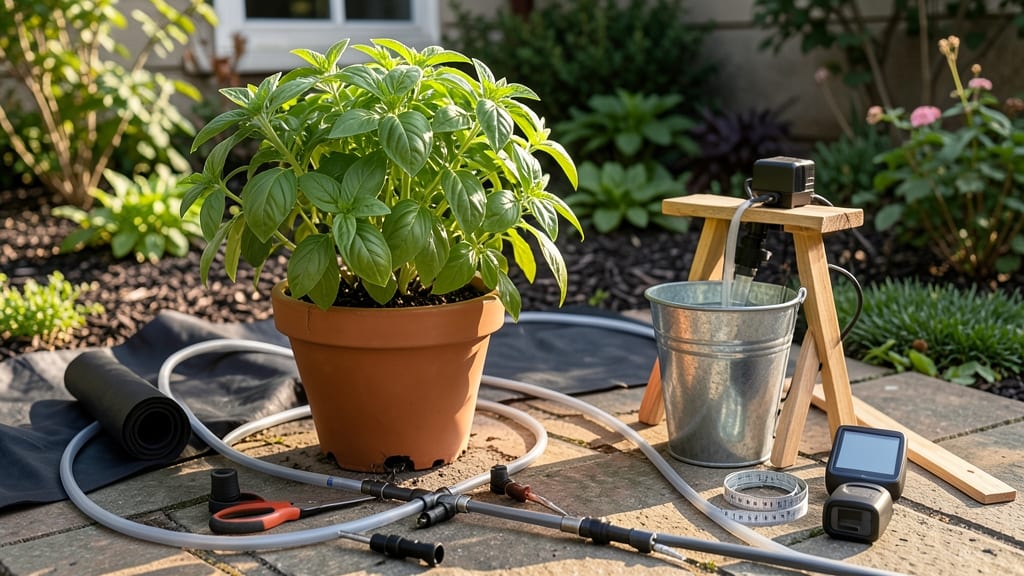
Installing drip irrigation for potted plants saved me from overwatering my herbs last summer. 🌱 The system delivers water right to roots, cutting waste and keeping plants thriving—even when I travel.
My basil, rosemary, and peppers now grow stronger with less effort, and the setup costs less than $30 for a basic system.
You’ll need a 5-gallon water reservoir, 1/4-inch tubing, emitters (one per pot), a timer, and basic connectors. For small pots (under 5 gallons), use 1/16-inch tubing with 0.5 GPH emitters—they’re gentle enough for delicate herbs.
Larger pots need 1/8-inch tubing with 1 GPH emitters to handle the volume without soggy soil.
The payoff is consistent moisture, fewer dried-out leaves, and plants that grow faster. My mint, which used to bolt in hot weather, now stays lush all season. The system also stops overwatering—no more mushy roots or wasted water.
Plus, you can automate it for 10-minute cycles twice daily, so your plants get care even when you don’t.
Start with 3-5 pots to test the setup, then expand. The tubing connects easily with slip-fit connectors, and you can adjust flow by adding or removing emitters.
Just avoid sharp bends in the tubing—they can kink and disrupt water flow. With this system, your containers will look neat, hydrated, and effortless all season long.
📚 In This Guide
- What you need
- Instructions
- Tips and common mistakes
- Wrapping up and next steps
What you need
- ● Drip irrigation kit (includes tubing, emitters, and connectors): 1 kit (choose a 1/4-inch or 1/2-inch diameter for potted plants)
- ● Soaker hose or micro-sprinkler tubing: Length based on your setup (e.g., 25–50 ft for 5–10 pots)
- ● Drip emitters: 1–2 per pot (adjustable flow rate, 1–2 gallons per hour recommended)
- ● T-fittings or branch fittings: Quantity based on your layout (for splitting tubing to multiple pots)
- ● End caps: 2–4 (to seal unused tubing ends)
- ○ Timer or smart valve: 1 (optional but highly recommended for automation)
- ● Scissors or a hose cutter (for clean tubing cuts)
- ● Drill or hole punch (if attaching tubing to pots)
- ● Measuring tape
- ● Adjustable wrench (for tight connections)
- ● Zip ties or hose clamps (to secure tubing to pots)
- ● Water filter (to prevent clogs in emitters)
- ● Pressure regulator (if your water pressure is high)
- ● Fertilizer injector (for nutrient-rich drip irrigation)
- ● Wire or stakes (to elevate tubing above pots for even watering)
Step-by-step instructions for installing a drip irrigation system for potted plants
Here's how to create an efficient, space-saving drip system that keeps your container garden thriving with minimal effort.
💧 Step 1: Gather Supplies and Plan Your Layout
Start by collecting your drip irrigation kit, which should include a main supply line, emitters, tubing, connectors, and a pressure regulator if needed. For 4 containers, you'll want about 10 feet of tubing and 4 emitters—one per pot. Arrange your pots in their final positions before connecting anything. This ensures your tubing runs are clean and you won't have to stretch or bend tubes awkwardly later.
Measure the distance between each pot and sketch a rough path for your tubing. Avoid sharp turns, which can kink the lines and restrict water flow. If your pots are on different levels, like a raised bed or deck, plan for a gradual slope in your tubing to prevent air pockets. Label each emitter with the corresponding pot number to avoid confusion when it's time to adjust flow rates.
🪴 Step 2: Connect the Main Supply Line and Emitters
Begin by attaching the pressure regulator to your water source, whether that's a faucet or a larger irrigation line. This step is critical—without it, the high pressure from your tap can damage emitters and cause uneven watering. Use the connectors provided in your kit to attach the main supply line to the regulator, ensuring it's snug but not overtightened.
Cut the tubing to length between each pot, leaving a little extra for adjustments. Slide an emitter onto the end of each tubing segment and secure it with the provided clamp or twist-lock connector. For 4-inch pots, use a 1 gallon-per-hour emitter to avoid overwatering. Test each connection by turning on the water briefly—listen for hissing or dripping, which signals a loose fit. Tighten gently until the connection is sealed but not crushed.
☀️ Step 3: Lay Tubing and Position Emitters
Lay the tubing along your planned path, securing it to the ground or container edges with small stakes or zip ties. For pots, tuck the tubing under the rim or weave it through the soil surface so it's hidden but accessible. Position emitters so the water flows directly into the soil, about 1-2 inches from the base of the plant. This targeted approach prevents runoff and ensures roots get consistent moisture.
Adjust the tubing so it slopes slightly downward toward each emitter. Even a 1-inch drop over 3 feet helps water flow smoothly. If you notice air bubbles in the tubing, tap it gently to dislodge them. Turn the system on and watch the water flow—each emitter should deliver a steady, even stream without splashing. If water pools on the surface, bury the emitter slightly deeper or redirect the flow closer to the soil.
⏰ Step 4: Test and Fine-Tune the System
Run the system for 10-15 minutes and check each pot for even saturation. The top 1-2 inches of soil should feel moist but not soggy. If some pots are drying out faster, adjust the emitter flow by turning the small screw on the side—clockwise to reduce, counterclockwise to increase. For 4-inch pots, aim for about ½ cup of water per minute per emitter.
Monitor the system over 24 hours to spot any leaks or uneven distribution. If you notice dry spots, reposition the emitter or extend the tubing slightly. For pots with thirsty plants like succulents, you may need to run the system longer or add a second emitter. Once everything is balanced, set a watering schedule—typically 2-3 times per week for most container plants, adjusting for your climate and pot size.
Tips & tricks for perfect drip irrigation setup
Real talk: A well-planned drip system isn't just about connecting tubes—it's about creating a system that actually works for your specific setup. These are the tricks that'll save you from common headaches and keep your potted plants thriving.
Precision in Tubing Length: When cutting your tubing between pots, leave an extra 6-8 inches beyond your measured distance. You'll need this wiggle room for adjustments later, especially if you're working with uneven surfaces or need to weave tubing around obstacles. I've learned this the hard way after having to redo connections because I cut too close to the mark. Use a hacksaw or tubing cutter for clean cuts that won't fray or restrict water flow.
Emitter Placement Strategy: Position your 1 gallon-per-hour emitters so they deliver water right at the soil's surface, about 1-2 inches from plant stems. For containers with multiple plants, consider adding a second emitter if the area exceeds 1 square foot. Watch for signs of uneven moisture—yellowing leaves or dry soil patches often mean your emitters need repositioning. The goal is to mimic natural rainfall patterns without creating surface runoff.
Pressure Regulation is Non-Negotiable: That pressure regulator isn't optional—it's your system's safety valve. Without it, your 1 gallon-per-hour emitters could get overwhelmed by standard tap pressure (typically 40-60 psi), causing uneven watering and potential damage. Most regulators reduce pressure to 15-30 psi, which is ideal for drip systems. Test your connections after installation by running water briefly and listening for consistent, steady flow without splashing.
Hidden Tubing Secrets: For a clean, professional look, tuck your tubing under pot rims or bury it just beneath the soil surface. Use small landscape staples or zip ties to secure tubing to container edges without damaging the pots. If you're working with decorative pots, consider using clear tubing—it blends invisibly with most container styles. Remember that even a 1-inch elevation drop over 3 feet helps maintain proper water flow, so plan your layout with subtle slopes when possible.
Pro Tips for Install A Drip Irrigation System For Potted Plants
- Real talk: A well-planned drip system isn't just about connecting tubes—it's about creating a system that actually wo...
- Precision in Tubing Length: When cutting your tubing between pots, leave an extra 6-8 inches beyond your measured dis...
- Emitter Placement Strategy: Position your 1 gallon-per-hour emitters so they deliver water right at the soil's surfac...
Frequently asked questions
Got questions?
Here are some of the most common ones about setting up a drip irrigation system for potted plants—plus quick, practical answers to keep your containers happy and hassle-free!
How often should I water my potted plants with a drip system?
A drip system for potted plants typically waters every 1-3 days, depending on plant type, pot size, and climate. Start with shorter cycles (e.g., 10-15 minutes) and adjust based on soil moisture. Pro tip: Use a moisture meter or check soil 1-2 inches deep—if it’s dry, extend the runtime!
Can I install a drip system in winter?
Yes! Winter is a great time to install a drip system, especially in colder climates. Just use frost-proof emitters and bury tubing at least 2 inches deep to protect it from freezing. If temps drop below freezing, consider adding insulation or moving potted plants to a sheltered area.
Is a drip irrigation system worth it for just a few potted plants?
Even for small setups, a drip system saves time, prevents overwatering, and delivers water directly to roots. For 3-5 pots, a manual or timer-controlled micro-drip kit (under $20) is a game-changer—no more lugging watering cans!
What do I do if my drip system isn’t working?
Start with these fixes:
- Clogged emitters: Soak them in vinegar or lemon juice for 30 minutes, then rinse.
- Low water pressure: Check for kinks in tubing or a blocked filter.
- Leaks: Tighten connections or replace damaged tubing.
Still stuck? Test each emitter individually by disconnecting the line to pinpoint the issue.
Can I use a drip system for plants with different water needs?
Yes, but you’ll need to customize your setup. Use adjustable emitters (e.g., 0.5–8 GPH) to match plant needs—succulents (low flow) vs. herbs/veggies (higher flow). Group pots with similar needs together, or split the system into zones with separate timers.
Wrapping up and next steps
Installing a drip irrigation system for your potted plants is a game-changer—it saves time, conserves water, and keeps your greenery thriving with minimal effort! 🌱 By following these simple steps, you’ve created a low-maintenance, efficient setup that works perfectly for containers of any size.
The best part? You can now relax while your plants stay consistently hydrated.
Ready to take it further? Experiment with timers, add a few more emitters, or even expand to your garden beds! Your plants—and your water bill—will thank you. Happy growing! 🌿