
Landscaping
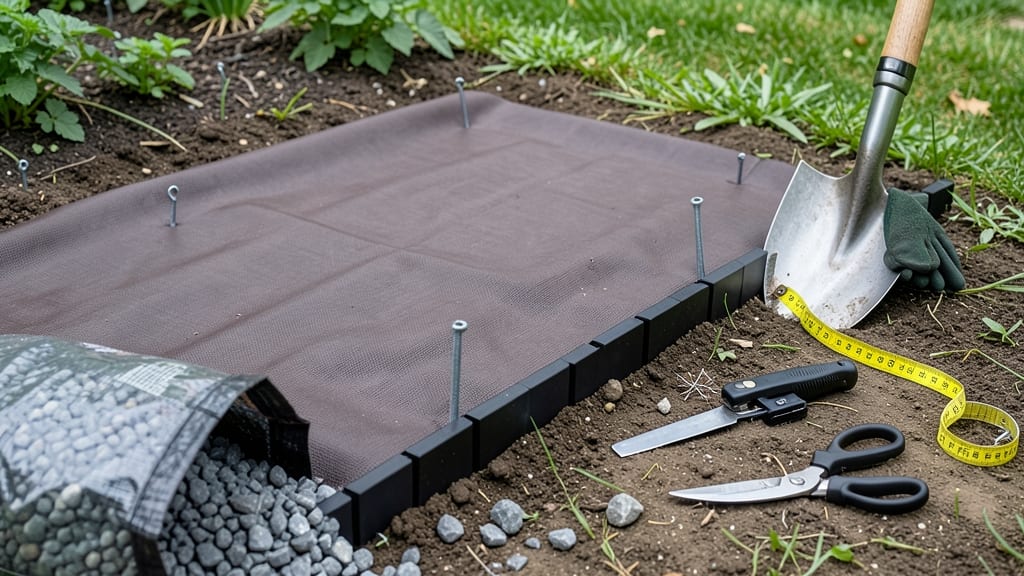
How to install landscape fabric and edging transforms a messy garden into a polished one. ✨ I learned the hard way—skipping fabric and proper edging means years of weeding and uneven borders that look like they were drawn by a toddler with chalk. The right setup keeps weeds at bay, defines your beds neatly, and makes maintenance a breeze.
You’ll need landscape fabric (the heavier, the better for permanent beds), sturdy plastic or metal edging, a tape measure, gloves, and a few basic tools. My go-to combo is 30-inch-wide fabric for flower beds and 18-inch-wide for pathways—wide enough to block weeds but narrow enough to work around plants.
Don’t skimp on quality here; cheap fabric tears or lets weeds poke through.
The payoff? A garden where weeds stay out, mulch stays put, and your beds look like they belong in a magazine spread. After installation, you’ll spend half the time keeping things tidy, and your plants will thrive without competition.
The edging alone adds a professional touch that makes even a small garden look intentional.
Works for flower beds, veggie patches, or pathways—just adjust the fabric width and edging depth based on your project. Here’s how to do it without the common mistakes that leave gaps and frustration. Let’s get started with the right prep and techniques!
📚 In This Guide
- What you need
- Instructions
- Tips and common mistakes
- Wrapping up and next steps
What you need
- ● Landscape fabric: Choose a high-quality, UV-stabilized fabric (e.g., polypropylene or woven geotextile) with a weight of 3-6 oz per square yard. Measure your garden area and buy 10-20% extra to account for overlaps and mistakes.
- ● Edging material: Plastic or metal edging: Opt for 12-18 inches tall (depending on weed severity) and cut to fit your garden’s perimeter.
- ● Flexible steel or aluminum edging: Great for curves; ensure it’s galvanized for durability.
- ● Natural stone or brick: For a rustic look; use 2-3 inch thick pavers or stones.
- ● Mulch: 2-4 inches of organic mulch (e.g., wood chips, bark, or straw) to cover the fabric and suppress weeds.
- ● Staples or landscape fabric staples: Galvanized or plastic-coated (avoid rusting in soil). Aim for 1 staple every 12-18 inches along seams.
- ● Garden soil or topsoil: Enough to create a 2-3 inch base layer under the fabric.
- ● Measuring tape and string or spray paint (to mark layout).
- ● Shovel or spade for digging trenches (if installing edging).
- ● Utility knife or scissors for cutting fabric.
- ● Staple gun (manual or electric) for securing fabric.
- ● Rake or hoe to level the ground.
- ● Wheelbarrow for transporting soil and mulch.
- ● Work gloves and knee pads for comfort.
- ● Level (to ensure edging is straight).
- ● Hammer or mallet (for driving in stakes or stakes for edging).
- ● Weed barrier adhesive (for extra security where fabric meets edging).
- ● Landscape fabric tape (to seal seams and prevent tears).
- ● Ground stakes or pins (to hold fabric in place while stapling).
- ● Edging cap or trim (for a polished look on top of plastic/metal edging).
- ● Post-hole digger (if installing deep or permanent edging stakes).
Step-by-step instructions for installing landscape fabric and edging
Here's how to create a weed-free, professional-looking garden bed that stays crisp for years.
🪴 Step 1: Mark and Prepare the Garden Bed Layout
Use a spray paint or stakes and string to outline your bed shape on the ground. I like to lay down a 12-inch wide board along the edge to visualize the finished look—this helps me adjust curves before cutting fabric. Measure and mark 4-foot wide sections if you're working with large areas, as fabric rolls are typically 4 feet wide.
Remove all existing vegetation, rocks, and debris from within the marked area using a garden shovel or edging tool. Dig down 2-3 inches to create a clean base—this prevents weeds from growing up through the fabric later. Rake the soil smooth so the fabric will lay flat without gaps.
🌱 Step 2: Lay Down the Landscape Fabric
Unroll the landscape fabric (typically 3-4 feet wide) along one edge of your bed, letting it extend 3-6 inches beyond the marked line. Overlap sections by 6 inches to prevent weeds from sneaking through seams. Secure the fabric with landscape fabric staples or U-shaped pins every 12-18 inches along the edges and corners.
For curves, cut the fabric with scissors or a utility knife—don't tear it, as jagged edges can poke through soil later. Smooth out wrinkles by gently pressing down with your hands or a 2x4 board. If the fabric feels too stiff, lightly mist it with water to help it relax before securing.
✂️ Step 3: Install the Edging for a Clean Finish
Place your edging material (plastic, metal, or stone) along the marked line, pressing it firmly into the ground. For plastic or metal edging, use a mallet to tap it into place every 12-18 inches. For stone edging, lay stones on their sides and pack soil around them to lock them in. The top of the edging should sit 1-2 inches above the soil level to prevent erosion.
Cut the landscape fabric 1-2 inches inside the edging with a utility knife to create a clean border. Fold the excess fabric under the edging or trim it flush—this keeps the fabric contained and looking neat. If using metal or plastic edging, bend the fabric edges inward slightly to prevent them from curling outward over time.
💧 Step 4: Secure Edges and Add Mulch
Fold any overhanging fabric edges under the edging or trim them flush to avoid tripping hazards. Use landscape fabric staples or heavy rocks to pin down edges where the fabric meets the edging. This step is critical—loose edges will eventually flip up and create gaps for weeds.
Spread a 2-3 inch layer of mulch (such as wood chips, bark, or gravel) over the fabric, leaving a 1-inch border along the edging. This protects the fabric from sunlight, which can degrade it over time. Water the mulch lightly to help it settle and create a smooth, finished look.
☀️ Step 5: Maintain for Long-Term Weed Control
Check the edging and fabric every 6 months to ensure no gaps have formed where weeds could grow. If you notice fabric peeking through the mulch, add more mulch to cover it completely. Avoid piling mulch against the edging, as this can cause it to shift or crack over time.
For permanent beds, consider adding ground cover plants or low-growing perennials to further suppress weeds naturally. The key to long-term success is keeping the fabric fully covered and the edging intact—this ensures your clean lines stay crisp for years.
Tips & tricks for perfect landscape fabric installation
These little details make all the difference between a temporary fix and a weed-free garden bed that lasts for years.
Visualize Before You Dig: I can't stress enough how helpful it is to use that 12-inch board along your marked edge before you start digging. It gives you a clear picture of your finished bed and helps you spot any awkward curves or tight corners before you cut your fabric. This saves time and fabric waste—trust me, I've learned this the hard way after cutting too much fabric to fit a tricky corner!
Overlap Fabric Strategically: When you overlap fabric sections by 6 inches as instructed, make sure you stagger the seams. Think of it like brickwork—if you line up all your seams, you create a straight line where weeds can potentially grow through. Staggering them breaks up any potential weak spots and gives you that extra layer of protection.
Edge Securing Secret: For Step 3, when you're installing your edging, take an extra moment to bend the fabric edges inward slightly before securing them. This prevents that classic "flipped-up fabric" look that happens when edges curl outward over time. A quick fold with your fingers or a small tuck under the edging makes all the difference in keeping things looking professional.
Mulch Like a Pro: That 2-3 inch layer of mulch isn't just decoration—it's your fabric's best friend. Use a rake to spread it evenly, then give it a light watering to help it settle. For extra protection, I like to add a second thin layer of mulch after about 3 months. This keeps the fabric from getting sunburned and maintains that crisp, clean look year after year.
Pro Tips for Install Landscape Fabric And Edging
- These little details make all the difference between a temporary fix and a weed-free garden bed that lasts for years.
- Visualize Before You Dig: I can't stress enough how helpful it is to use that 12-inch board along your marked edge be...
- Overlap Fabric Strategically: When you overlap fabric sections by 6 inches as instructed, make sure you stagger the s...
Frequently asked questions
Got questions about installing landscape fabric and edging?
Here are some of the most common ones—plus quick answers to keep your project on track!
Do I need landscape fabric if I’m using mulch?
Yes! While mulch suppresses weeds, landscape fabric blocks them completely by preventing sunlight from reaching weed seeds. Together, they create a long-term weed barrier. For extra durability, choose fabric with a UV-resistant coating (rated for 5+ years).
When’s the best time to install landscape fabric and edging?
Spring or early fall are ideal—soil is workable, and temperatures are mild. Avoid installing in freezing weather (fabric can crack) or during peak summer heat (it may shrink). If you’re in a warm climate, install in shade on hot days to protect the fabric from warping.
Can I reuse old landscape fabric?
Not recommended! Old fabric breaks down, loses weed-blocking effectiveness, and can harbor pests or disease. If you’re on a budget, opt for cheaper edging materials (like plastic or metal) instead of reusing fabric. Always use new fabric for best results—think of it like fresh mulch!
What if my edging keeps popping up after installation?
Loose soil or uneven ground are usually the culprits. Re-check that edging is secured every 12–18 inches with stakes or pins. For plastic/metal edging, use landscape nails or a mallet to drive it below ground level (1–2 inches deep). If the area shifts, consider soil stabilization (like gravel underneath) before reinstalling.Are there alternatives to landscape fabric?
For a permanent solution, try:
- Gravel or rocks (natural weed suppression, but requires deeper installation).
- Hard landscaping (patios, decks, or pavers—no fabric needed!).
- Corn gluten meal (organic pre-emergent for annual weeds, but reapply yearly).
- Cardboard + mulch (DIY, short-term fix—break down in 1–2 years).
Fabric is still the gold standard for long-term weed control, though!
Wrapping up and next steps
Installing landscape fabric and edging is a game-changer for keeping your garden weed-free and looking sharp! With the right materials and a little patience, you’ll transform your outdoor space into a well-organized, low-maintenance paradise. 🌿✨
Now that you’re equipped with the know-how, roll up those sleeves and tackle your project with confidence! Ready for the next step? Consider adding mulch or plants to complete your dream landscape—your garden will thank you!