
Propagation
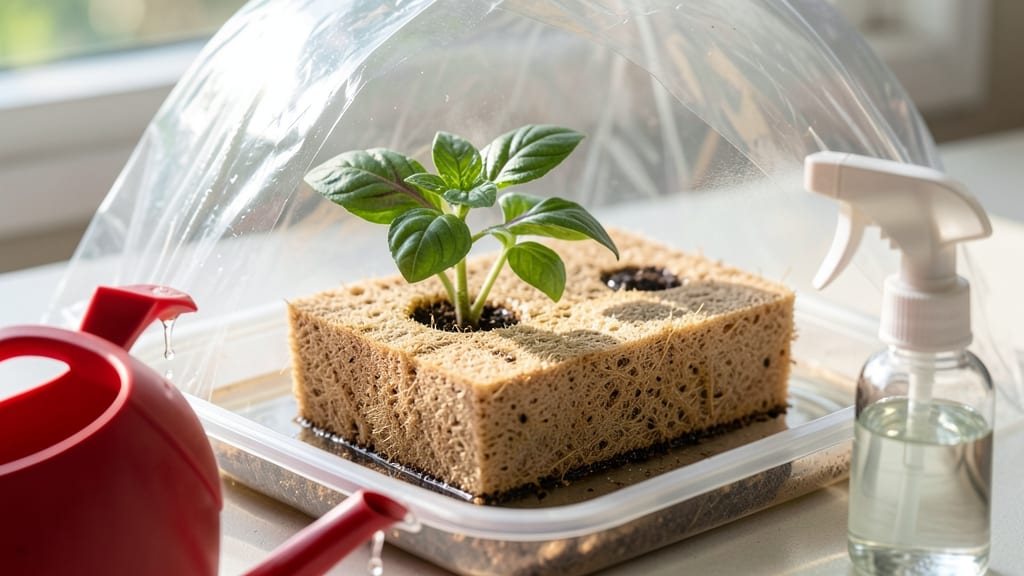
How to keep coco liners from drying out ruins weeks of seed-starting work. 🌱 The problem isn't just wilting—it's stunted seedlings, fungal risks, and wasted effort. I've lost count of trays where the edges dried before germination even began, and I finally cracked the moisture system that works reliably.
Heat and airflow are the silent killers here. A sunny windowsill or warm basement can dry coco liners in hours, while poor storage lets moisture escape overnight. The solution isn't complicated—it's about creating a microclimate that mimics tropical conditions where these liners thrive naturally.
You'll need a humidity dome or plastic wrap, a spray bottle (not a watering can), and a way to monitor soil moisture without overwatering.
With the right setup, your liners stay consistently damp—not soggy, not bone-dry—just right for steady germination. You'll see the first sprouts emerge within 5-10 days instead of waiting weeks for moisture to return, and the seedlings grow stronger from the start.
The key is checking moisture daily with your finger, not guessing by appearance.
This method works for both indoor setups and greenhouse environments, though you'll need to adjust for extreme heat or dry climates. The same principles apply whether you're starting herbs, flowers, or vegetables—once you master moisture control, you'll never struggle with drying again.
📚 In This Guide
- What you need
- Instructions
- Tips and common mistakes
- Wrapping up and next steps
What you need
- ● Coco liners (or coconut coir bricks) – 1-10+ (depends on your propagation needs; standard 4" x 4" liners work best).
- ● Water – Room-temperature (avoid tap water if it’s heavily chlorinated; let it sit for 24 hours or use filtered water).
- ● Spray bottle – 8-16 oz (for gentle misting; look for one with a fine-mist nozzle).
- ● Plastic wrap or clear plastic bags – Ziploc or reusable silicone bags (large enough to cover liners snugly).
- ● Scissors or box cutter – For trimming plastic to fit liners neatly.
- ● Tray or shallow container – Wide and shallow (to hold liners and catch excess water; a baking sheet or seedling tray works).
- ○ Optional: Humidity dome or propagator – Clear plastic with lid (if you want a more controlled environment).
- ● Perlite or vermiculite – 1-2 tbsp (mixed into coco coir for better aeration if liners feel too dense).
- ● Hydrogen peroxide (3%) – 1 tsp per quart of water (sterilizes water to prevent mold or bacterial issues).
- ● pH test strips – To check water pH (ideal range: 5.5–6.5 for coco coir).
- ● Fan (small, adjustable) – For light circulation (prevents stagnant moisture buildup).
- ● Moisture meter – Digital probe type (to monitor coco liner moisture levels like a pro!).
Step-by-Step instructions for keeping coco liners moist for longer
Here's how to maintain that perfect balance of moisture without drowning your coco liners.
💧 Step 1: Create a Moisture Barrier with Plastic
Line the bottom of your coco liner tray with a single layer of plastic wrap or a clear plastic lid that fits snugly. This creates a mini greenhouse effect that slows evaporation. I like to use a humidity dome if I have one—it keeps the environment stable and reduces daily watering by half.
Make sure the plastic touches all sides of the tray. Any gaps will let moisture escape, and you'll end up checking humidity levels every few hours. The goal is to trap just enough moisture to keep the coco coir damp but not soggy.
🌱 Step 2: Water Deeply but Sparingly at First
Give the coco liners a slow, deep watering until water runs out the drainage holes at the bottom. This ensures the entire liner soaks up moisture evenly. I use a spray bottle with a fine mist for the first few days to avoid over-saturating the surface—coco coir can hold too much water if you're not careful.
After the initial soak, let the liners sit for 10-15 minutes to drain excess water. You want the coco to feel slightly damp to the touch, like a wrung-out sponge. If it feels dry after a few days, repeat the process—but never let it sit in standing water.
☀️ Step 3: Adjust Light and Temperature to Slow Drying
Place your coco liners in a spot with indirect light—direct sunlight heats the coco too quickly, causing moisture to evaporate faster. I keep mine near a north-facing window or under grow lights set to 12 hours per day. If your space gets hot, move them to a cooler area or use a small fan on low to circulate air gently.
Watch for signs of drying: if the top layer feels dry but the bottom stays moist, you're losing water too fast. A digital hygrometer helps track humidity levels—aim for 60-70% humidity in the tray. If it drops below 50%, it's time to re-moisten.
🪴 Step 4: Group Liners Together for Shared Humidity
Stack or cluster your coco liners close together—they’ll create a microclimate that retains moisture longer. I place them in a shallow tray filled with ½ inch of water, then set the liner tray on top of a rack (so the bottoms don’t soak). The evaporating water keeps the air around the liners consistently damp.
This trick works best for 4-6 liners grouped together. If you only have one or two, wrap them loosely in a damp paper towel and secure it with a rubber band to slow moisture loss. Just don’t make it too tight—you still need airflow to prevent mold.
⏰ Step 5: Monitor and Refresh Moisture Daily
Check your coco liners once a day by pressing a finger ½ inch deep into the coco. If it feels dry, mist the surface lightly with water until it’s damp again. I set a reminder on my phone—skipping a day can mean the difference between thriving seedlings and crispy ones.
Every 3-4 days, give them a light soak from the bottom (place the tray in a shallow dish of water for 5 minutes). This mimics natural rainfall and keeps the roots hydrated without over-saturating. Avoid top-watering after germination—it can dislodge tiny seedlings or spread disease.
Tips & tricks for perfect coco liner moisture balance
These simple tricks will help you maintain that ideal dampness without turning your coco liners into soggy messes.
Plastic Barrier Precision: When creating your moisture barrier in Step 1, use a plastic wrap that's slightly larger than your tray. This ensures full coverage without gaps—even the tiniest opening can let moisture escape. I press down firmly on all edges to create a proper seal. For extra insurance, you can even use a second layer of plastic if your space is particularly dry.
Watering Technique: In Step 2, the 10-15 minute drainage time is crucial—don't rush it! This waiting period ensures excess water drains completely, preventing waterlogging that can suffocate roots. I test by lifting the tray slightly to check for any residual water pooling at the bottom. If you're in a hurry, you can reduce this to 5 minutes, but you'll need to monitor more closely afterward.
Light Management: For Step 3, if you don't have a north-facing window, try placing your liners under fluorescent lights instead of LED grow lights. Fluorescents emit less heat, which means less moisture loss. I've also found that moving liners to a bathroom during hot afternoons works well—the high humidity in bathrooms helps maintain moisture levels naturally.
Grouping Strategy: When implementing Step 4, the shallow tray method works best with a rack that has at least 1-inch spacing. This prevents the bottom of your liners from sitting in water while still benefiting from the humid air. For solo liners, I've had success using a small plastic container with a lid—place the liner inside and add a damp paper towel to create your own mini humidity chamber.
Pro Tips for Keep Coco Liners From Drying Out
- These simple tricks will help you maintain that ideal dampness without turning your coco liners into soggy messes.
- Plastic Barrier Precision: When creating your moisture barrier in Step 1, use a plastic wrap that's slightly larger t...
- Watering Technique: In Step 2, the 10-15 minute drainage time is crucial—don't rush it! This waiting period ensures e...
Frequently asked questions
Got questions about keeping your coco liners lush and hydrated? You're not alone! Here are some of the most common concerns—and their solutions—to help you propagate like a pro.
How often should I water coco liners to prevent drying out?
Check moisture levels every 2–3 days by poking a finger 1–2 inches deep. Water thoroughly until it drains from the bottom, but avoid soggy soil. Adjust frequency based on humidity—hot, dry air means more frequent watering, while cooler, damp conditions may require less.
What if my coco liners are already drying out? Can I save them?
Don’t panic! Place the liner in a shallow tray of water for 10–15 minutes to rehydrate. Trim any wilted or crispy sections, then repot with fresh, moist coco coir. If roots are still firm, they’ll bounce back—just avoid stressing them further.
Are there alternatives to coco liners that hold moisture better?
Yes! Try peat moss mixes or vermiculite-blended soil for better moisture retention. For hydroponics, rockwool cubes are a great alternative—just soak them before use. If you love coco, mix in hydrogel crystals (10% by volume) to boost hydration.
How long can coco liners stay moist without watering?
With proper setup, coco liners can stay hydrated for 3–5 days in moderate climates. Use a humidity dome or plastic wrap to extend this to 7–10 days. For longer trips, pre-soak liners and place them in a sealed container with a damp paper towel.
Can I reuse dried-out coco liners for propagation?
Not ideal! Dried coco loses its structure and may harbor mold or bacteria. Instead, compost the old liner and start fresh. If you’re desperate, sterilize it with a 10% hydrogen peroxide solution, but repotting in fresh coco is always safer for your cuttings.
Wrapping up and next steps
Keeping your coco liners moist and thriving doesn’t have to be a guessing game—just follow these simple, science-backed tricks! With the right balance of water, humidity, and airflow, you’ll create the perfect environment for your cuttings to root like pros. Your green thumb is closer than you think!
Ready to put your newfound knowledge into action? Grab your supplies, roll up your sleeves, and give your coco liners the love they deserve. Watch those roots grow with confidence—and soon, you’ll be sharing your success with fellow plant parents! 🌱✨