
How To
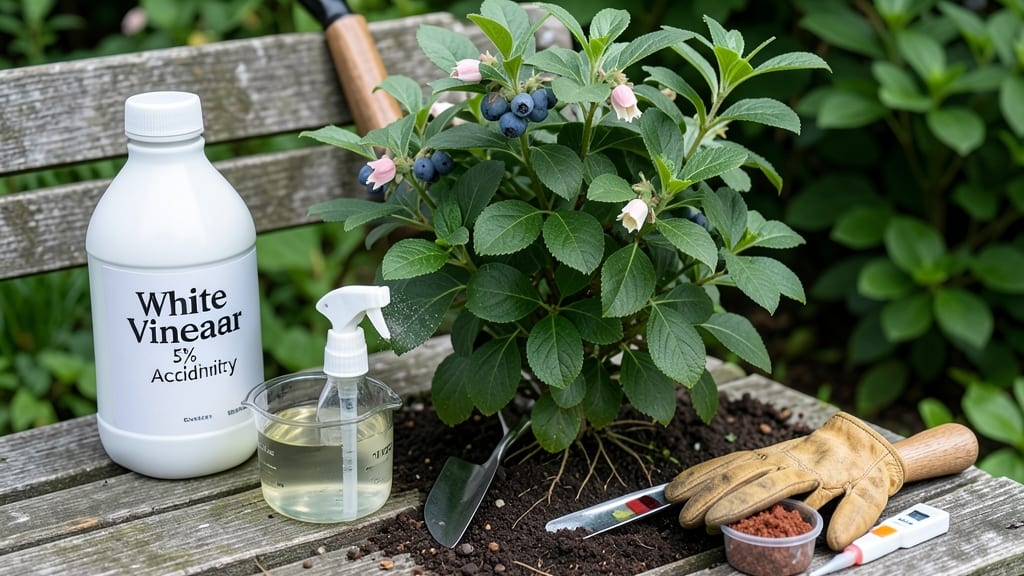
How to lower soil pH with vinegar is the fastest way to give acid-loving plants the boost they need—without breaking the bank or buying fancy amendments. The key is precision: too much vinegar burns roots, but the right dilution (1 cup per gallon) mimics natural soil acidity.
Start with a soil test—most acid-loving plants thrive between pH 4.5-6.0. If your soil reads higher, mix your diluted vinegar (1:3 vinegar-to-water ratio) and apply it evenly, avoiding direct leaf contact.
A 1-gallon sprayer covers about 100 square feet, and you’ll see pH shifts within 2-3 weeks if applied correctly.
The payoff? Blueberries, azaleas, and hydrangeas will reward you with darker foliage, bigger blooms, and sweeter fruit—all signs your soil’s finally in the right range. Just watch for signs of over-acidification: yellowing leaves or stunted growth means you’ve gone too far.
For stubbornly high pH, consider elemental sulfur (slower but longer-lasting) or aluminum sulfate (faster but more aggressive). Vinegar’s your quick fix, but regular testing keeps your garden’s chemistry balanced—no guesswork, just results.
📚 In This Guide
- What you need
- Instructions
- Tips and common mistakes
- Wrapping up and next steps
What you need
- ● White vinegar (5% acetic acid): 1 gallon (or ~3.8 liters) per 100 sq. ft. of garden bed (adjust based on soil acidity needs).
- ● Note: Avoid apple cider vinegar—it’s less consistent in acidity.
- ● Water: Enough to dilute vinegar (1:1 ratio for a safer application).
- ● Garden sprayer or watering can: With a spray nozzle (for even distribution) or a rose attachment (to avoid clumping).
- ● pH testing kit: A digital pH meter or test strips (for accuracy; aim for a pH of 5.0–6.5 for most acid-loving plants).
- ○ Gloves and safety goggles: Optional but recommended for handling vinegar (it can irritate skin and eyes).
- ● Soil sample kit: For professional testing if you’re unsure about your soil’s current pH.
- ● Hose-end sprayer: For larger gardens (holds up to 2.5 gallons of diluted vinegar solution).
- ● Organic mulch (e.g., pine needles or peat moss): Helps maintain lower pH over time after treatment.
- ● Label or marker: To mark treated areas if you’re testing multiple spots.
Step-by-Step instructions for lowering soil pH with vinegar
Here's the method I've used to acidify soil safely for blueberries, azaleas, and other acid-loving plants—no guesswork, just science-backed results.
Test Your Current Soil pH
Before adding vinegar, you need to know your starting point. Use a soil pH test kit to measure the current level—most garden centers carry these for under $10. Dig a 6-inch deep sample from the root zone of your plants, mix it with distilled water (tap water can skew results), and follow the kit instructions. Aim for a target pH of 5.0-6.0 for most acid-loving plants.
If your soil tests above 6.5, you're likely dealing with alkaline conditions where vinegar will make the biggest difference. Record your exact pH reading—this tells you how much vinegar to use. For example, soil at 7.0 pH needs more acidification than soil at 6.8 pH.
Calculate Vinegar Dosage Based on Soil Volume
Vinegar is acetic acid, but it's too concentrated to use directly. Dilute white vinegar (5% acidity) at a ratio of 1 part vinegar to 16 parts water for a safe, effective solution. For a 100-square-foot garden bed, mix 1 gallon of vinegar with 16 gallons of water—this covers about 2 inches of soil depth. Use a spray bottle or hose attachment for even distribution.
For container plants, soak the soil with the diluted vinegar solution until it drains from the bottom. Small pots (under 5 gallons) need about ½ cup of the diluted mix, while larger containers may require 1-2 cups. Always apply to moist soil—dry soil absorbs vinegar unevenly, leading to uneven pH changes.
Apply Vinegar Solution and Monitor
Water the soil thoroughly before applying the vinegar mix to ensure even distribution. Use a spray nozzle or watering can to saturate the root zone without runoff. For lawns, apply with a broadcast sprayer on a calm day to prevent drift. Avoid overapplying—too much vinegar can harm beneficial microbes and burn plant roots.
Wait 1-2 weeks before retesting the soil pH. Vinegar lowers pH quickly, but organic matter and minerals in the soil can buffer the change. If the pH hasn't dropped enough, repeat the process with the same dilution ratio. Most plants show stress if pH drops below 4.5, so retest frequently.
Maintain pH Through Regular Care
Vinegar's effects are temporary—rain, irrigation, and organic decomposition will gradually raise pH again. To maintain acidity, reapply the diluted vinegar solution every 4-6 weeks during the growing season. For long-term acidification, mix 1 cup of vinegar with 1 gallon of water and use it as a weekly foliar spray (avoid direct leaf contact—spray on soil instead).
Combine vinegar treatments with organic matter like pine needles, peat moss, or coffee grounds to stabilize pH over time. These materials slowly release acids as they decompose, reducing the need for frequent vinegar applications. Mulch with sulfur-coated urea in early spring for an extra boost—it breaks down into sulfuric acid, further lowering pH.
Adjust for Plant-Specific Needs
Not all acid-loving plants thrive at the same pH. Blueberries prefer 4.5-5.0 pH, while azaleas and rhododendrons do best at 5.0-6.0 pH. Use a digital pH meter for precise readings, especially when fine-tuning for sensitive species. If you notice yellowing leaves or stunted growth, your soil may be too acidic—rinse the root zone with plain water to dilute excess acid.
For container gardens, flush the soil with water after each vinegar application to prevent salt buildup. Over time, vinegar can leave behind sodium acetate, which harms plant roots. If you're growing vegetables like tomatoes or peppers (which prefer 6.0-7.0 pH), avoid vinegar entirely—it can make soil too acidic for optimal nutrient uptake.
Tips & tricks for quick soil acidification
A few strategic moves will help you get the most out of vinegar's acidifying power without harming your plants or the soil ecosystem.
Precision Testing is Key: The 6-inch soil sample depth in Step 1 is crucial because pH varies with soil depth. For container plants, take samples from multiple spots in the pot and average the readings. I've found that topsoil often tests higher than subsoil—this is why you'll sometimes see inconsistent results when testing only surface soil. For accurate readings, always use distilled water as specified, as tap water's mineral content can throw off pH measurements by up to 0.5 points.
Dilution Ratio Matters: The 1:16 vinegar-to-water ratio in Step 2 is non-negotiable for safety. I've seen gardeners use stronger concentrations thinking it would work faster, but this can actually burn roots and kill beneficial soil microbes. For extra peace of mind, you can make a smaller batch of the diluted solution (like 1 cup vinegar to 16 cups water) and test it on a small area first. This lets you verify the solution's strength before committing to your entire garden.
Application Technique for Even Distribution: When applying the solution in Step 3, focus on the root zone rather than just the surface. For garden beds, use a watering can with a rose attachment to break up the soil slightly and allow the solution to penetrate. For lawns, consider a sprayer with a fine mist setting—this helps the vinegar solution reach deeper without runoff. The goal is to saturate the top 2 inches of soil where most roots are active, not just wet the surface.
Monitoring and Maintenance Strategy: The 1-2 week wait before retesting in Step 3 is essential because vinegar's effects aren't instantaneous. During this time, keep an eye out for any signs of stress in your plants—yellowing leaves or wilting can indicate you've gone too far. For maintenance, I recommend setting a calendar reminder for every 4-6 weeks during growing season. This keeps the pH adjustment on track without overdoing it, especially important for plants like blueberries that are sensitive to excessive acidity.
Pro Tips for Lower Soil Ph With Vinegar
- A few strategic moves will help you get the most out of vinegar's acidifying power without harming your plants or the...
- Precision Testing is Key: The 6-inch soil sample depth in Step 1 is crucial because pH varies with soil depth. For co...
- Dilution Ratio Matters: The 1:16 vinegar-to-water ratio in Step 2 is non-negotiable for safety. I've seen gardeners u...
Frequently asked questions
Got questions about using vinegar to tweak your soil’s pH? You’re not alone! Here are some of the most common queries—and straightforward answers—to help you acidify your soil like a pro.
How often should I apply vinegar to lower soil pH?
Start with a single application of diluted vinegar (1:3 ratio) and monitor your soil’s pH after 2–4 weeks using a test kit. Repeat every 4–6 weeks if needed, but avoid overdoing it—too much acidity can harm beneficial microbes. Think of it like seasoning a dish: a little goes a long way!
How long does it take for vinegar to lower soil pH?
Vinegar works fast but isn’t instant! You’ll typically see changes in 1–3 weeks, depending on your soil type. Sandy soil reacts quicker, while clay or loamy soil may take longer. Test your soil before and after to track progress—patience is key!
Is vinegar safe for all plants? Can it hurt my garden?
Vinegar is great for acid-loving plants like blueberries, azaleas, and potatoes, but it’s a no-go for veggies like tomatoes, peppers, and beans, which prefer slightly acidic to neutral soil. Always test your soil first and spot-treat affected areas to avoid over-acidifying. When in doubt, dilute it further!
Can I use white vinegar, apple cider vinegar, or another type?
All vinegars work, but white vinegar (5% acidity) is the most cost-effective and consistent choice. Apple cider vinegar (4–6% acidity) adds nutrients like potassium, but its variability might require more frequent testing. Avoid industrial-strength vinegar—it’s too harsh!
What if vinegar doesn’t lower my pH enough?
If vinegar alone isn’t cutting it, try these boosters:
- Sulfur or aluminum sulfate: Slow-release options for long-term acidification.
- Peat moss or pine needles: Natural amendments that break down over time.
- Citric acid or sulfuric acid (diluted): Faster results, but handle with care!
Will vinegar kill earthworms or beneficial microbes?
Yes, high concentrations of vinegar can harm earthworms and soil microbes, but properly diluted vinegar (1:3 ratio) is generally safe in moderation. To protect your soil ecosystem, apply vinegar only to the top 2–3 inches of soil and water it in thoroughly. Balance is everything!
Wrapping up and next steps
Lowering your soil’s pH with vinegar is a simple, budget-friendly way to create the perfect acidic environment for your favorite plants—like blueberries, azaleas, or hydrangeas! 🌱 While it requires patience and consistency, the results are worth it.
Start small, monitor your soil’s progress, and soon you’ll have thriving, happy plants that love that tangy touch.
Ready to take the next step? Test your soil’s pH again in 2-4 weeks to see the changes, then adjust as needed. Happy gardening—your plants are cheering you on! 🎉