
Container Gardens
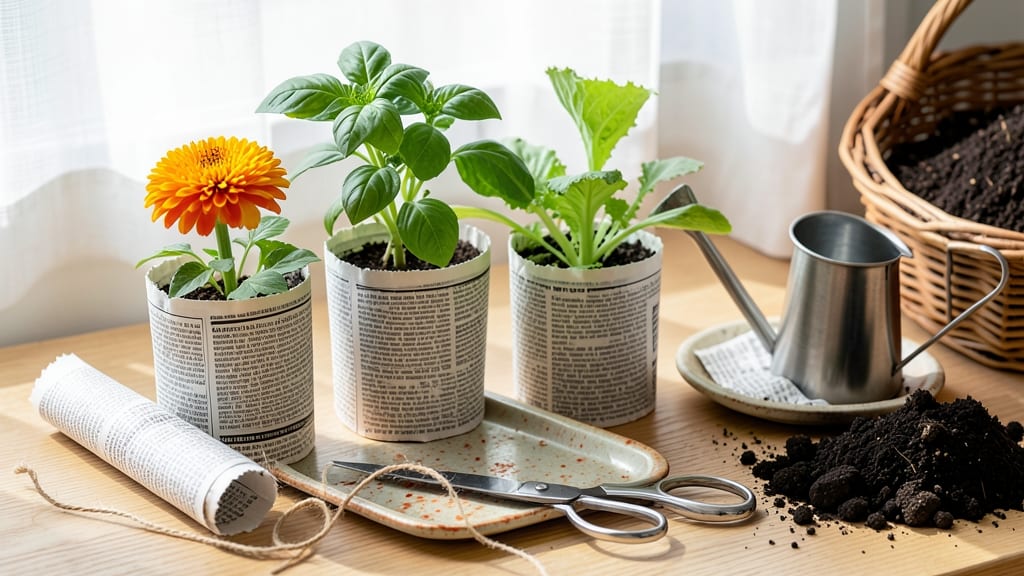
My first batch of newspaper pots saved me $20 on seedling containers—and they’re 100% compostable. 🌱 The trick is folding the paper just right to create sturdy little pots that hold moisture without falling apart. No glue, no plastic, just newspaper and a little ingenuity.
You’ll need 3 supplies: newspaper, scissors, and potting soil. Cut strips about 1-inch wide, then stack and fold them into cone shapes—it takes less than 5 minutes per pot. The best part? These biodegradable pots break down right in the soil when you transplant seedlings.
Once filled with soil, keep them lightly moist but not soggy. In 4-6 weeks, you’ll have sturdy seedlings ready for the garden, and the pots will dissolve harmlessly into the earth. Perfect for beginners or anyone tired of plastic waste.
Works for herbs, flowers, or veggies—just adjust the pot size. No more struggling with flimsy plastic trays. Let’s make seed starting easier and greener!
📚 In This Guide
- What you need
- Instructions
- Tips and common mistakes
- Wrapping up and next steps
What you need
- ● Newspapers: 4–6 sheets (standard broadsheet or tabloid size, ~22" x 28" or ~11" x 17"). Tip: Use black-and-white pages—they’re more durable!
- ● Scissors: Sharp, clean pair for clean cuts.
- ● Water: A spray bottle or small cup for dampening.
- ● Potting soil: Lightweight seed-starting mix (1–2 cups, depending on pot size).
- ● Seedlings or seeds: Small plants or seeds ready for transplanting.
- ● Newspaper strips or twine: To secure the base (if needed).
- ● Plastic wrap or aluminum foil: For extra moisture retention (great for humidity-loving seeds!).
- ● Biodegradable pot labels: Write seed names with a toothpick and soil!
- ● Compostable twine: To tie the pot closed at the top (prevents unraveling).
Step-by-step instructions for making zero-waste newspaper pots
Here's my go-to method for creating sturdy, biodegradable pots in under 5 minutes—no tools required.
📰 Step 1: Gather and Prepare the Newspaper
Start with a sheet of newspaper—black and white ink only, no glossy sections. I like to use the sports or comics page because it's thicker and holds its shape better. Fold the paper in half lengthwise, then unfold it to create a crease down the middle. This crease will serve as your pot's spine.
Next, fold the newspaper into thirds by folding the top third down to meet the crease, then folding the bottom third up to meet it. This creates a long rectangle that's about 1/3 the width of the original sheet. The goal is to create a sturdy base for your pot—this folding pattern distributes weight evenly and prevents collapse when wet.
📐 Step 2: Shape the Pot Base
Unfold the newspaper just enough to create a cone shape by bringing the two short ends together. Overlap the edges by about 1 inch—this creates a seam that holds the pot's structure. I like to pinch the edges firmly between my fingers to create a tight seal before proceeding. This is where most pots fail if you rush it.
Now, roll the newspaper tightly into a cone shape, keeping the seam on the bottom. The cone should be about 3-4 inches tall—this size works perfectly for most seedlings. Press the sides gently but firmly to maintain the shape. You'll notice the newspaper naturally stiffens as you work, which helps the pot hold its form when watered.
💧 Step 3: Secure the Pot and Add Moisture
To lock the pot in place, fold the top edge of the newspaper down about ½ inch and tuck it under the seam at the bottom. This creates a secure base that won't unravel when you handle it. I like to make a small slit in the bottom of the pot with my fingernail to create drainage—this is critical for preventing root rot in seedlings.
Once your pot is shaped, place it in a shallow dish or saucer and fill it with water until the newspaper is fully saturated. Let it soak for about 5 minutes until the paper feels stiff and the water stops being absorbed. This step ensures the pot won't disintegrate when you water your seedlings later. You'll see the pot hold its shape much better after soaking—this is your signal it's ready for planting.
🌱 Step 4: Plant Your Seeds and Care for Seedlings
Fill the pot with your seed-starting mix, leaving about ½ inch of space at the top. Plant your seeds according to the packet instructions, then cover them lightly with additional soil. Water gently until the soil is evenly moist but not soggy. The beauty of newspaper pots is that they break down naturally, so you can transplant directly into the garden without disturbing roots.
Place your pots in a seed tray or directly in your growing area. Keep the soil consistently moist but never waterlogged—newspaper pots dry out faster than plastic ones. You'll notice the pots start to soften after about 4-6 weeks, which is perfect timing for transplanting most seedlings. This natural degradation means no waste and minimal root disturbance when moving plants outdoors.
✂️ Step 5: Transplant Seedlings Directly
When your seedlings are ready for transplanting, simply peel back the newspaper pot and place the entire pot in the planting hole. The newspaper will break down in the soil, providing additional organic matter. Water the area thoroughly to help the pot disintegrate and the roots integrate with the surrounding soil. This method reduces transplant shock because the root ball stays intact.
I like to add a handful of compost to the planting hole before inserting the pot—this gives the seedlings a nutrient boost as the newspaper breaks down. Within a few weeks, there'll be no trace of the pot, and your seedlings will be thriving in their new home. This zero-waste approach has saved me hundreds of dollars on plastic pots over the years, and it's a great way to reduce garden waste.
Tips & tricks for perfect newspaper pots
These simple techniques will help you create sturdy, long-lasting newspaper pots every time—no matter your gardening experience.
Paper Selection Matters: For the strongest pots, choose newspaper with minimal glossy sections and plenty of black ink. The sports or comics pages are ideal because their thicker paper resists tearing when wet. Avoid newspapers with large photos or colored ink—they tend to bleed and weaken the structure when saturated. I've found that using the centerfold sections (where the paper is thickest) creates pots that hold their shape even after multiple waterings.
The Folding Technique is Critical: When creating your thirds fold in Step 1, press firmly along each fold line to create crisp creases. This isn't just about aesthetics—sharp folds create clean edges that hold the pot's structure when you roll it. In Step 2, that 1-inch overlap is non-negotiable for stability. I've ruined more pots than I care to admit by skipping this step, so take your time pressing those edges together. The extra effort prevents collapse when you add soil and water.
Drainage is Non-Negotiable: That small slit you make in the bottom during Step 3 isn't just for show—it's what prevents root rot. Without proper drainage, your seedlings will suffocate in soggy soil. Use your fingernail to make the slit clean and precise, about ¼-inch wide. For extra insurance, you can make two small slits on opposite sides of the pot's base. This simple step makes all the difference between healthy seedlings and wilted failures.
Soaking Time is Key: The full 5 minutes of soaking in Step 3 transforms flimsy paper into sturdy planters. Don't rush this step—wait until the paper feels stiff and stops absorbing water. You'll know it's ready when the pot maintains its shape when you lift it from the water. This pre-soaking prevents the pots from disintegrating when you water your seedlings later. I've seen beginners skip this and end up with pots that fall apart after just one watering.
Pro Tips for Make Newspaper Pots
- These simple techniques will help you create sturdy, long-lasting newspaper pots every time—no matter your gardening ...
- Paper Selection Matters: For the strongest pots, choose newspaper with minimal glossy sections and plenty of black in...
- The Folding Technique is Critical: When creating your thirds fold in Step 1, press firmly along each fold line to cre...
Frequently asked questions
Got questions about newspaper pots? We’ve got answers!
Whether you’re a first-time gardener or a pro looking for quick tips, this FAQ covers the basics—plus troubleshooting for common hiccups. Let’s dive in!
Can I use any type of newspaper for these pots?
Stick to uncoated, unglossy newspapers—ink-free or soy-based ink is best to avoid chemicals in your soil. Avoid colored or shiny pages, as they may contain harmful additives. Recycled newsprint (like Sunday editions) works too, just tear out ads or glossy inserts first!
How long do newspaper pots last before they break down?
Newspaper pots typically last 4–6 weeks in moist soil before decomposing. For faster breakdown (like with delicate seedlings), use 2–3 layers of newspaper. To extend their life, keep them slightly dry when not watering—overwatering speeds up deterioration.
What if my pots fall apart too quickly?
If your pots crumble before seedlings are ready, try these fixes:
- Add a mesh liner: Wrap the pot in cheesecloth or pantyhose before rolling.
- Use fewer layers: 2–3 sheets hold shape longer than 4+.
- Seal with water: Lightly dampen the newspaper before rolling to tighten fibers.
Are there eco-friendly alternatives to newspaper pots?
Try these zero-waste options:
- Cardboard egg cartons (cut into cups)
- Toilet paper rolls (soaked in water to soften)
- Coconut coir pots (store-bought, fully compostable)
- Molded peat pots (if you can’t find ink-free paper)
What should I avoid when making newspaper pots?
Steer clear of these mistakes:
- Over-soaking: Wet newspaper loses structure fast.
- Tight rolls: Leave a ½-inch gap at the top for drainage.
- Glossy/colored ink: Can leach toxins into soil.
- Skipping the bottom: Always leave the base open for roots!
Wrapping up and next steps
You’ve now mastered the art of creating zero-waste, eco-friendly newspaper pots—a simple yet brilliant way to nurture seedlings without harming the planet! 🌱 These pots are perfect for gardeners of all levels, offering a budget-friendly and sustainable solution that even beginners can tackle in minutes.
Whether you’re growing herbs, flowers, or veggies, your green thumb is ready to shine.
Ready to take the next step? Experiment with different plants or even try making larger pots for bigger seedlings. Share your success with fellow gardeners—your creativity might inspire someone else to go green too! 🌟