
Planting
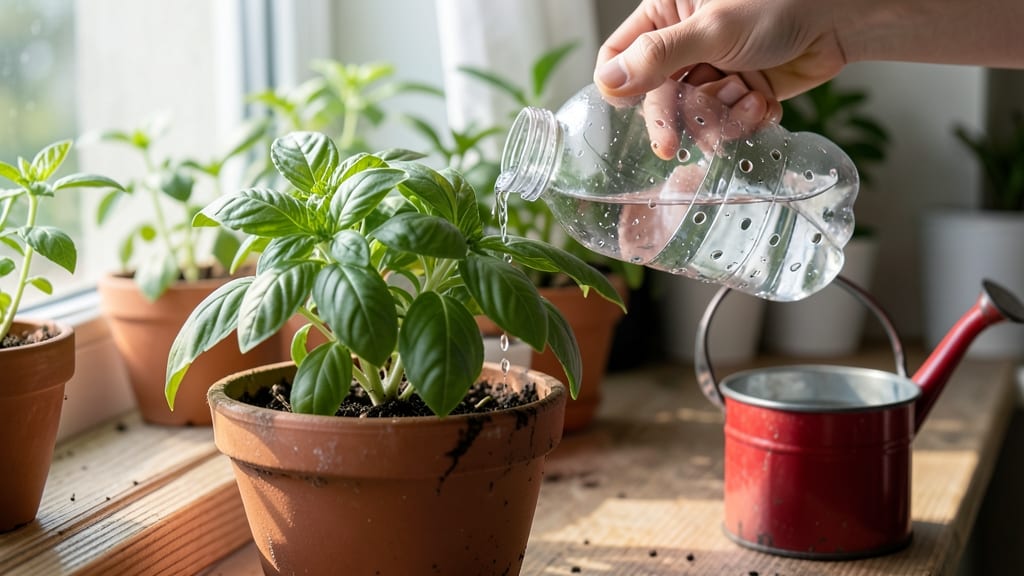
My first DIY plant watering bottle saved me from lugging heavy watering cans to my balcony garden. 🌱 The right setup delivers water exactly where plants need it—no more overwatering or missed spots in tight containers. Even my finicky herbs stopped wilting after switching to this method.
You only need a clean plastic bottle, a small funnel, and some basic tools to create a precision watering system. The best part? You can customize the spray pattern for delicate seedlings or deep-watering needs.
I added a pinch of liquid fertilizer to mine, and my basil grew twice as fast. This bottle eliminates water waste by delivering just what your plants need, when they need it. No more soggy soil or thirsty roots—just perfect moisture control that keeps your garden thriving without extra effort.
Works for everything from tiny succulents to towering tomato plants. Here’s how to make yours in under 10 minutes with supplies you already have at home.
📚 In This Guide
- What you need
- Instructions
- Tips and common mistakes
- Wrapping up and next steps
What you need
- ● Clean plastic spray bottle (8–16 oz, with a fine-mist nozzle—think old cleaning or travel spray bottles)
- ● Drill or hole punch (for adding a spout—a manual hole punch works if you’re DIY-friendly!)
- ● Ruler or measuring tape (to mark precise spots for holes)
- ● Permanent marker (for marking drill/punch points)
- ● Scissors or utility knife (for trimming excess plastic if needed)
- ● Water (duh!—but filtered or rainwater is best for plants 💧)
- ○ Optional add-ins (see below!)
- ● Food coloring or liquid plant fertilizer (to tint water and nourish roots)
- ● Small mesh screen or cheesecloth (to filter water if using tap)
- ● Decorative labels or stickers (to personalize your bottle!)
- ● Bamboo or metal straw (for a reusable, eco-conscious touch)
Step-by-step instructions for making a DIY plant watering bottle
Here's how to turn a simple spray bottle into a precision watering tool that saves time and keeps your plants thriving.
🪴 Step 1: Gather Your Upcycled Materials
Start with a clean, empty plastic spray bottle—I prefer ones with a fine mist nozzle for delicate seedlings or a stream setting for larger plants. Check the bottle's capacity; a 16-ounce size works perfectly for most indoor plants. You'll also need a permanent marker to label your creation and a pair of scissors to make adjustments.
If your bottle has a trigger sprayer, skip to the next step. If it's a simple flip-top design, you'll need to modify it for better control. Test the spray pattern first—some bottles create uneven mist, which can lead to dry spots in the soil. I like to give the bottle a few test sprays before committing to the project.
💧 Step 2: Modify the Spray Nozzle for Precision
Most spray bottles come with a one-size-fits-all nozzle, but plants need tailored watering. If your bottle has an adjustable nozzle, set it to the finest mist for seedlings or medium stream for established plants. For flip-top bottles, you can improve control by removing the cap entirely and using the bottle like a small watering can—just tilt it to direct the flow.
Here's the trick: poke tiny holes in the bottle's cap with a hot needle (heat it over a flame or with a lighter) if you want a customizable spray pattern. Place the cap upside-down in the bottle's opening to create a drip irrigation system—ideal for self-watering setups. Test your modifications by spraying into a cup of water to see how evenly it distributes.
✂️ Step 3: Label and Customize for Plant-Specific Use
Use the permanent marker to label your bottle with the plant type and watering schedule. For example, "Basil – Every 2 Days" or "Snake Plant – Every 3 Weeks." This prevents overwatering, which is the #1 killer of houseplants. I also add a small dot of nail polish on the bottle's side to mark the fill line—fill it to that level for consistent watering.
For a two-tone system, fill the bottle halfway with plain water and top it with fertilized water (mixed at half-strength). This lets you alternate between hydration and nutrients without switching bottles. Store it in a cool, dark place when not in use to prevent algae growth in the water.
☀️ Step 4: Test and Adjust Your Watering Technique
Fill your bottle with room-temperature water and give your plants a test watering. Start at the base of the plant and move the bottle in a slow, circular motion to ensure even moisture distribution. Watch for water pooling—if it sits on the soil surface, your bottle's stream is too forceful. Adjust by moving farther away or switching to a finer mist setting.
For potted plants, water until you see moisture seep out the drainage holes—this ensures the roots get hydrated. For hanging plants, tilt the bottle to water the roots directly. If your bottle sprays too aggressively, cover the nozzle with your thumb to reduce pressure. The goal is gentle, deep watering that mimics natural rainfall.
⏰ Step 5: Integrate Into Your Plant Care Routine
Use your DIY watering bottle once a week to check soil moisture levels. Stick your finger 1 inch into the soil—if it feels dry, it's time to water. For succulents and cacti, reduce watering to every 2-3 weeks and use the bottle's finest mist setting to avoid over-saturating the roots.
Place your labeled bottles near their corresponding plants to streamline your routine. I keep a small caddy on my kitchen counter with bottles for herbs, a separate one for my living room plants, and another for the bathroom collection. This system cuts watering time in half and keeps my green thumbs happy.
Tips & tricks for perfect DIY plant watering bottles
A few clever tweaks can turn your basic spray bottle into a plant care game-changer. Here's what I wish I knew before repurposing mine:
Nozzle Customization: If your bottle's spray pattern feels inconsistent, try this: Remove the nozzle completely and wrap a small piece of fine mesh (like an old coffee filter) around the opening. Secure it with a rubber band—this creates an even, gentle mist perfect for delicate seedlings. I've also found that cutting a tiny slit in the nozzle with scissors can adjust the spray intensity without losing control.
Storage Strategy: To prevent algae growth between uses, add 1-2 drops of hydrogen peroxide to each bottle after watering. The peroxide breaks down safely and keeps water fresh longer. Store bottles upside-down in a cool, dark place—they'll stay ready for action and won't develop that murky water smell. I keep mine in a small drawer organizer to maximize space.
Labeling Hack: For the fill line, use a piece of masking tape instead of nail polish—it's easier to adjust and won't smudge. I also add color-coding: green tape for herbs, blue for succulents, and red for tropical plants. This visual system makes it instantly clear which bottle goes where, especially when you're watering multiple plants at once.
Water Temperature Tip: Always use room-temperature water—cold water can shock plant roots. If you're in a hurry, fill the bottle with water 10-15 minutes before use. For tropical plants, you can even add a few drops of distilled water to mimic humidity. The key is consistency—your plants will thrive when they receive the same conditions each time.
Pro Tips for Make Plant Watering Bottle
- A few clever tweaks can turn your basic spray bottle into a plant care game-changer. Here's what I wish I knew before...
- Nozzle Customization: If your bottle's spray pattern feels inconsistent, try this: Remove the nozzle completely and w...
- Storage Strategy: To prevent algae growth between uses, add 1-2 drops of hydrogen peroxide to each bottle after water...
Frequently asked questions
Got questions about your DIY plant watering bottle? You’re not alone! Here are some of the most common concerns—and quick, easy answers to keep your plants thriving.
How often should I water my plants with this bottle?
It depends on your plant type! Most houseplants thrive with watering every 1–2 weeks, while succulents or cacti need water every 3–4 weeks. Check soil moisture by sticking your finger 1–2 inches deep—if it’s dry, it’s time to water. Overwatering is the #1 killer, so always let excess water drain away.
Can I reuse old spray bottles from my cleaning supplies?
Just rinse them thoroughly with hot, soapy water to remove residue, then dry completely. Avoid bottles that once held bleach or harsh chemicals—these can linger and harm your plants. A quick vinegar rinse (1:1 water ratio) is a great way to neutralize any leftover grime.
What if my plant’s leaves turn yellow or brown after using the bottle?
Yellowing leaves often mean overwatering, while brown tips can signal underwatering or fluoride/chlorine buildup. Try letting tap water sit out for 24 hours before using it, or collect rainwater for a chemical-free option. If the issue persists, adjust your watering schedule or check for pests.
Are there alternatives if I don’t have spray bottles?
No problem! Upcycle plastic milk jugs (poke holes in the cap), old soda bottles (cut the bottom off), or even clean yogurt containers. Just ensure the holes are small enough to create a gentle mist—large holes can flood roots. A watering can with a rose attachment also works in a pinch!
Can I use this bottle in cold weather?
Yes, but avoid freezing temperatures. If your plants are outdoors, bring the bottle inside overnight or use it in the morning when temps are warmer. Cold water can shock plant roots, so always use room-temperature water for best results. For winter care, reduce watering frequency—most plants go dormant!
Still stumped? Drop your question in the comments—we’re happy to help your green thumb grow!
Wrapping up and next steps
Creating your own DIY plant watering bottle is a simple, eco-friendly way to keep your green friends thriving while saving time and reducing waste! 🌱 With just a few household items, you’ve got a custom solution tailored to your plants’ needs.
Whether you’re a busy gardener or a plant parent looking to simplify care, this project proves that small changes make a big difference.
Now that you’re equipped with your new watering buddy, why not take it a step further? Try experimenting with different spray patterns or even adding a bit of liquid fertilizer for an extra boost. Your plants—and the planet—will thank you! 🌟