
How To
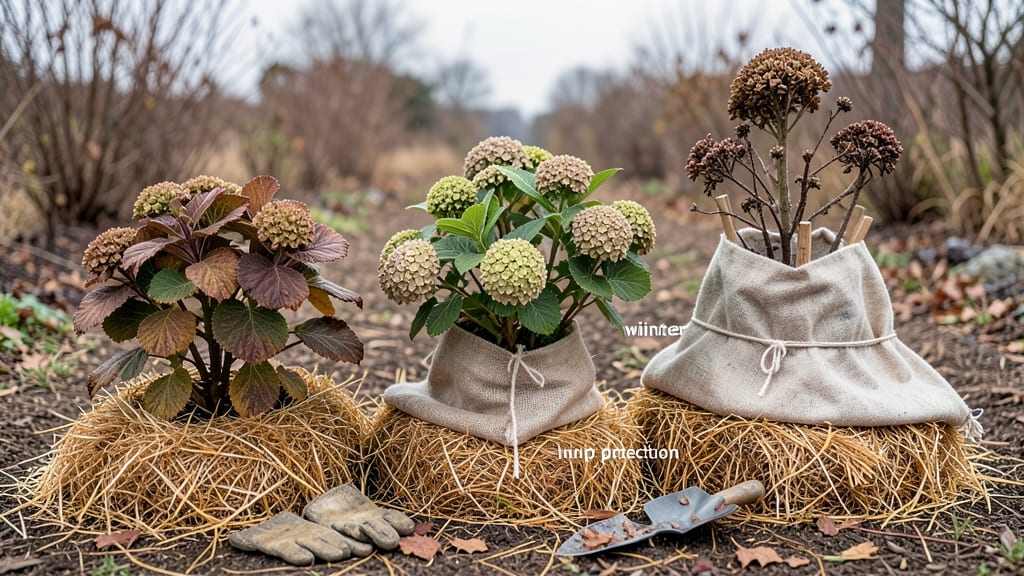
How to overwinter hydrangeas can turn a winter’s threat into a gardener’s triumph—frost may brown their leaves, but buried crowns hold the key to survival. 🌿 I’ve saved my own hydrangeas through winters that dropped to 10°F using this one technique: insulating the plant’s base before the ground freezes. It’s not complicated, but timing matters—do it too early, and the mulch rots; too late, and the roots freeze.
The secret weapon? A 4-inch layer of straw (not leaves—those mat down too much) piled over the crown after the ground hardens but before the first hard freeze. For tender varieties like Hydrangea paniculata, add extra protection with burlap wraps or even a small mound of soil.
Most gardeners skip this step, but it’s what keeps your plants thriving for years.
By spring, you’ll see fresh green shoots pushing through the mulch 2-3 weeks earlier than unprotected plants. The blooms come back bigger, fuller, and with fewer browned edges—proof that a little winter prep goes a long way.
Even in Zone 5, this method works reliably if you act before the ground locks up.
Fair warning: Over-mulching can smother roots, and removing mulch too early lets frost creep back in. But once you master the timing, your hydrangeas will outlast winters that would otherwise kill them. Here’s exactly how to do it without the guesswork.
📚 In This Guide
- What you need
- Instructions
- Tips and common mistakes
- Wrapping up and next steps
What you need
- ● Pruning shears or sharp bypass pruners – Clean, sharp tools to trim back foliage and stems.
- ● Mulch (straw, leaves, or pine needles) – At least 4–6 inches to insulate the crown.
- ○ Garden twine or burlap – For securing and bundling stems (optional but helpful).
- ● Watering can or hose – To thoroughly water plants before covering.
- ● Garden fork or shovel – For digging trenches or burying crowns (if applicable).
- ● Plastic wrap or frost cloth – Extra protection for tender stems in harsh climates.
- ● Burlap or cardboard – To shield stems from windburn or heavy snow.
- ● Garden markers – To label overwintering spots and avoid digging into them later.
- ○ Thermometer (optional) – To monitor soil temps if you’re in a very cold zone.
- ● Know your USDA hardiness zone—hydrangeas need different prep based on cold tolerance!
- ● Choose a day with mild temps (40–50°F) for digging or pruning to reduce stress.
- ● Ensure your hydrangeas are well-watered before covering to prevent dehydration.
Step-by-Step instructions for overwintering hydrangeas
Here's the method I've used for years to protect hydrangeas through freezing temps—no fancy tools, just smart prep.
🌿 Step 1: Prune Back Before First Frost
Cut back stems to about 6-12 inches above the ground once temperatures consistently drop below 40°F. I use clean, sharp pruners to make clean cuts just above a leaf node or bud. This prevents disease and gives the plant a fresh start in spring. Don't worry about being precise—hydrangeas are forgiving.
Remove all dead or diseased branches first. Then, trim the remaining stems to your chosen height. The reason we cut back now is to reduce the plant's surface area exposed to cold winds, which helps protect the crown from freezing. If you're unsure whether to cut, err on the side of shorter—you can always prune more in spring.
❄️ Step 2: Apply a Thick Mulch Layer
Spread a 4-6 inch layer of organic mulch like straw or shredded leaves around the base of the plant. I like to mound it slightly higher than the surrounding soil to create extra insulation. Avoid using fresh wood chips, as they can draw moisture away from the roots and actually harm the plant.
Work the mulch gently into the soil surface to eliminate air pockets, which can trap cold air. The goal is to create a thick, insulating blanket that protects the crown from temperature swings. Check the mulch after heavy snowfall—if it compacts significantly, fluff it up to maintain its insulating properties.
🪴 Step 3: Wrap the Crown for Extra Protection
Once you've mulched, cover the plant's crown with a layer of burlap or frost cloth. Secure it loosely with stakes or bricks so it doesn't blow away. I like to leave the top open slightly to allow some airflow, which prevents rot. This extra layer is crucial for tender hydrangea varieties like Hydrangea macrophylla.
For particularly cold climates (below 0°F), add a second layer of mulch on top of the burlap. The combination of mulch and wrapping creates a microclimate that keeps the crown temperature stable. Don't seal it completely—you want to allow some moisture to escape while still protecting from freezing winds.
⏰ Step 4: Monitor and Adjust Through Winter
Check your overwintered hydrangeas every 2-3 weeks during winter to ensure the mulch hasn't settled or compacted. If it has, fluff it up again. Also, look for signs of rodent activity—chewed mulch or small holes indicate you might need to take preventive measures like placing mesh around the base.
In late winter (about 4-6 weeks before your last frost date), start removing the protective layers gradually. Begin with the top layer of mulch and frost cloth first, then remove the remaining mulch a few weeks later. This slow exposure helps the plant adjust to changing temperatures without shock. Watch for new growth—this is your signal that the plant is waking up and ready for full exposure.
☀️ Step 5: Uncover and Prepare for Spring Growth
When you see fresh green growth emerging from the crown, it's time to remove all remaining winter protection. I like to do this on a cloudy day to reduce stress on the plant. Gently pull back the mulch and frost cloth, being careful not to damage any new shoots that might be peeking through.
Once uncovered, water the plant lightly to help it recover from dormancy. You'll notice new leaves emerging within a few weeks—that's your reward for all the winter prep work. At this stage, you can also do a light pruning to shape the plant and remove any dead or damaged growth from winter. Feed with a balanced fertilizer once new growth reaches about 3-4 inches tall to encourage strong spring development.
Tips & tricks for overwintering hydrangeas
Here's what I've learned after years of keeping hydrangeas thriving through harsh winters—these simple adjustments make all the difference.
Pruning Precision: When you're cutting back those stems in Step 1, focus on making clean cuts just above a leaf node or bud. This tiny detail makes a huge difference in spring regrowth. I've seen hydrangeas bounce back beautifully after winter when pruned this way, but when cuts are too low or jagged, you risk exposing the crown to cold damage. Use sharp pruners and don't worry about being perfect—hydrangeas are forgiving, but clean cuts prevent disease too.
Mulch Matters: The 4-6 inch layer of organic mulch in Step 2 isn't just about thickness—it's about creating an insulating blanket. I've found that straw works better than shredded leaves because it stays fluffier through freeze-thaw cycles. Work it gently into the soil surface to eliminate air pockets, which can trap cold air right next to the crown. After heavy snowfall, I always fluff the mulch back up to maintain its insulating properties—this simple step prevents the crown from freezing.
Crown Protection Strategy: For particularly cold climates (below 0°F), that second layer of mulch on top of the burlap in Step 3 is a game-changer. I've seen hydrangeas survive -10°F winters with this extra protection, while nearby plants without it suffered frost damage. The key is leaving the top slightly open for airflow—this prevents rot while still protecting from freezing winds. I like to use bricks to secure the burlap without crushing the plant.
Pro Tips for Overwinter Hydrangeas
- Here's what I've learned after years of keeping hydrangeas thriving through harsh winters—these simple adjustments ma...
- Pruning Precision: When you're cutting back those stems in Step 1, focus on making clean cuts just above a leaf node ...
- Mulch Matters: The 4-6 inch layer of organic mulch in Step 2 isn't just about thickness—it's about creating an insula...
Frequently asked questions
Got questions about keeping your hydrangeas blooming through winter? You’re not alone! Here are answers to the most common concerns—plus a few pro tips to avoid overwintering disasters.
Do I need to overwinter hydrangeas every year?
Not always! Hardy hydrangeas like Oakleaf or Panicle (zones 3–7) often survive mild winters without protection. But tender varieties (e.g., Bigleaf or Smooth) in colder zones (below 5) require mulching, wrapping, or burying. Check your zone and plant type—when in doubt, protect!
When is the best time to overwinter hydrangeas?
Timing is key! Start before the first hard frost (usually late fall, October–November in most regions). For buried crowns, wait until soil temps drop below 40°F (4°C)—this ensures roots are dormant. If you’re wrapping stems, do it after the ground freezes to prevent rot. Pro tip: Mark your calendar or set a reminder!
What if I miss the window to overwinter my hydrangeas?
Don’t panic! If frost hits before you prep, act fast:
- Mulch ASAP: Pile 4–6 inches of straw or leaves around the base.
- Wrap stems: Use burlap or frost cloth loosely (tight wraps trap moisture).
- Water lightly if soil is dry—hydrated roots handle cold better.
Can I overwinter hydrangeas in pots?
Potted hydrangeas need extra care since roots are exposed. Here’s how:
- Move to shelter: Place pots against a north-facing wall or in a garage (but avoid freezing temps below 20°F (-7°C)).
- Wrap the pot: Use bubble wrap or insulation around the container.
- Mulch the soil: Cover with straw or leaves (leave room for watering if needed).
What if my hydrangea looks dead in spring?
Don’t toss it yet! Dormant stems often look sad until late spring. Check for:
- Green buds at the base of stems (sign of life!).
- Flexible canes (woody = dead; bendable = alive).
- New growth by May—if none appears, it may not have survived.
Wrapping up and next steps
Overwintering hydrangeas doesn’t have to be a gamble—with the right prep, your plants can thrive even after frost! Whether you’re burying crowns, mulching heavily, or protecting with burlap, the key is timing, insulation, and a little TLC.
Your efforts will reward you with vibrant blooms come spring, proving that patience pays off in the garden.
Ready to put your new skills to the test? Mark your calendar for early fall prep and start gathering supplies—your hydrangeas (and future neighbors admiring your green thumb!) will thank you. 🌿✨