
Tools
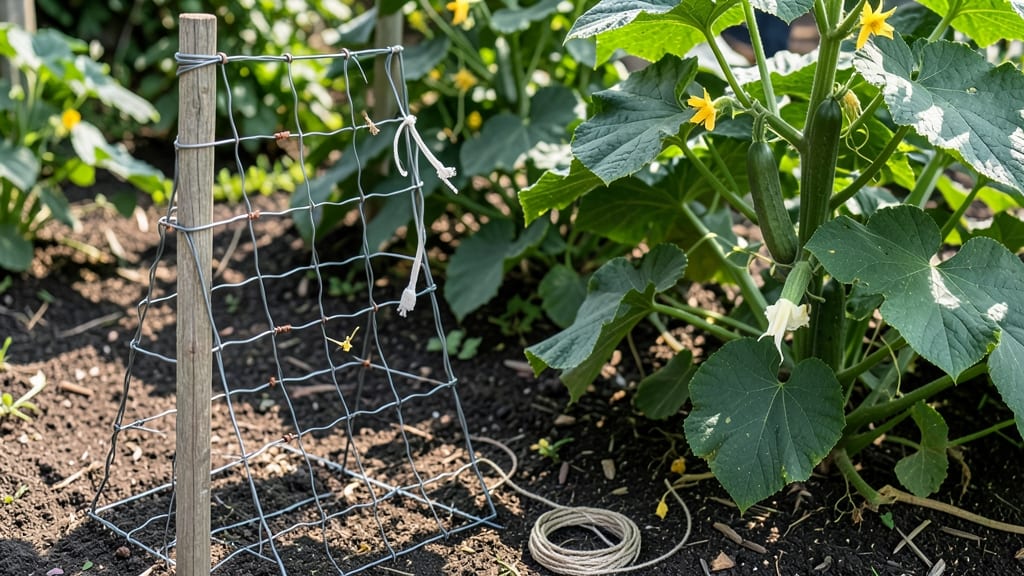
How to build a wire trellis—that first cucumber vine reaching for the sky changed everything. 🌱 A sturdy wire trellis isn't just support—it's the difference between sprawling chaos and a neat, productive garden that actually works for your space. I've built mine from scraps and store-bought kits, and the right wire gauge makes all the difference for heavy climbers like pole beans or rambling roses.
You only need four basic supplies: 12-gauge galvanized wire (the sweet spot for strength and flexibility), sturdy wooden posts (4x4s work great), heavy-duty staples, and a tape measure. No fancy tools—just wire cutters, gloves, and maybe a helper for the heavier sections.
The whole project takes under 60 minutes, even for a 6-foot trellis, and you'll save money compared to pre-made options.
What you end up with is a framework that holds 20+ pounds per vine without sagging, plus the flexibility to train plants exactly how you want. My cucumbers now grow straight up instead of sprawling everywhere, and my clematis blooms are at eye level instead of hidden in the grass.
The best part? You can customize the height, width, and even add diagonal wires for extra support.
Works for everything from vegetable gardens to decorative borders, and the same basic technique scales from small balcony setups to full backyard installations. Let's get those posts in the ground—your plants will thank you by summer.
📚 In This Guide
- What you need
- Instructions
- Tips and common mistakes
- Wrapping up and next steps
What you need
- ● Galvanized wire: 12- to 16-gauge (for flexibility and strength). Aim for 100–200 feet, depending on trellis size (e.g., 100 ft for a 4’x6’ frame).
- ● Wooden posts: 4x4 or 2x4 pressure-treated lumber (4–6 posts, 6–8 feet tall, spaced 4–6 feet apart).
- ● Concrete or gravel: For anchoring posts (1–2 bags of quick-setting concrete or 50 lbs of gravel per post).
- ○ Post anchors or rebar: Optional but recommended for extra stability (4–6 pieces, 12–18 inches long).
- ● Measuring tape
- ● Post hole digger or auger (rent if needed)
- ● Level
- ● Hammer or mallet
- ● Wire cutters or heavy-duty scissors
- ● Pliers (for twisting wire)
- ○ Staple gun (optional, for securing wire to posts)
- ● Wire twist ties or zip ties (for securing wire ends)
- ● Garden twine (for tying plants to the trellis)
- ● Decorative paint or stain (to match your garden aesthetic)
- ● T-posts (if you prefer no concrete anchors)
Step-by-step instructions for building a wire trellis
Here’s how to create a sturdy, customizable trellis that’ll support climbing plants for years—no power tools required.
🪴 Step 1: Assemble the Frame with Sturdy Posts
Start by driving two 4-foot wooden posts into the ground at least 12 inches deep—this ensures stability against wind. Space them 4 feet apart for a standard 4-foot-wide trellis. I like to use 2x4 lumber for the frame because it’s lightweight yet strong enough to hold vertical wires. Cut two 4-foot horizontal beams to connect the posts at the top and bottom, securing them with 3-inch deck screws or heavy-duty staples.
Check for square by measuring diagonally from corner to corner—both measurements should match. If not, adjust the posts before securing. This frame will be the backbone of your trellis, so take your time here. Uneven frames make wobbly supports that sag under heavy vines.
💧 Step 2: Attach Horizontal Wires for Vine Support
Stretch 18-gauge galvanized wire (the standard for trellises) horizontally between the posts at 6-inch intervals. Start at the bottom, leaving 3 inches of space from the ground to prevent soil splatter on climbing plants. Use heavy-duty zip ties or staple guns to secure the wire to the frame—no knots, which can loosen over time. For a 4-foot trellis, you’ll need 7 horizontal wires total.
Pull the wire taut but not so tight it snaps—just firm enough to support 10-pound vines without stretching. I like to use a level to ensure all wires run perfectly horizontal. If the wire sags after a few weeks, it’s time to tighten it again. This is the part where most DIY trellises fail—don’t skip the level check!
✂️ Step 3: Add Vertical or Diagonal Supports for Heavy Climbers
For plants like pole beans or heavy cucumbers, add vertical wires every 12 inches between the horizontal strands. These extra supports prevent vines from tearing through the main wires. Use the same 18-gauge wire, securing it with zip ties at each intersection. If you’re building a freestanding trellis, add diagonal braces from the top posts to the ground for extra wind resistance.
Test your trellis by gently pulling on each wire—it should hold firm without bending. If any section feels flimsy, add another zip tie or reinforce with a small wooden dowel. Once satisfied, step back and admire your sturdy structure. This is the moment your garden’s vertical space finally feels usable—no more sprawling vines taking over the yard.
🌱 Step 4: Secure and Plant (Optional but Recommended)
Wrap the base of the trellis with landscape fabric to protect the wood from rot, especially if the posts sit in soil. Then, plant your climbers—morning glories, clematis, or pole beans—right at the base of the trellis. Train the main vine along the bottom wire first, then gently weave side shoots upward as they grow. Avoid tying vines directly to the wire; let them twine naturally for stronger growth.
Water deeply after planting to encourage root establishment. Within 2-3 weeks, you’ll see the first tendrils reaching for the wires. This is where the real magic happens—your trellis isn’t just support; it’s the backbone of your vertical garden’s success.
Tips & tricks for perfect wire trellis construction
Took me a while to figure these out, so here goes—these small details make all the difference between a trellis that lasts and one that sags after the first windstorm.
Post Placement Precision: When driving your 4-foot wooden posts 12 inches deep, use a level to ensure they stand perfectly vertical before securing. I’ve seen trellises lean dramatically after just one season because the posts weren’t plumb from the start. For extra stability in windy areas, consider driving a third post in the center—it’ll distribute weight better than relying solely on the two end posts. This is the foundation, so don’t rush it.
Wire Tension Technique: The key to those 6-inch intervals between horizontal wires isn’t just spacing—it’s tension. After securing each wire with zip ties, give it a firm tug to eliminate any slack. Think of it like tightening guitar strings: just enough resistance to hold shape, but not so tight it snaps. I’ve found that wires left slightly loose will sag within weeks, especially with heavy vines like cucumbers. Pro tip: Use a helper to hold the wire taut while you secure both ends—it makes all the difference.
Material Upgrade: While the instructions call for 18-gauge galvanized wire, I’ve switched to 16-gauge wire for my heavier climbers (think grapes or kiwi vines). It’s more expensive but lasts years longer without stretching. For the 2x4 lumber frame, treat it with outdoor wood sealant before assembly—this prevents rot at the soil line where moisture collects. Trust me on this: untreated wood will last only one season in damp climates.
Wind Resistance Hack: For freestanding trellises (not attached to fences), add diagonal braces from the top posts to the ground at a 45-degree angle. Use the same 2x4 lumber for these braces, securing them with deck screws. This simple addition turns your trellis from a flimsy support into a windproof structure. I’ve seen trellises collapse in storms without these braces—don’t skip this step if you’re in a breezy area.
Pro Tips for Build A Wire Trellis
- Took me a while to figure these out, so here goes—these small details make all the difference between a trellis that ...
- Post Placement Precision: When driving your 4-foot wooden posts 12 inches deep, use a level to ensure they stand perf...
- Wire Tension Technique: The key to those 6-inch intervals between horizontal wires isn’t just spacing—it’s tension. A...
Frequently asked questions
Got questions about building a wire trellis? You’re not alone! Here are answers to the most common concerns to help you create the perfect garden support with confidence.
What’s the best wire gauge for a sturdy trellis?
For most garden trellises, 12- to 14-gauge galvanized or aluminum wire is ideal—it’s strong enough to support vines but flexible enough to bend without snapping. Heavier vines (like grapes or kiwi) may need 10-gauge wire or reinforced posts. Avoid thin wire; it’ll sag or break under weight!
How long does it take to build a wire trellis?
For a basic 6-foot-tall, 4-foot-wide trellis, expect to spend 1–2 hours if you’re prepping materials and have basic tools. Rushing can lead to uneven spacing or weak joints, so take your time! Pro tip: Measure twice, cut once—it saves frustration later.
Can I use a wire trellis for heavy plants like cucumbers or squash?
Yes, but with adjustments! For heavy vines, use sturdier posts (4x4 lumber or metal stakes) and closely spaced wire (every 6–12 inches). Add horizontal cross-wires for extra support. Avoid overloading one section—distribute vines evenly to prevent sagging.
What if my trellis sags or bends after installation?
Sagging usually means the wire or posts aren’t secure. Tighten the wire (use zip ties or wire twist ties) and check post depth—they should be buried 12+ inches or anchored with concrete. For extra reinforcement, add diagonal braces between posts. If the wire stretches, replace it with a thicker gauge.
Are there alternatives to wire trellises for small spaces?
For compact gardens, try:
- Bamboo stakes or canes (great for lightweight vines like beans or peas).
- PVC pipe frames (paint them for a polished look).
- Trellis panels (pre-made from wood or metal for instant support).
- String or twine (for temporary, small-scale climbing plants).
Wrapping up and next steps
Building a wire trellis is a rewarding project that adds both functionality and style to your garden! With just a few materials and basic tools, you’ve got everything you need to create a sturdy support system for climbing plants.
Remember, the key is to measure carefully, secure your posts firmly, and twist or weave the wire tightly for durability.
Now that you’re armed with the know-how, go ahead and get creative! Try experimenting with different wire gauges, shapes, or even adding decorative elements. Once your trellis is up, watch your plants thrive as they climb and flourish. Happy gardening! 🌱✨
Ready for more DIY projects? Check out our guide on how to install garden stakes next!