
Flowers
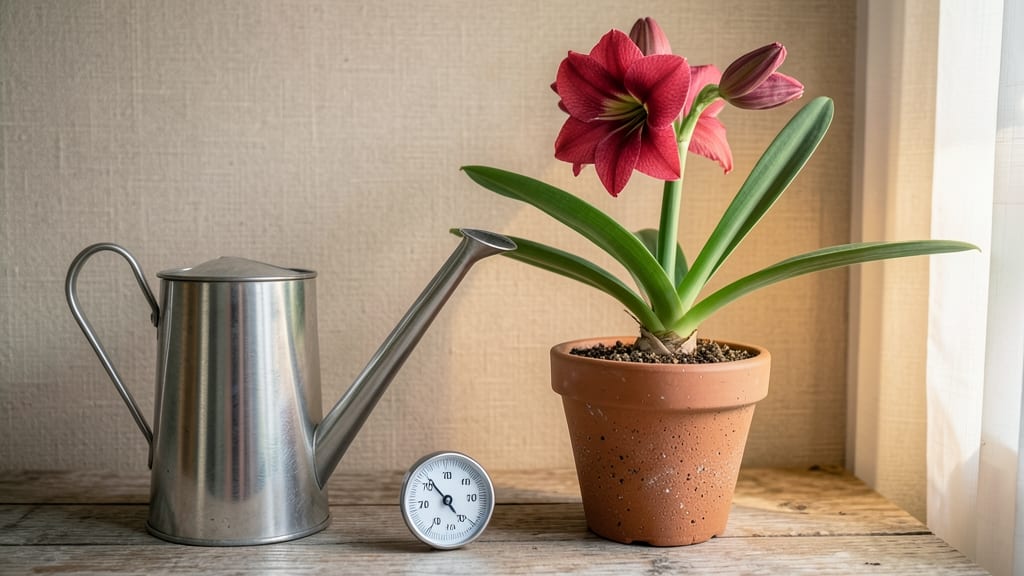
Caring for amaryllis flowers is easier than you think—these bold blooms thrive with just a few simple steps. 🌸 I’ve had mine rebloom every year for five seasons, and the secret isn’t complicated: bright light, occasional water, and a little patience.
Most people overthink it, but amaryllis are forgiving plants that reward minimal effort with dramatic, show-stopping flowers.
The key is matching their natural rhythm: six weeks of darkness in winter triggers blooming, while summer’s warmth lets them rest. You’ll need a sunny window or grow light, well-draining soil, and a pot just slightly larger than the bulb.
Overwatering is the #1 mistake—let the top inch dry out between drinks, and you’ll avoid mushy roots.
By summer’s end, you’ll have lush foliage and—if you’ve given them enough rest—the promise of next winter’s blooms. The flowers themselves last 2-3 weeks, but the bulb keeps producing for years if you follow this cycle.
No greenhouse, no fancy tools, just reliable beauty that comes back stronger every season.
Perfect for apartment dwellers, holiday gift-givers, or anyone who wants drama without the fuss. Here’s how to keep yours thriving year after year—no green thumb required.
📚 In This Guide
- What you need
- Instructions
- Tips and common mistakes
- Wrapping up and next steps
What you need
- ● 1-2 amaryllis bulbs – Choose healthy, firm bulbs (avoid soft or moldy ones!).
- ● Well-draining potting mix – A blend of cactus/succulent mix (60%) and perlite or pumice (40%) works best. Avoid heavy garden soil!
- ● 1-2 pots with drainage holes – Use 6-8 inch containers for single bulbs or larger pots for multiple bulbs. Terracotta or ceramic pots are ideal.
- ● Watering can with a narrow spout – Helps avoid overwatering by targeting the soil directly.
- ● Fertilizer – A balanced, water-soluble fertilizer (10-10-10 or 20-20-20) or a bulb-specific fertilizer for best results.
- ○ Grow lights (optional) – If natural light is limited, a full-spectrum LED grow light (12-14 hours/day) keeps blooms happy.
- ● Spray bottle – For gently misting leaves (especially in dry climates).
- ● Decorative pot cover or saucer – Protects surfaces from water spills.
- ● Humidity tray with pebbles – Boosts moisture levels if your home is dry.
- ● Bulb food or root stimulator – Adds a nutrient boost during planting.
- ● Pruning shears – For trimming dead foliage or spent blooms cleanly.
- ● Support stake or floral wire – Helps tall stems stand upright.
Step-by-Step instructions for growing amaryllis blooms year-round
Here's how I keep my amaryllis blooming reliably—no black thumb required.
🌱 Step 1: Plant the Bulb in Well-Draining Soil
Fill a pot with 6-8 inches of diameter with a mix of potting soil and perlite (60% soil, 40% perlite). Amaryllis bulbs need excellent drainage—waterlogged roots will rot before they bloom. Gently place the bulb in the center, leaving about ⅓ of it exposed above soil level. This exposed portion helps prevent rot and encourages strong root growth.
Press the soil lightly around the bulb so it stays upright. The bulb's natural shape tells you which way is up—the pointed side should face upward. Water lightly after planting, just enough to settle the soil around the base. You'll know it's right when the soil feels moist but not soggy.
☀️ Step 2: Provide Bright, Indirect Light
Amaryllis bulbs crave bright light for 6-8 hours daily, but direct midday sun can scorch the leaves. A south- or east-facing window is ideal. If your space is dim, supplement with a grow light positioned 12-18 inches away. You'll see the leaves respond within a week—healthy growth means you've got the light right.
Rotate the pot a quarter turn weekly so the plant grows evenly. Leggy growth or leaves leaning toward the light means you need to move it closer. The goal is sturdy, upright stems that can support the heavy flower stalks later.
💧 Step 3: Water When Soil Dries Out
Water your amaryllis when the top 2 inches of soil feel dry to touch. Overwatering is the #1 killer of these plants—yellowing leaves or mushy bulbs are sure signs you're watering too much. Use room-temperature water to avoid shocking the roots, and always water at the base, not over the leaves.
Reduce watering significantly once the flower stalk appears. The bulb draws moisture from the soil to fuel the bloom, so let the top 3-4 inches dry out completely between waterings. This mimics their natural drought cycle and ensures vibrant, long-lasting flowers.
⏰ Step 4: Encourage Blooming with a Rest Period
After flowering, let the leaves yellow naturally—this is how the bulb stores energy for next year. Once the leaves die back, withhold water for 6-8 weeks. Place the pot in a cool, dark spot (50-60°F) where it won't be disturbed. This dormancy period is critical for reblooming.
After 8 weeks of rest, bring the pot back to bright light and resume watering. New growth should appear within 2-3 weeks. Real talk: Skipping this rest period means fewer (or no) blooms next time. The bulb needs this break to recharge.
✂️ Step 5: Prune and Maintain for Next Year's Blooms
Once the flower stalk wilts, cut it at the base with clean scissors. Don't remove the leaves—they photosynthesize and feed the bulb. If leaves turn brown, trim them back but leave as much green as possible. Fertilize lightly with a balanced 10-10-10 fertilizer every 4-6 weeks during the growing season.
Repot every 2-3 years when the bulb outgrows its container. Choose a pot just 1-2 inches larger in diameter—too much space encourages leaf growth over blooms. The key is balance: enough room for roots but not so much that the bulb wastes energy filling empty space.
Tips & tricks for perfect amaryllis care
Real talk: Amaryllis care isn't rocket science, but these little details make all the difference between a one-time bloom and year-round beauty.
Soil Mix Secrets: The 60% potting soil to 40% perlite ratio in Step 1 isn't just about drainage—it's about aeration too. I've found that adding a handful of orchid bark to the mix gives even better airflow to the roots. This prevents that dreaded mushy bulb scenario while still holding enough moisture for healthy growth. The exposed third of the bulb acts like a natural moisture regulator—think of it as the plant's built-in humidity control.
Lighting Hacks: That 6-8 hours of bright light in Step 2 is non-negotiable, but here's what nobody tells you: if your amaryllis starts stretching toward the light (called etiolation), it's already too late to fix it this season. Instead, place your grow light just 12 inches away initially and adjust as the plant grows. I've seen dramatic improvements in stem thickness when I move the light closer as the leaves grow taller—it's like giving your plant a personal trainer for stronger stems.
Watering Wisdom: The 2-inch soil dryness test in Step 3 is your best friend, but here's my pro move: I use a chopstick to check moisture. Stick it in the soil—if it comes out clean, water time. If it's damp just 1 inch down, wait another day. This method gives you a more precise read than just touching the surface. And when that flower stalk appears? That's your cue to get stingy with water—let those top 3-4 inches dry out completely between waterings. The bulb will thank you with bigger, brighter blooms.
Dormancy Done Right: The 6-8 week rest period in Step 4 is where most people mess up. I store my pots in a cardboard box in my garage (around 50-60°F) with a little packet of silica gel to absorb any moisture. The key is consistency—don't peek at the bulb or move it around. I mark my calendar 8 weeks out so I don't accidentally bring it back too early. When new growth appears in 2-3 weeks, that's your green light to bring it back into the light.
Pro Tips for Care For Amaryllis Flower
- Real talk: Amaryllis care isn't rocket science, but these little details make all the difference between a one-time bloom and year-round beauty.
- Soil Mix Secrets: The 60% potting soil to 40% perlite ratio in Step 1 isn't just about drainage—it's about aeration too.
- Instead, place your grow light just 12 inches away initially and adjust as the plant grows.
Frequently asked questions
Got questions about keeping your amaryllis thriving? Here are answers to the most common concerns—so you can enjoy those stunning blooms with confidence!
How often should I water my amaryllis?
Water your amaryllis only when the top 1-2 inches of soil are dry. Overwatering is the #1 killer—stick to every 7-10 days (less in winter). Use well-draining soil and a pot with drainage holes to prevent soggy roots.
Why isn’t my amaryllis blooming?
Blooms need a 12-week "rest period" after flowering: reduce water, stop fertilizing, and keep it in cool (60–65°F) light. If it’s been years since blooming, try replanting in fresh soil or giving it a bright, indirect spot.
Can I grow amaryllis outdoors?
Yes, but only in USDA zones 9–11 (or as an annual in colder climates). Plant bulbs in well-draining soil after the last frost, in full sun. In colder areas, dig up bulbs in fall, trim foliage, and store them dry until spring.
What do I do if bugs appear on my amaryllis?
Check for mealybugs, aphids, or spider mites on leaves/stems. Wipe off pests with a soapy water cloth or spray with neem oil. Isolate the plant to prevent spreading, and improve airflow by spacing pots apart.
Are amaryllis bulbs toxic to pets?
Yes!
All parts of the amaryllis (bulb, leaves, flowers) are toxic to cats and dogs if ingested. Keep plants out of reach or opt for pet-safe alternatives like spathiphyllum (peace lily) if you have furry friends.
Wrapping up and next steps
Caring for an amaryllis is simpler than you think—just a little patience and the right touch! With the right light, water, and soil, your plant will reward you with stunning blooms year after year.
Remember, consistency is key, whether you’re nurturing new growth or keeping your bulb happy in dormancy.
Now that you’re armed with all the tips, go ahead and give your amaryllis the love it deserves! Ready for more? Try experimenting with different varieties or share your progress with fellow plant lovers—your green thumb is about to shine! 🌸✨