
Container Gardens
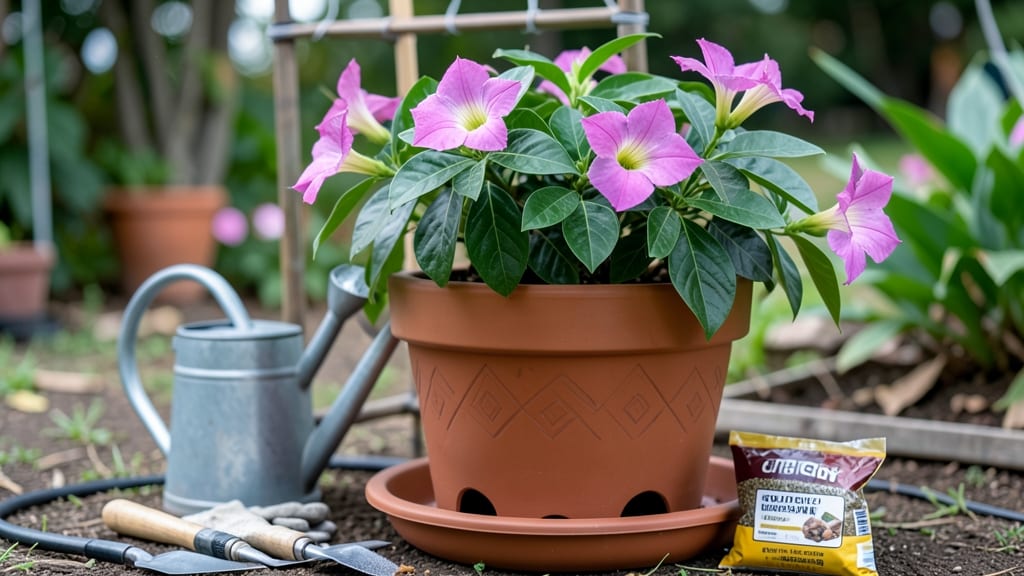
How to care for a mandevilla in pots turns any patio into a tropical paradise with bold, velvety blooms that last all summer. 🌺 I’ve had mine climb trellises for years, and the secret isn’t complicated—just bright light, consistent water, and a little winter prep. Most people overwater or underfeed, but once you nail these basics, your plant will reward you with nonstop flowers from spring through fall.
The right setup makes all the difference: a well-draining potting mix (think 60% potting soil, 30% perlite, 10% compost), a container with drainage holes, and a sunny spot (at least 6 hours of direct light daily).
Mandevilla’s roots are shallow but aggressive—repotting every 2-3 years keeps them from getting root-bound, and pruning after blooms encourages bushier growth. I prune mine back by one-third in early spring, and they bounce back faster than you’d expect.
By summer’s end, your plant will be covered in trumpet-shaped blooms in shades of pink, red, or white, with glossy leaves that add lush texture.
The key to long-term success? Fertilizing monthly during growing season (use a balanced 20-20-20 or a bloom booster) and protecting from frost—Mandevilla is tropical, so it won’t survive below 40°F. Bring pots indoors or wrap them in bubble wrap for winter if you’re in a colder zone.
Even in small spaces, Mandevilla thrives—just match the pot size to its growth (a 5-gallon container works for the first year, but larger plants need 10+ gallons). The biggest mistake? Letting soil dry out completely between waterings.
Stick your finger 1-2 inches deep—if it’s dry, water thoroughly until it drains from the bottom. With these tweaks, your Mandevilla will outperform store-bought plants and become the star of your outdoor space.
📚 In This Guide
- What you need
- Instructions
- Tips and common mistakes
- Wrapping up and next steps
What you need
- ● Container: A pot with drainage holes (minimum 12–18 inches in diameter and depth for mature plants; 10–12 inches for younger ones). Terracotta or fiberglass works best for airflow.
- ● High-Quality Potting Mix: A well-draining blend like 50% peat moss or coconut coir, 30% perlite/pumice, and 20% compost (avoid garden soil—it compacts!).
- ● Mandevilla Plant: A healthy vine (check for green leaves, no pests, and sturdy stems). Nursery-bought or propagated cuttings work!
- ● Support Structure: A trellis, bamboo stake, or decorative obelisk (4–6 feet tall) to guide the vine upward.
- ● Slow-Release Fertilizer: A balanced, time-released granular fertilizer (e.g., 10-10-10 or 14-14-14) to mix into the soil at planting.
- ● Watering Can or Hose: With a gentle spray nozzle to avoid disturbing the soil.
- ● Pruning Shears: Sharp, sterilized shears for trimming (clean with rubbing alcohol between cuts).
- ● Mulch: Orchid bark or pine needles to retain moisture and add aesthetics.
- ● Liquid Fertilizer: A balanced liquid feed (e.g., 20-20-20) for mid-season boosts (dilute to half-strength).
- ● Self-Watering System: A wicking system or drip irrigation for busy gardeners.
- ● Decorative Accents: Pebbles, moss, or colorful pots to elevate your container’s style.
- ● Gloves & Sunscreen: Because handling pots and pruning in the sun can get messy and warm!
Step-by-step instructions for caring for mandevilla in pots
Here’s how to keep your mandevilla thriving in containers—no greenhouse required.
🪴 Step 1: Select the Right Container and Drainage
Mandevilla roots need room to spread but also excellent drainage. Choose a pot with drainage holes—at least 12 inches in diameter for mature plants—and elevate it on feet or a saucer to prevent root rot. Terra cotta pots work best because they wick away excess moisture, but plastic containers are fine if you monitor watering closely.
Real talk: I’ve seen mandevilla plants drown in decorative pots with no drainage. If your container lacks holes, drill them yourself—2-3 holes near the bottom—and use a well-draining potting mix to prevent soggy roots. The key is balance: big enough for roots but not so large that soil stays wet too long.
☀️ Step 2: Position for Bright, Indirect Light
Mandevilla craves morning sun and afternoon shade, especially in hot climates. A south- or west-facing window with filtered light is ideal, but direct midday sun can scorch leaves. If you’re growing outdoors in summer, place the pot in partial shade—3-4 hours of direct sun max—and bring it indoors when temperatures hit 90°F+.
Watch for these signs: Leaves turning yellow or crispy edges mean too much sun. If the plant stretches toward the light with sparse leaves, it’s not getting enough. Adjust placement until you see dark green, glossy foliage and plentiful blooms—that’s your happy plant.
💧 Step 3: Water Deeply but Sparingly
Let the top 1-2 inches of soil dry out between waterings—stick your finger in the soil to check. When it feels dry, water deeply until it drains from the bottom, then empty the saucer to prevent root rot. Overwatering is the #1 killer of potted mandevilla, so err on the side of underwatering unless you’re in a humid climate.
Here’s the thing—I’ve killed mandevilla plants by watering on a schedule instead of checking soil moisture. In winter, reduce watering to every 10-14 days since growth slows. You’ll know you’re doing it right when the soil feels light and slightly dry at the surface but moist 2 inches down.
✂️ Step 4: Prune and Fertilize for Bushier Growth
Pinch back leggy stems in early spring to encourage branching. Cut just above a leaf node with clean, sharp pruners, and don’t worry about losing flowers—new blooms will form on fresh growth. After pruning, feed with a balanced liquid fertilizer (10-10-10) every 2-3 weeks during the growing season (spring to fall).
I like to fertilize right after watering so the roots absorb nutrients efficiently. If you see yellow leaves, it’s often a sign of over-fertilizing—flush the soil with water to dilute excess salts. Deadhead spent blooms to redirect energy into new flowers, and you’ll be rewarded with nonstop blooms from spring to frost.
🌿 Step 5: Protect from Cold and Pests
Mandevilla is tropical—it won’t survive below 40°F. Move pots indoors before the first frost or cover them with frost cloth if you’re in a borderline zone. In winter, reduce watering and fertilizing, and place the plant near a bright window (grow lights help if natural light is weak).
Keep an eye out for aphids or spider mites, which love stressed plants. Wipe leaves with a soapy water solution (1 tsp mild dish soap per quart of water) if you spot pests. A healthy mandevilla with proper light and watering rarely gets infested, but early intervention keeps things under control.
Tips & tricks for thriving potted mandevilla
Common pitfalls—and how to sidestep every one—when keeping your mandevilla happy in containers.
Container Size and Soil Strategy: The 12-inch minimum diameter isn't just about roots—it's about airflow. I've seen mandevilla plants develop root rot in oversized decorative pots because the soil stays damp too long. If you're using a larger pot, add extra perlite or coarse sand to the mix to improve drainage. For terra cotta pots, the porous material helps wick away moisture naturally, but check soil moisture more frequently in plastic containers.
Light Adjustment Secrets: That 3-4 hours of morning sun is non-negotiable, but here's the trick: rotate your pot every few weeks so all sides get even light exposure. You'll notice new growth developing more uniformly, and the plant won't become lopsided. In winter, supplement with a grow light if natural light is weak—mandevilla needs at least 6 hours of light daily to maintain blooming.
Watering Precision: The finger test is your best friend. Stick your finger 2 inches down—if it feels moist, wait. If it's completely dry, water until it drains freely from the bottom. I've learned this the hard way: soggy soil leads to root rot faster than you'd think, while dry soil causes leaves to droop dramatically but recovers quickly once watered. The key is consistency in your checking routine.
Fertilizer Timing: That 2-3 week schedule during growing season works, but here's what nobody tells you—the first feeding after repotting should wait 4-6 weeks. New roots are sensitive to fertilizer salts, and you'll get stronger growth if you let them establish first. Also, always dilute your 10-10-10 fertilizer by half—mandevilla is sensitive to salt buildup, which shows up as brown leaf tips.
Pro Tips for Care For Mandevilla In Pots
- Common pitfalls—and how to sidestep every one—when keeping your mandevilla happy in containers.
- Container Size and Soil Strategy: The 12-inch minimum diameter isn't just about roots—it's about airflow.
- Light Adjustment Secrets: That 3-4 hours of morning sun is non-negotiable, but here's the trick: rotate your pot every few weeks so all sides get even light exposure.
Frequently asked questions
Got questions about keeping your potted Mandevilla happy? You’re not alone!
Here are answers to the most common concerns—so you can enjoy those stunning blooms without the guesswork.
How often should I water my potted Mandevilla?
Water your Mandevilla when the top 1–2 inches of soil feel dry. In summer, this might mean watering every 2–3 days, while winter care could stretch it to once a week. Overwatering is the #1 killer—always check moisture before adding more! Drainage holes in pots are a must to prevent root rot.
Can Mandevilla survive winter in pots?
Yes, but with care! Mandevilla is not frost-hardy—move pots indoors or to a sheltered spot (like a garage) before temperatures drop below 40°F (4°C). Reduce watering in winter and place near bright, indirect light. If you’re in a cold climate, consider overwintering as a dormant plant with minimal water.
Why are my Mandevilla leaves yellowing or dropping?
Yellow leaves usually signal overwatering or poor drainage. Check for soggy soil or root rot (smelly, mushy roots). Drooping can also mean underwatering or low humidity. Mist leaves occasionally or place the pot on a tray of pebbles with water to boost moisture.
How do I get my Mandevilla to bloom more?
Blooms thrive with bright, indirect light (6+ hours daily) and regular feeding during spring/summer. Use a balanced fertilizer (20-20-20) every 2–4 weeks. Prune leggy growth in early spring to encourage bushier, flower-heavy plants. Cold drafts or sudden temperature drops can halt blooming—keep it cozy!
What’s the best pot size for Mandevilla?
Start with a pot 1–2 inches larger in diameter than the root ball—too big = soggy soil. Mandevilla grows fast, so upgrade to a 12–14" pot after 1–2 years. Use lightweight, breathable materials like terracotta or fabric pots to prevent root suffocation. Add fresh potting mix every spring for nutrients!
Pro Tip:
Rotate your pot quarter-turns weekly to ensure even sun exposure—this prevents lopsided growth and keeps your Mandevilla looking perfectly balanced!
Wrapping up and next steps
Caring for Mandevilla in pots is all about balancing sun, water, and a little TLC to keep those stunning blooms thriving! With the right soil, drainage, and seasonal adjustments, you’ll enjoy a lush, tropical escape that’s as rewarding as it is beautiful. 🌿✨
Ready to level up your container garden? Start by snagging a healthy Mandevilla plant (or propagating cuttings!) and put these tips into action. Before you know it, your patio or balcony will be bursting with color—one happy vine at a time!