
Tools
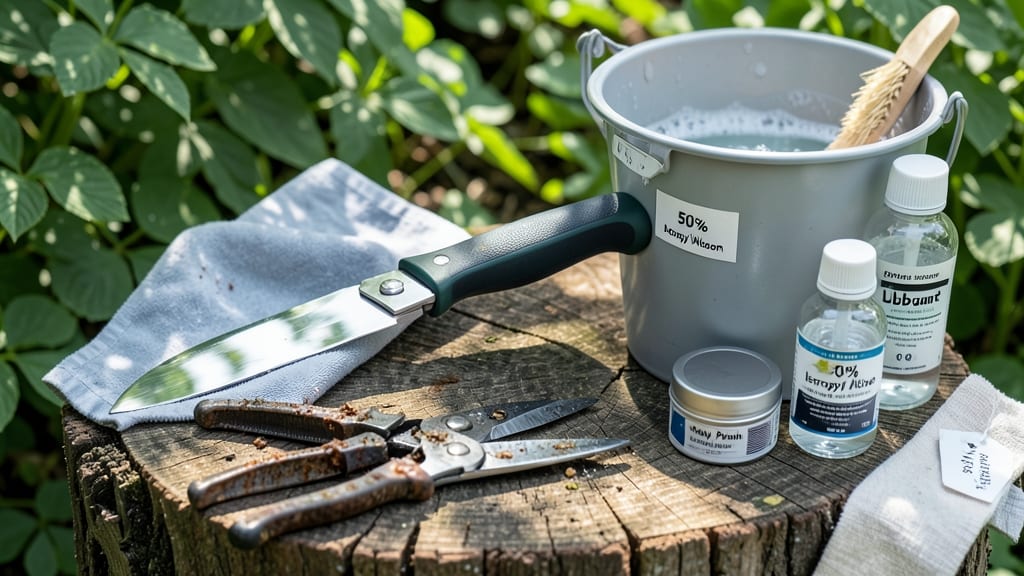
How to clean garden clippers the right way turns pruning into a breeze. ✂️ I’ve spent years wrestling with stubborn blades that snagged leaves instead of cutting cleanly—until I learned this simple routine that keeps them sharp and rust-free for seasons. The secret isn’t fancy tools; it’s just a few minutes of care after every use.
Grab a clean rag, some white vinegar, a small brush, and a drop of mineral oil—that’s it. First, wipe away sap and debris with the rag, then soak the blades in vinegar for 5 minutes to dissolve grime.
Scrub with the brush to remove rust or dried plant residue, and dry thoroughly before oiling the moving parts. This keeps blades sharp and hinges smooth.
When you do this after every use, your clippers stay in top shape for years—no more struggling with dull edges or rusted blades mid-prune. The payoff? Clean cuts that heal faster, healthier plants, and tools that last through multiple growing seasons.
Plus, you’ll avoid the panic of a blade seizing up when you need it most.
For stubborn rust, soak blades overnight in vinegar and scrub with steel wool. Store clippers dry and oiled in a case or hanging rack to prevent moisture buildup. A little maintenance now means fewer headaches—and more time enjoying your garden—later. Let’s get those blades gleaming!
📚 In This Guide
- What you need
- Instructions
- Tips and common mistakes
- Wrapping up and next steps
What you need
- ● Soft-bristle brush (e.g., toothbrush or nylon brush) – 1 (for scrubbing debris)
- ● Rag or microfiber cloth – 2-3 (for wiping down blades and handles)
- ● Mild dish soap (e.g., Dawn) – 1 small amount (gentle but effective)
- ● Rust inhibitor oil (e.g., WD-40 Specialist or 3-in-1 oil) – 1 small bottle (prevents future rust)
- ● Rubbing alcohol (70% or higher) – 1 small bottle (disinfects and dries quickly)
- ● Paper towels – 1 roll (for final drying)
- ● Wire brush (for stubborn rust or sap buildup)
- ● Hose with spray nozzle (if clippers are very dirty)
- ● Vinegar (white) (mix with water for a natural rust remover)
- ● Gloves (nitrile or rubber, to protect your hands)
Step-by-Step instructions for cleaning garden clippers
Here's the quick, foolproof method I use after every cutting session to keep my clippers sharp and rust-free.
🪴 Step 1: Disassemble and Remove Debris
Start by opening your clippers completely—most have a simple lever or screw mechanism. Lay them on a clean towel to catch any dirt that falls out. I always run my finger along the blade edges and pivot point to dislodge stubborn plant residue. Use a small screwdriver if needed, but be gentle to avoid damaging the pivot.
For stubborn sap or dried sap, I grab a stiff-bristled brush (like an old toothbrush) and scrub the blades and pivot area. This prevents gunk from hardening and making future cleaning harder. Never use your hands to pry—you'll risk cuts or bent blades.
💧 Step 2: Soak in Warm Soapy Water
Fill a bucket with warm water (not hot—just warm enough to feel comfortable) and add a few drops of mild dish soap. I use Castile soap because it cuts grease without harsh chemicals. Submerge the blades completely for 5-10 minutes to loosen deep-seated dirt. For really gunked-up clippers, I let them soak overnight—rust and sap have no chance against this.
Agitate the blades gently with your fingers or a soft brush after soaking. You'll feel the grime release immediately. If you notice rust spots forming, don't panic—we'll handle that next. The key here is consistency: cleaning after every use prevents buildup entirely.
✂️ Step 3: Scrub and Dry Thoroughly
Use a clean rag or paper towel to wipe down all surfaces, including the pivot area and handle. For stubborn spots, I dip a toothbrush in mineral oil (just a drop) and scrub the blade edges and pivot. This lubricates moving parts while you clean. Wipe again immediately—excess oil attracts dirt.
Let the clippers air-dry completely before reassembling. I prop them open with a rubber band to ensure airflow reaches the pivot. Never store them damp—rust starts within 24 hours if moisture lingers. A quick check: if condensation forms on the blades, they're not dry enough yet.
🪴 Step 4: Apply Protective Oil and Reassemble
Once fully dry, apply 2-3 drops of light machine oil (like 3-in-1 oil) to the pivot and blade edges. Work it in with your finger until you see a thin, even coating. This prevents rust and keeps the blades moving smoothly. Avoid over-oiling—excess attracts dust and gunk faster.
Reassemble the clippers and give the pivot a few test opens and closes. If it feels stiff, add another drop of oil. Store them in a dry place (like a tool caddy or hanging rack) with the blades open to air out completely. I keep mine near my gardening tools so they're ready for the next session.
⏰ Step 5: Monthly Deep Maintenance
Every 4-6 weeks, even with regular cleaning, I do a deeper check. Remove the blades completely (if possible) and soak them in equal parts white vinegar and water for 1 hour. This cuts through any residual rust or mineral buildup. Rinse thoroughly, dry completely, and re-oil before reassembling.
Here's the thing—I've had the same pair of Felco pruners for 10 years because of this routine. The vinegar soak is the secret weapon against rust. After rinsing, I always wipe the blades with a microfiber cloth to remove any vinegar residue, which can be slightly acidic over time.
Tips & tricks for keeping garden clippers rust-free and sharp
These little tricks will save you from dealing with stubborn rust and dull blades in the long run.
Sap Removal Secret: In Step 1, when you're dealing with dried sap, I've found that a small drop of rubbing alcohol on a cotton swab works wonders for dissolving sticky residue without scratching the blades. Just dab gently along the edges—it cuts through sap like magic. This is especially helpful for pruners used on trees like maple or birch, which produce thick sap.
Soak Time Flexibility: The 5-10 minute soak in Step 2 is perfect for regular cleaning, but for clippers that have been neglected or used on particularly gunky plants, don't hesitate to extend that soak to the full 24 hours mentioned. I've revived clippers that were practically glued shut with dried sap using this overnight method. Just remember to agitate them occasionally so the soap penetrates all those crevices.
Drying Hack: After Step 3's thorough scrub, I've developed a habit of placing my clippers on a towel rack or even a sunny windowsill to dry. The warmth helps evaporate moisture faster, and the airflow prevents condensation from forming. If you're in a hurry, a quick pass with a hair dryer on low heat (just 30 seconds) can speed things up—just keep it moving to avoid overheating the metal.
Oil Application Technique: When applying the 2-3 drops of light machine oil in Step 4, I've learned to work it in using a clean fingertip rather than just dropping it on. This gives you better control and ensures even coverage. Focus especially on the pivot area—this is where most rust starts if moisture gets trapped. A light coat is all you need; excess oil will just attract more dirt and sap over time.
Pro Tips for Clean Garden Clippers
- These little tricks will save you from dealing with stubborn rust and dull blades in the long run.
- Sap Removal Secret: In Step 1, when you're dealing with dried sap, I've found that a small drop of rubbing alcohol on a cotton swab works wonders for dissolving sticky residue without scratching the blades.
- I've revived clippers that were practically glued shut with dried sap using this overnight method.
Frequently asked questions
Got questions about keeping your garden clippers in top shape? We’ve got answers! Here are some of the most common concerns—plus quick fixes to keep your tools sharp and rust-free for years to come.
How often should I clean my garden clippers?
Clean your clippers after every use if they’ve been cutting wet or dirty plants (like leaves, grass, or sap). For dry conditions, a quick wipe-down weekly is enough. Regular cleaning prevents rust and sap buildup, which dulls blades faster. Think of it like flossing—consistency is key!
Can I use WD-40 to clean and lubricate my clippers?
WD-40 is great for removing sap and rust, but it’s not a long-term lubricant. After cleaning with it, apply a light machine oil or silicone spray to protect moving parts. WD-40 evaporates quickly, leaving blades dry and prone to corrosion over time.
What’s the best way to dry garden clippers after cleaning?
After rinsing, shake off excess water and use a clean microfiber cloth to dry the blades and joints thoroughly. Store them in a dry, well-ventilated spot (like a tool caddy or hanging rack) to prevent moisture buildup. Avoid leaving them in damp garages or sheds—rust loves humidity!
Why are my clippers rusting even after cleaning?
Rust usually means moisture is lingering. Check for:
- Residue: Sap or plant oils can trap moisture—clean blades before storing.
- Storage: Use a silica gel packet in your toolbox to absorb humidity.
- Material: Stainless steel clippers resist rust better than carbon steel—consider upgrading if rust is persistent.
Are there alternatives to manual cleaning for busy gardeners?
Yes! For quick maintenance, try:
- Ultrasonic cleaners (for deep sap removal—soak blades in soapy water with a cleaning solution).
- Compressed air to blow out debris from joints and pivots.
- Pre-cut cleaning wipes (like those for knives) for on-the-go wipe-downs.
Just remember: Nothing beats a good scrub for long-term blade health!
Wrapping up and next steps
Keeping your garden clippers clean and sharp isn’t just about maintenance—it’s about making your gardening tasks easier and more enjoyable!
With the right tools and a quick routine, you can banish rust and dull blades for good. Now that you’re armed with the know-how, there’s no excuse to let your clippers gather dust.
Ready to tackle your next pruning project with confidence? Grab those clippers, follow your new cleaning ritual, and watch your garden thrive—one snip at a time! 🌿✂️