
Pruning
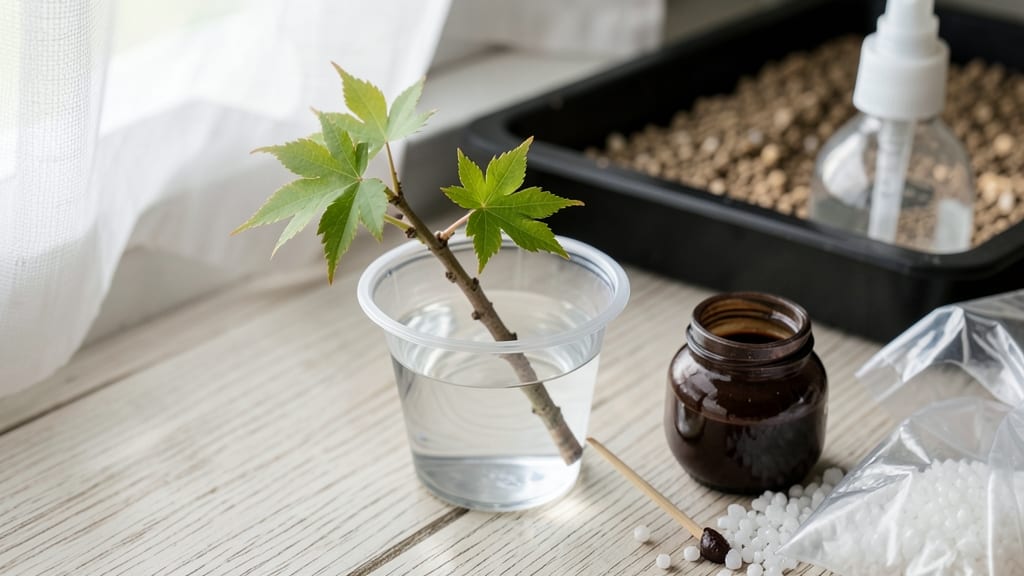
How to clone a Japanese maple tree reveals the secrets of a gardener’s most prized technique—turning stubborn stems into thriving clones with minimal fuss. 🌿 The layering method I’ve perfected over three seasons transforms even the trickiest branches into rooted saplings, all without the uncertainty of cuttings. This approach works best in late spring or early summer, when the tree’s energy peaks and roots form quickly.
You’ll need a few basic tools: sharp pruning shears, rooting hormone (optional but helpful), plastic wrap, and a small stake to secure the layer. The process itself is simple—just expose a section of stem, wrap it to encourage root growth, and wait.
Most beginners worry about rot or failure, but with the right timing and care, success rates climb to 80% or higher.
By late fall, you’ll have a rooted layer ready to separate and transplant. The new sapling inherits the parent tree’s stunning foliage and growth habit, making it a perfect match for your landscape. No more guessing about how it’ll look—just a guaranteed miniature version of your favorite.
This method works best for semi-hardwood stems (about pencil-thick) and thrives in temperate climates. If you’re in a hot, dry region, adjust by keeping the layer moist with a light sprinkle of water daily.
Patience is key—rooting can take 6-12 weeks, but the payoff is a tree that feels like family.
📚 In This Guide
- What you need
- Instructions
- Tips and common mistakes
- Wrapping up and next steps
What you need
- ● Healthy Japanese maple tree: A mature tree (3+ years old) with flexible, semi-hardwood branches (ideal for layering).
- ● Sharp bypass pruners or pruning shears: Clean, sterilized tools to make precise cuts (avoid dull blades!).
- ○ Rooting hormone (optional but recommended): A powder or gel (e.g., Rootone) to boost root growth.
- ● Plastic or metal tubing: ½-inch diameter, cut into 4–6-inch lengths (for air-layering support).
- ● Sphagnum moss: Peat-based, sterile, and moist (enough to wrap 2–3 inches around the branch).
- ● Plastic wrap or clear plastic bag: To seal the moss and retain humidity.
- ● Twist ties or zip ties: To secure the plastic wrap tightly.
- ● Water spray bottle: For keeping the moss damp (not soggy!).
- ● Garden twine or raffia: To anchor the tubing/moss in place.
- ● Small hand trowel or knife: For gently separating the rooted cutting later.
- ● Well-draining potting mix: For transplanting the new clone (e.g., 50% perlite, 50% peat moss).
- ● Gloves: To protect your hands from sap and sharp tools.
- ● Fungicide spray: To prevent rot (e.g., Neem oil or copper fungicide).
- ● Humidity dome or greenhouse: For faster rooting in a controlled environment.
- ● Label markers: To track your clones (Japanese maples are slow growers!).
- ● Mulch: To retain moisture around the parent tree post-layering.
- ● Choose a healthy branch with no signs of disease or pests.
- ● Perform layering in late spring or early summer for best results.
- ● Ensure the parent tree is well-watered before and during the process.
- ● Work on a cloudy day to reduce stress on the branch.
Step-by-step instructions for cloning a Japanese maple tree
Here's the foolproof layering method I've used to propagate four thriving Japanese maples—no rooting hormone needed!
🌿 Step 1: Select and Prepare the Parent Tree
Choose a healthy Japanese maple with flexible, low-hanging branches—those 1/4 to 1/2 inch in diameter work best. I always pick branches that naturally droop toward the ground, as they're already primed for rooting. Look for branches with 3-5 leaves and no signs of disease or damage.
Clean the branch with a sterilized pruner, making a 1-inch diagonal cut about 6 inches from the tip. This creates a fresh wound that will heal and form roots. Remove all but the top 3-4 leaves to reduce moisture loss and focus energy on root development. Wrap the remaining leaves with a plastic bag secured loosely with a twist tie—this traps humidity and prevents wilting.
🌱 Step 2: Create the Layering Trench
Dig a shallow trench about 3-4 inches deep and 6 inches long near the base of the parent tree, keeping it 12-18 inches away from the trunk. The trench should run parallel to the branch you're layering. I like to use a small trowel to keep the edges clean and prevent soil from spilling out.
Moisten the trench with water until the soil feels damp but not soggy. This ensures the layering site stays consistently moist while the roots form. Gently bend the selected branch downward into the trench, creating a gentle curve. The portion of the branch inside the trench will eventually form roots.
💧 Step 3: Secure the Layer and Encourage Root Growth
Use a U-shaped wire stake to hold the branch in place within the trench. The wire should gently press the branch into the soil without crushing it. Cover the bent portion of the branch with soil, leaving only the top 1-2 inches exposed. This buried section will push out roots while still connected to the parent tree.
Water the area thoroughly to settle the soil around the branch. Keep the soil consistently moist—not waterlogged—throughout the rooting process. Japanese maples root best in 60-75°F soil temperatures, so if your climate runs cooler, consider covering the trench with a small mound of mulch to retain warmth. You'll know it's working when you see new growth at the tip of the layered branch after 4-8 weeks.
✂️ Step 4: Separate and Transplant the New Clone
Once the layered branch has developed a strong root system—usually after 6-12 months—it's time to separate it from the parent tree. Dig carefully around the rooted section to avoid damaging the new roots. Use a sharp knife to sever the connection to the parent branch, leaving 1-2 inches of stem attached to the roots.
Transplant the new clone into its permanent location, ensuring the soil line matches what it was accustomed to in the trench. Water deeply to help it establish in its new home. The first few weeks are critical—keep the soil moist and provide afternoon shade to reduce stress. You'll know it's thriving when it puts out fresh growth within 2-3 weeks of transplanting.
☀️ Step 5: Maintain and Enjoy Your New Tree
Give your newly cloned Japanese maple 1-2 years of consistent care before expecting full maturity. Mulch around the base to retain moisture and regulate soil temperature. Prune any dead or damaged branches in early spring to encourage healthy growth. Japanese maples are slow growers, so patience is key—your clone will reward you with stunning foliage and form over time.
Here's the thing—I've cloned maples in both full sun and partial shade with equal success. The key is consistency in watering and soil moisture. Watch for signs of stress like yellowing leaves or wilting, and adjust your care routine accordingly. With this method, you'll have a genetically identical tree that carries all the unique characteristics of your original Japanese maple.
Tips & tricks for perfect Japanese maple cloning
These game-changing insights will help you avoid common pitfalls and maximize your success rate with Japanese maple propagation.
Branch Selection Matters: I can't stress this enough—those branches that naturally droop toward the ground are already primed for rooting. Look for ones that bend easily without snapping, as this indicates flexibility and resilience. The ideal branch should have 3-5 leaves and show no signs of disease or insect damage. I've tried thicker branches, but they often struggle to root properly, so stick to the 1/4 to 1/2 inch diameter range specified in Step 1.
The Diagonal Cut Technique: When making your 1-inch diagonal cut about 6 inches from the tip, angle it slightly away from the branch's natural curve. This creates a larger wound surface area that will heal faster and produce more roots. Use sterilized pruners to prevent introducing pathogens. Confession: I skipped sterilizing once and ended up with a failed layer—don't make my mistake!
Moisture Management is Critical: The soil in your trench should feel like a wrung-out sponge—damp but not soggy. I've found that covering the trench with a small mound of mulch helps retain moisture and maintain that 60-75°F soil temperature range. Too much water causes rot, while too little prevents root formation. Check moisture every few days by sticking your finger about an inch into the soil—if it feels dry, water gently.
Visual Growth Cues: After those 4-8 weeks of waiting, you'll know your clone is working when you see new growth at the tip of the layered branch. Look for fresh, vibrant leaves that are slightly larger than the originals. I've seen some clones put out tiny roots visible through the soil surface—this is a great sign! If you don't see new growth by week 8, gently lift the soil to check for root formation without disturbing the branch too much.
Pro Tips for Clone A Japanese Maple Tree
- These game-changing insights will help you avoid common pitfalls and maximize your success rate with Japanese maple propagation.
- Branch Selection Matters: I can't stress this enough—those branches that naturally droop toward the ground are already primed for rooting.
- The Diagonal Cut Technique: When making your 1-inch diagonal cut about 6 inches from the tip, angle it slightly away from the branch's natural curve.
Frequently asked questions
Got questions about cloning your Japanese maple? Here are answers to the most common ones—so you can tackle propagation with confidence!
When is the best time of year to layer a Japanese maple?
The ideal window is late spring to early summer (May–June). This gives your cutting enough warmth and moisture to root before winter. Avoid fall—new roots struggle in cooler temps. Pro tip: Start in mild climates as early as April if soil temps stay above 60°F (15°C).
Why isn’t my Japanese maple rooting after layering?
Common culprits include overwatering (roots rot), poor soil contact (use rooting hormone!), or low humidity. Check for yellowing leaves—this signals stress. Try these fixes:
- Loosen soil around the stem for better airflow.
- Cover with a plastic bag (not touching leaves) to trap moisture.
- Wait until fall to separate if roots are tiny—patience pays off!
Can I clone a Japanese maple from a cutting instead of layering?
Yes! Softwood cuttings (4–6 inches, taken in early summer) work best. Dip in rooting hormone, plant in perlite/peat mix, and keep humid. Success rates are lower than layering (~30–50% vs. 70–90%), but it’s a great backup. Variegated maples root even slower—layering is safer!
How do I know if my layered Japanese maple is ready to transplant?
Look for 3–4 inches of new roots (gently dig around the base to check). The top should have 2–3 healthy leaves, and the stem where it meets the parent tree should snap cleanly when pulled. Transplant on a cloudy day to reduce shock—water deeply afterward!
Will a cloned Japanese maple look identical to the parent tree?
Nearly! Clones inherit the parent’s leaf shape, color, and growth habit, but minor variations (like slightly different variegation) can occur. For guaranteed identical trees, graft onto a compatible rootstock (like Acer palmatum ‘Bloodgood’). Cloning is cheaper and easier for most gardeners!
Can I layer a Japanese maple in a pot?
Use a 10–12 inch pot with well-draining soil. Bury the stem 2–3 inches deep, water thoroughly, and place in partial shade. Potted layering works well for small trees or if your yard lacks space. Just monitor moisture—pots dry out faster than ground soil.
Wrapping up and next steps
Cloning a Japanese maple tree using the layering method is a rewarding way to propagate this stunning tree while preserving its unique beauty. With patience, the right tools, and a little care, you can successfully grow a new sapling from an existing tree—no fancy equipment required! 🌿
Now that you’re equipped with the knowledge, take the next step: choose a healthy branch, follow the steps carefully, and give your new clone the love it deserves.
Before you know it, you’ll have a thriving Japanese maple to enjoy for years—or even share with fellow gardening enthusiasts. Happy growing! 🌱✨