
Pests
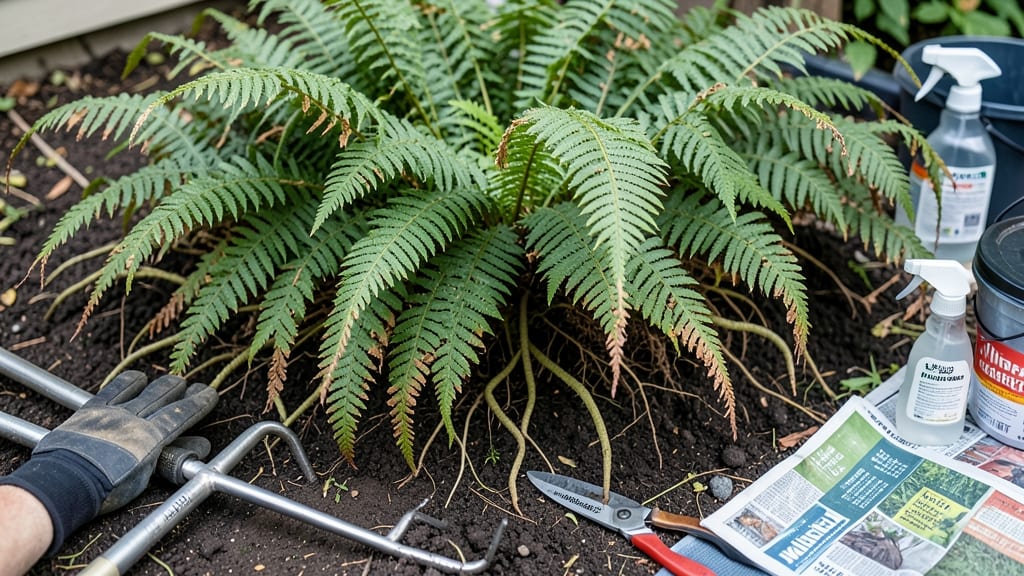
How to get rid of ferns in your yard—without chemicals or endless digging—is a battle I’ve won with a simple but powerful trick: the boiling water barrier method. I’ve spent years wrestling with these relentless plants, and this approach finally gave me the fern-free yard I wanted. The key is timing and precision. Early spring or fall works best when ferns are actively growing but not dormant. You’ll need a kettle (or a portable pour spout), long sleeves, and a sunny day—boiling water kills roots on contact, but you’ve got to be strategic to prevent regrowth.
By creating a 3-inch-wide barrier around the fern patch, you’ll see new growth slow within days and complete eradication in 2-4 weeks. The yard stays fern-free for seasons, and the method works on everything from delicate maidenhair to aggressive sword ferns.
Fair warning: this method requires patience and persistence, but the results—no more fern creep—are worth it. Here’s exactly how to do it without scorching your lawn or burning yourself in the process.
📚 In This Guide
- What you need
- Instructions
- Tips and common mistakes
- Wrapping up and next steps
What you need
- ● Boiling water – At least 5 gallons (use a large pot, kettle, or even a boiling water dispenser for efficiency).
- ● Heavy-duty gloves – Heat-resistant (gardening or kitchen-grade) to protect your hands.
- ● Long-sleeved clothing – Cotton or thick fabric to shield your arms from splashes.
- ○ Garden trowel or shovel – For digging around the fern roots (optional but helpful).
- ● Plastic sheeting or tarp – A 4’x6’ sheet to cover nearby plants if needed.
- ● Garden hose or bucket – For rinsing tools and cooling the area afterward.
- ○ Markers or stakes – To outline the boiling water barrier (optional but useful for precision).
- ● Vinegar (1 part white vinegar + 1 part water) – Spray on remaining fern fronds for extra kill power.
- ● Mulch or landscape fabric – To prevent regrowth after treatment.
- ● Pruners or shears – For trimming stubborn fern tops before boiling.
- ● Safety goggles – If you’re extra cautious about splashes.
Step-by-Step instructions for eliminating ferns using a boiling water barrier
Here's the method that works—no harsh chemicals, just targeted heat to break the fern life cycle.
Identify and Map the Fern Growth Pattern
Walk your yard and mark the fern patches with flags or spray paint. Ferns spread through underground rhizomes, so you'll see distinct clusters. Look for the densest areas—they're the root systems you'll target first. Note where the fern fronds are most vigorous, as these indicate the healthiest underground network.
Measure the diameter of each patch. Most fern colonies spread in a 3-6 foot radius, so plan your treatment zone accordingly. If you see fronds popping up in a straight line, that's likely a rhizome running underground—this is where you'll need to apply extra heat. Sketch a quick map if your yard has multiple patches; this helps you avoid missing any hidden rhizomes.
Prepare the Boiling Water Solution
Fill a large, sturdy watering can or garden sprayer with boiling water—this ensures the water is hot enough to kill rhizomes on contact. Avoid using a kettle or small pot; you'll need at least 2 gallons per patch to saturate the soil effectively. If you don't have a large container, boil water in batches and carefully transfer it to your watering tool.
Add 1 tablespoon of salt per gallon of boiling water. The salt increases the solution's effectiveness by drawing out moisture from the rhizomes, accelerating cell death. Stir well to dissolve the salt completely before applying. Test the temperature by dripping a small amount on your wrist—it should feel painfully hot but not scalding. If it's too cool, reheat it immediately.
Apply the Boiling Water Barrier in Stages
Start at the outer edge of the fern patch and work your way inward. Pour the boiling water solution slowly and evenly over the soil, ensuring it seeps into the ground rather than running off. Focus on the 1-2 inch deep soil layer, where most rhizomes grow. You'll need to apply 2-3 gallons per square yard of fern-infested area to fully saturate the roots.
Repeat the treatment every 3-4 days for 2 weeks. This consistent approach ensures any new rhizome growth is killed before it spreads. Avoid treating on rainy days—watering the area beforehand will dilute the solution and reduce its effectiveness. If you miss a spot, ferns will regrow from the remaining rhizomes, so precision matters.
Monitor and Retreat as Needed
After the initial treatment, watch for new fronds. If you see any emerging within 4-6 weeks, the rhizomes weren't fully eradicated. Reapply boiling water to those specific spots, focusing on the soil rather than the fronds themselves. Ferns are resilient, but repeated heat exposure will eventually break their life cycle.
Once the area is clear, mulch the treated soil with 2-3 inches of landscape fabric or cardboard to prevent new rhizomes from spreading. This barrier also suppresses weeds and conserves moisture in the soil. Water the area lightly after mulching to help the fabric settle. Over time, the fabric will decompose, but by then, the ferns should be gone for good.
Tips & tricks for eliminating ferns in your yard
These practical strategies will help you tackle fern eradication like a pro—without wasting time or effort.
Precision Mapping: In Step 1, when you're marking fern patches, pay special attention to the soil texture. Fern rhizomes often grow in slightly raised or moist areas, so these spots need extra treatment. I've found that using a garden hose to lightly water the mapped areas before marking helps reveal hidden patterns in the soil that aren't visible when dry.
Solution Preparation: For Step 2, if you don't have a large watering can, consider using a clean, repurposed plastic milk jug with the cap removed. Cut a small hole in the bottom and use it like a makeshift watering can. Just be sure to boil the water in batches and transfer it carefully to avoid burns. The salt measurement is critical—too little won't help, but too much can harm surrounding plants, so stick to exactly 1 tablespoon per gallon.
Application Technique: When applying the boiling water in Step 3, work in concentric circles starting from the outer edge. This creates a natural barrier that prevents rhizomes from spreading outward. I've noticed that using a long-handled spoon or stick helps stir the soil slightly before applying water, which helps the solution penetrate deeper into the rhizome network.
Monitoring Strategy: After your initial treatment in Step 4, create a simple checklist of the treated areas. Mark each spot with a small stake or flag and date it. This visual record helps you track which areas need reapplication and which have successfully cleared. I've had the best results when I mark spots that show any sign of regrowth within 3-4 weeks of the initial treatment.
Pro Tips for Get Rid Of Ferns In Your Yard
- These practical strategies will help you tackle fern eradication like a pro—without wasting time or effort.
- Precision Mapping: In Step 1, when you're marking fern patches, pay special attention to the soil texture. Fern rhizo...
- Solution Preparation: For Step 2, if you don't have a large watering can, consider using a clean, repurposed plastic ...
Frequently asked questions
about eliminating ferns from your yard—because even the toughest gardeners need a little clarity! Here are answers to the most common queries to help you tackle those tenacious ferns like a pro.Why do ferns keep coming back even after I pull them out?
Ferns spread via rhizomes (underground stems) and spores, which can lie dormant for years. Simply pulling them out leaves fragments behind, leading to regrowth. The boiling water barrier method kills the entire root system—including hidden rhizomes—for a more permanent solution.
How long does it take to see results after treating with boiling water?
You’ll notice wilting within 24–48 hours, but full eradication takes 3–6 months as the roots decompose. Monitor the area and reapply boiling water to any stubborn spots. Patience pays off—no more fern surprises!
Can I use vinegar or herbicide instead of boiling water?
Vinegar (20–30% acetic acid) works but requires multiple applications and may harm nearby plants. Herbicides (glyphosate) kill ferns but can take longer and pose risks to pets/kids. Boiling water is fast, chemical-free, and targeted—ideal for fern hotspots.
Will boiling water damage my lawn or garden beds?
When applied carefully along the edges of fern patches, boiling water won’t harm grass or most plants. Avoid spraying directly on desirable vegetation. For extra safety, pre-wet the soil around target areas to minimize heat transfer to nearby roots.
Is there a best time of year to treat ferns?
Spring or early summer (when ferns are actively growing) is ideal. Avoid treating in freezing temps or extreme heat—aim for 50–80°F. This timing ensures you catch rhizomes before they spread spores, making eradication easier.
Pro Tip: Test a small area first!
If you’re unsure about boiling water’s effect, patch-test in an inconspicuous spot (like a corner of the yard) 24 hours before full treatment. This helps you gauge heat tolerance of surrounding plants.
Wrapping up and next steps
Getting rid of ferns in your yard doesn’t have to be a never-ending battle! With a boiling water barrier, you can reclaim your space naturally and effectively. Remember, consistency is key—patience and persistence will pay off as you watch those ferns fade away for good. 🌱✨
Now that you’re armed with the right techniques, take action this weekend! Start small—clear a section at a time—and soon, your yard will be fern-free and ready for the plants you do want. Happy gardening! 🌿💪