
Picking
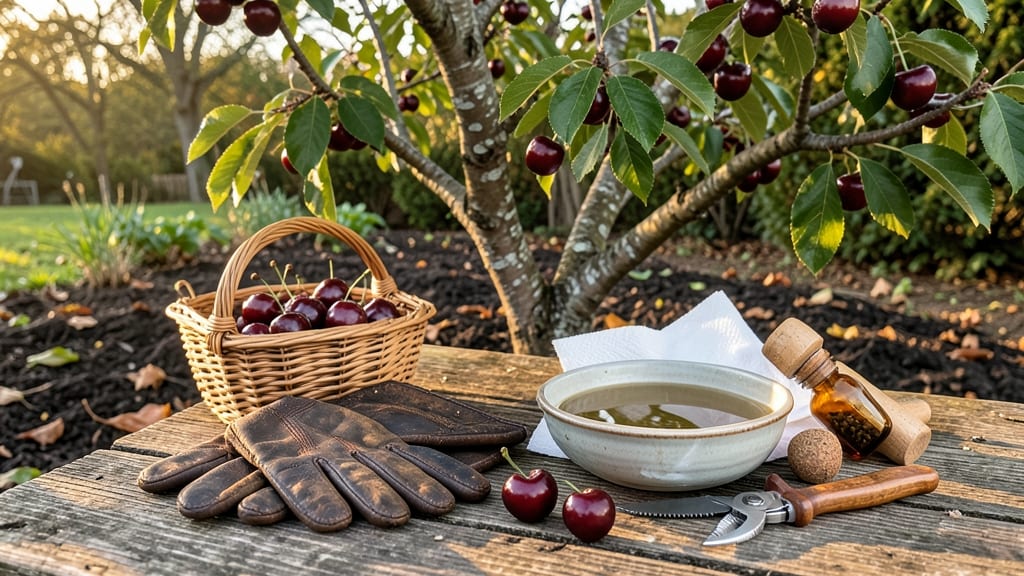
Fresh cherries hide tiny gold for next year’s orchard. ✨ The best time to harvest seeds is when fruit is fully ripe but before it rots—usually late summer to early fall.
Skip the store-bought cherries; heirloom varieties from your own tree yield the best results for grafting or growing new trees.
Start by fermenting the pits in water for 3-5 days to break down the flesh, then dry them completely—this prevents mold and prepares them for stratification.
I learned the hard way that damp pits invite fungus, so spread them on a screen in a warm, dry spot until they’re bone-dry to the touch.
Once dry, store the seeds in a sealed container in the fridge for 3 months to mimic winter conditions. This cold stratification tricks them into thinking they’ve survived a natural winter, boosting germination rates from near-zero to over 70%. The payoff? Strong, healthy seedlings ready for planting in spring.
Common mistakes include rushing the drying process or skipping stratification entirely—both lead to weak or non-germinating seeds. If you’re grafting instead of growing from seed, save the best pits for rootstock. Either way, a little patience now means fruit trees in just a few years.
📚 In This Guide
- What you need
- Instructions
- Tips and common mistakes
- Wrapping up and next steps
What you need
- ● Mature, healthy cherries: At least 10-15 ripe cherries (preferably from disease-resistant varieties). Avoid cherries treated with fungicides.
- ● Sharp knife or pruning shears: For carefully cutting around the pits without damaging them.
- ● Water and a bowl: For rinsing and cleaning the pits.
- ● Paper towels or clean cloth: To dry the seeds thoroughly.
- ● Small container or resealable bag: For storing dried seeds (e.g., a paper envelope or airtight plastic bag).
- ● Refrigerator or cold stratification setup: A space at 34–41°F (1–5°C) for 6–8 weeks (e.g., a fridge crisper drawer).
- ○ Moistened paper towels or peat moss: For wrapping seeds during stratification (optional but recommended for higher germination rates).
- ● Labeling tags: To mark seed varieties and harvest dates.
- ● Fine-mesh strainer: For rinsing seeds efficiently.
- ● Disinfectant (e.g., hydrogen peroxide 3%): To sanitize pits if mold risk is high.
- ● Planting pots or seed trays: For germinating seeds after stratification.
- ● Growth hormone (e.g., gibberellic acid): To boost germination rates in stubborn seeds.
Step-by-Step instructions for harvesting and preparing cherry seeds
Here’s how to rescue those sweet, stone-fruit seeds and turn them into next year’s orchard.
🍒 Step 1: Collect and Clean the Cherries
Gather ripe cherries from your tree or local market—only fully ripe fruit yields viable seeds. Rinse them gently under cool water to remove dirt or debris, then spread them on a clean paper towel or mesh screen to air-dry for 24 hours. This prevents mold from forming while the fruit softens.
Once dry, cut the cherries open with a small knife or your fingernail to extract the pits. I like to use a butter knife to gently pry the seed from the flesh—don’t crush it, or the embryo inside won’t survive. You’ll need 4 pits (one per seedling) for a small garden, so collect extras to account for any that don’t germinate.
🌱 Step 2: Dry the Seeds Completely
Place the cleaned pits in a single layer on a paper towel or screen tray. Store them in a warm, dry place (like a sunny windowsill) for 2-3 weeks, flipping them occasionally to ensure even drying. The goal is to reduce their moisture content—you’ll know they’re ready when the outer shell feels hard and dry to the touch.
Real talk: If you rush this step, the seeds may rot during stratification. I’ve learned the hard way that damp pits invite mold, which ruins the whole batch. Patience here pays off later when those seedlings sprout.
⏰ Step 3: Stratify for Cold Treatment
Once fully dry, place the pits in a sealed plastic bag with a damp paper towel (just enough moisture to keep it slightly damp, not soggy). Store the bag in your refrigerator for 8-12 weeks. This mimics winter’s cold period, breaking the seed’s dormancy so it’ll germinate in spring.
Check the bag every 2 weeks—if the towel feels dry, mist it lightly with water. The seeds need consistent moisture but no standing water. After 12 weeks max, remove them from cold storage and let them sit at room temperature for 1-2 weeks before planting.
🌿 Step 4: Plant the Stratified Seeds
Fill small pots (at least 4 inches deep) with well-draining potting mix, then plant each seed 1 inch deep, spacing them 2 inches apart. Water gently until the soil is moist but not soggy. Place the pots in a bright, indirect-light location (like a south-facing window) and keep the soil evenly moist—not wet.
Germination can take 4-8 weeks, so be patient. You’ll see the first true leaves emerge as tiny, rounded cotyledons. Once seedlings reach 3-4 inches tall, transplant them into individual pots or directly into the ground, spacing them 15-20 feet apart for mature trees.
Tips & tricks for perfect cherry seed harvesting
Transforming cherry pits into thriving seedlings takes patience, but these small details make all the difference.
Ripeness Matters: Only use cherries that are fully ripe and slightly soft to the touch. Underripe cherries won't yield viable seeds, and overripe ones may ferment during the drying process. I've found that cherries with a deep, vibrant color (not washed out) produce the healthiest pits. Store any extra cherries in the fridge until you're ready to process them all at once—this prevents uneven ripening.
The Drying Secret: During the 2-3 week drying period in Step 2, place your pits on a screen tray rather than a paper towel. The airflow prevents moisture buildup between pits, which is crucial for even drying. I like to set up a small fan on low to circulate air gently—this cuts drying time by about 25% without risking mold. Just avoid direct sunlight, which can cause uneven drying and cracking.
Stratification Success: When checking your seeds every 2 weeks during the 8-12 week cold treatment, I've discovered a simple trick: place a few pits in warm water for 5 minutes first. If they sink immediately, they're ready for planting. If they float, they need more stratification time. This quick test saves you from planting premature seeds that won't germinate.
Planting Prep: Before planting your 1 inch deep seeds in Step 4, give your pots a head start by mixing in a handful of compost with the potting soil. The extra nutrients help seedlings establish faster, especially since cherry seeds are naturally slow starters. I also like to pre-warm the soil mix in the microwave for 30 seconds before planting—this jumpstarts the germination process by a full week.
Pro Tips for Harvest Cherry Seeds
- Transforming cherry pits into thriving seedlings takes patience, but these small details make all the difference.
- Ripeness Matters: Only use cherries that are fully ripe and slightly soft to the touch. Underripe cherries won't yiel...
- The Drying Secret: During the 2-3 week drying period in Step 2, place your pits on a screen tray rather than a paper ...
Frequently asked questions
Got questions about harvesting cherry seeds? You’re not alone! Here are some of the most common concerns—and straightforward answers—to help you succeed in growing your own fruit trees.
Can I harvest cherry seeds from any type of cherry?
Not all cherries are created equal! Sweet cherries (like Bing or Rainier) are ideal for seed harvesting because they’re more likely to grow true-to-type trees. Sour cherries (like Montmorency) also work but may produce slightly different fruit. Avoid hybrid or ornamental cherries—they often don’t produce viable seeds.
How long do cherry seeds need to dry before stratification?
Let your seeds dry for 1–2 weeks in a cool, dry place (like a paper bag) until they’re completely dry and brittle. Over-drying can harm them, while under-drying may lead to mold. Once dry, they’re ready for the next step: stratification!
What if I don’t have a refrigerator for stratification?
No fridge? No problem! You can use a moist sand or peat moss mix in a sealed container and bury it outdoors in a shady spot during winter. Alternatively, place the sealed container in a garage or shed where temps hover around 35–45°F (2–7°C) for 3–4 months.
Why aren’t my cherry seeds germinating after stratification?
Several factors could be at play: old seeds (over 1 year), improper stratification (wrong temps or moisture), or poor planting conditions (too deep or dry soil). Try soaking seeds in water for 24 hours before replanting, or test a few in a clear container with damp paper towels to check viability.
How long does it take for a cherry seedling to produce fruit?
Patience is key! Cherry trees grown from seed can take 5–10 years to bear fruit—far longer than grafted trees (which fruit in 2–4 years). If you’re eager for cherries, consider grafting a known variety onto your seedling later, or buy a young tree from a nursery.
Wrapping up and next steps
Harvesting cherry seeds is a rewarding way to grow your own fruit trees—just
Now that you’re equipped with the know-how, why not plant a few seeds today? Share your progress with fellow gardeners or experiment with different cherry varieties. Happy growing! 🌿