
Pruning
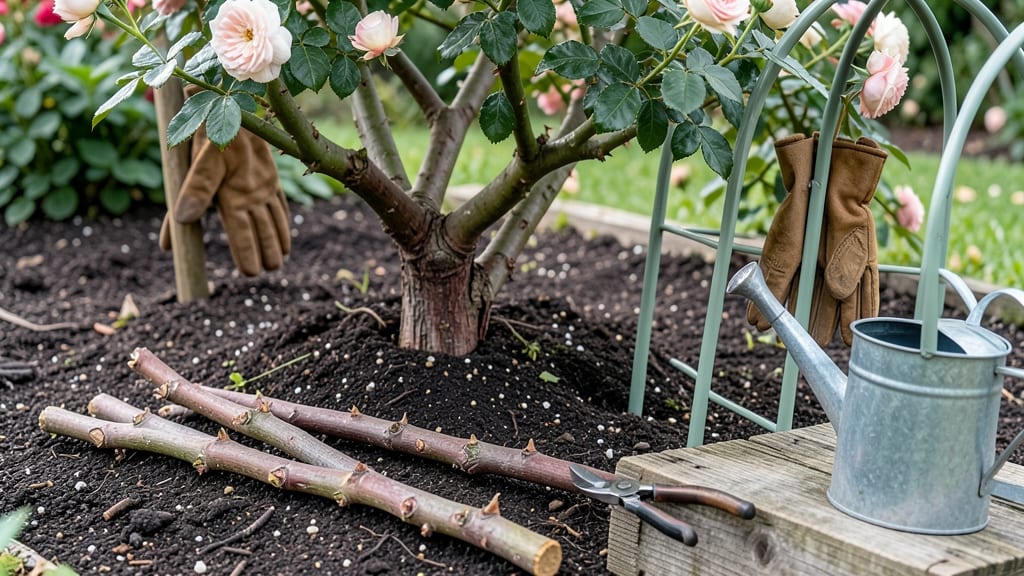
Turn your favorite rose bush into a stunning rose tree with just a few strategic cuts. ✂️ I’ve transformed leggy bushes into showstopping trees that bloom all season long—here’s how to do it without losing a single flower.
The secret lies in pruning at the right time (late winter or early spring) and training the strongest canes to form the trunk. You’ll need sharp pruners, a sturdy stake for support, and a little patience—no fancy grafting required.
Most roses can be shaped this way, but climbers and shrub roses work best.
By summer, your tree will have a thick, woody trunk and branches bursting with blooms. The best part? It’s more dramatic than a standard bush and easier to maintain once established. Just keep pruning to encourage airflow and prevent disease.
Works for any sunny spot in your yard, from formal gardens to casual cottage-style landscapes. Ready to give your roses a makeover? Let’s get started with the step-by-step process.
📚 In This Guide
- What you need
- Instructions
- Tips and common mistakes
- Wrapping up and next steps
What you need
- ● Rose bush (climbing or shrub variety) – Choose a healthy, disease-resistant variety like Rosa 'New Dawn' or Rosa 'Climbing Iceberg' for best results.
- ● Pruning shears or secateurs – Sharp, clean tools are a must! Invest in high-quality, bypass-pruning shears (avoid anvil types to prevent crushing stems).
- ● Loppers – For thicker branches (1/2" to 1.5" in diameter).
- ● Pruning saw – For any branches too thick for loppers (1.5" and up).
- ● Disinfectant (rubbing alcohol or pruning spray) – Keeps tools sterile and prevents disease spread.
- ● Garden twine or soft ties – To secure branches to the central support (e.g., bamboo stake or trellis).
- ● Central support structure – A sturdy bamboo stake, wooden post, or metal trellis (at least 6-8 feet tall).
- ● Balanced fertilizer (10-10-10 or rose-specific) – Promotes healthy growth after pruning.
- ● Mulch (wood chips or straw) – Helps retain moisture and protect roots.
- ● Hand pruners (for precision trimming) – Great for detailed work on smaller stems.
- ● Grafting tape or rubber tree band – If you’re grafting a rose bud onto a rootstock.
- ○ Pruning sealant (optional) – Helps prevent disease on large cuts (though many experts skip this for roses).
- ● Gloves (cut-resistant or gardening gloves) – Protects hands from thorns and debris.
- ● Hose or watering can – For post-pruning hydration.
- ● Rose food or bloom booster – Encourages vibrant, long-lasting flowers.
Step-by-Step instructions for creating a rose tree
Here’s how I transform a single rose bush into a stunning, multi-stemmed rose tree—perfect for year-round blooms.
🌿 Step 1: Select and Prune Your Rose Bush
Start with a healthy, established rose bush that’s at least 2-3 years old and has multiple strong canes. In late winter or early spring, before new growth begins, prune the bush back by one-third to encourage vigorous regrowth. Remove any dead, diseased, or crossing branches first—this ensures your rose tree starts with a solid foundation.
I like to make my cuts just above an outward-facing bud, about ¼ inch above it. This angle helps water run off the cut and prevents rot. If your rose bush has 5-7 strong canes, it’s ideal for creating a tree shape—fewer canes mean less blooms, while too many can crowd the center.
✂️ Step 2: Shape the Trunk and Main Canes
Once new growth appears in spring, wait until the shoots are 6-8 inches tall before shaping. Choose 3-5 of the strongest, straightest canes to become your rose tree’s main branches. These will form the "arms" of your tree, so pick canes that spread outward naturally.
To create the trunk, tie the remaining canes together at the base with soft horticultural tape or a strip of old fabric. This forces them to grow as one thick stem. Over time, the canes will fuse together, forming a sturdy trunk. Leave the top of the tied canes exposed so they can continue growing upward.
☀️ Step 3: Train and Prune for Balance
As your rose tree grows, prune the top of the trunk to encourage lateral branching. When the trunk reaches 3-4 feet tall, cut back the main shoot by half to stimulate side growth. This is where the magic happens—those new shoots will become your rose tree’s blooming branches.
I also prune any suckers (shoots growing from the base) to redirect energy upward. You’ll know you’re on the right track when your rose tree starts looking like a small, bushy tree with multiple blooming stems. It takes 2-3 years of careful pruning to fully mature, but the wait is worth it for those stunning, cascading blooms.
🪴 Step 4: Support and Maintain Year-Round
To keep your rose tree upright, install a small tree stake or bamboo support near the trunk. Tie it loosely with soft material to avoid damaging the canes as they grow. Mulch around the base with 2-3 inches of organic mulch to retain moisture and protect the roots.
Feed your rose tree with a balanced rose fertilizer in early spring and again after the first flush of blooms. Water deeply once a week, ensuring the soil stays moist but not soggy. In winter, wrap the trunk and canes with burlap or frost cloth to protect them from cold snaps—this keeps your rose tree blooming beautifully for years to come.
Tips & tricks for perfect rose tree pruning
Transforming a rose bush into a tree takes patience, but these practical tips will help you avoid common pitfalls and create a stunning, long-lasting centerpiece.
Pruning Precision: When you prune your rose bush back by one-third in Step 1, make sure to use sharp, clean shears to avoid tearing the canes. The ¼-inch cut above an outward-facing bud is crucial—this creates the perfect angle for water runoff and prevents rot. I've ruined multiple rose projects by using dull shears, so invest in a good pair and clean them with rubbing alcohol between cuts. This small detail makes all the difference in how quickly your rose tree recovers and grows.
Cane Selection Strategy: In Step 2, when choosing your 3-5 main branches, look for canes that spread outward naturally rather than growing straight up. These will form your rose tree's "arms" and should be spaced evenly around the base. I like to visualize the final shape—imagine how the branches will spread as they mature. If you have canes growing inward, you can gently bend them outward and secure them with soft twine until they set in that position. This creates a more balanced, natural look.
Trunk Formation Tip: The trunk creation in Step 2 is where many people struggle. Instead of using regular tape that might girdle the canes, opt for soft horticultural tape or even an old fabric strip. I've found that wrapping the canes loosely and leaving some space between them helps them fuse together more naturally over time. Check the wrap every few weeks to ensure it's not too tight—you want the canes to grow together, not strangle each other. This patience pays off when you see that beautiful, unified trunk emerge.
Pruning Timeline: The 2-3 year maturation period mentioned in Step 3 can feel long, but you can speed up the process slightly by doing what I call "strategic pruning." After your rose tree reaches 3-4 feet, instead of cutting back the main shoot by half all at once, you can do it in stages. First cut back by one-third, wait 4-6 weeks for new growth, then do another one-third cut. This gradual approach stimulates branching while being less stressful on your rose tree. Just remember to always cut just above an outward-facing bud to encourage healthy growth.
Pro Tips for Make A Rose Tree
- Transforming a rose bush into a tree takes patience, but these practical tips will help you avoid common pitfalls and...
- Pruning Precision: When you prune your rose bush back by one-third in Step 1, make sure to use sharp, clean shears to...
- Cane Selection Strategy: In Step 2, when choosing your 3-5 main branches, look for canes that spread outward naturall...
Frequently asked questions
Got questions about crafting your own stunning rose tree? You’re not alone! Here are answers to the most common queries—from timing to troubleshooting—to help you grow a showstopping centerpiece with confidence.
When is the best time to prune roses for a rose tree?
The ideal time to prune is late winter or early spring (just before new growth starts). For repeat-flowering roses, you can also do a light trim after the first flush of blooms. Avoid pruning in fall—it can leave cuts vulnerable to disease over winter. Pro tip: If you’re in a mild climate, prune anytime between January and March for best results!
How long does it take for a rose tree to bloom after pruning?
With proper care, you’ll see new growth and buds within 4–6 weeks after pruning. Full blooms typically appear in 6–8 weeks, depending on the rose variety and weather. Patience is key—healthy roses reward consistency! Pro tip: Fertilize lightly after pruning to encourage vibrant blooms.
Can I use any rose bush to make a rose tree?
Not all roses work! Choose climbing, rambling, or large-flowered hybrid roses (like ‘New Dawn’ or ‘Blaze’). Avoid shrub roses—they lack the long canes needed for a tree shape. If you’re starting with a shrub, graft it onto a rose rootstock for better structure. Pro tip: Check your rose’s growth habit before pruning!
What if my rose tree isn’t blooming well after pruning?
Several factors could be at play: over-pruning (leave 3–5 buds per stem), poor sunlight (roses need 6+ hours daily), or nutrient deficiencies. Check for pests (like aphids) and ensure your tree is well-watered but not soggy. Pro tip: Deadhead spent blooms to redirect energy to new growth!
Do I need to fertilize my rose tree after pruning?
Yes! Use a balanced rose fertilizer (like 10-10-10) 4–6 weeks after pruning to support regrowth. Avoid heavy nitrogen early—it promotes leaves over flowers. Pro tip: Mulch around the base to retain moisture and reduce weeds. Organic options like composted manure work too!
Wrapping up and next steps
Creating a stunning rose tree is all about patience, precision, and a little love for your plants! With the right tools, techniques, and timing, you’ll soon enjoy year-round blooms that turn heads.
Remember, consistency is key—whether it’s pruning in late winter or shaping your tree in spring, every trim brings you closer to that dream garden centerpiece. 🌹✨
Now that you’re armed with the know-how, why not take the next step? Start small—pick one rose bush to practice your pruning skills, or sketch out your ideal rose tree design. Before you know it, your garden will be the talk of the neighborhood!