
How To
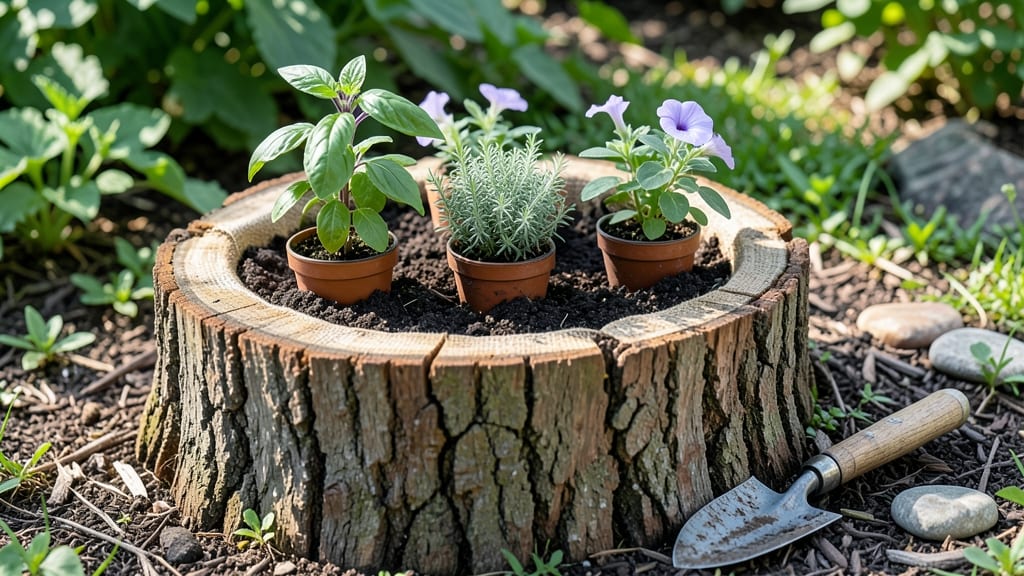
That old stump isn’t dead weight—it’s prime real estate. 🌱 I’ve turned forgotten stumps into thriving planters that add charm and function to my garden, and you can too with just a few simple steps.
The best part? No waste, no digging, and zero guilt about reclaiming space that would otherwise just sit there.
You’ll need basic tools—a drill, some screws, and a little potting mix—but the real magic happens when you pick the right plants. Shallow-rooted herbs like thyme or parsley, succulents, or even tiny ferns thrive in the cozy confines of a stump’s hollow.
The key is drainage: drill holes in the sides if it’s solid wood, or line the bottom with landscape fabric if it’s already hollow.
By the time you’re done, you’ll have a one-of-a-kind planter that doubles as a conversation starter. The soil stays moist longer, weeds struggle to take hold, and you get to flex your upcycling skills. Plus, it’s perfect for small spaces, patios, or even as a whimsical centerpiece in your yard.
Works for any stump size—big or small—and adapts to your style. Whether you paint it, leave it natural, or add decorative pebbles, this project proves that garden creativity doesn’t need a blank slate. Let’s get growing!
📚 In This Guide
- What you need
- Instructions
- Tips and common mistakes
- Wrapping up and next steps
What you need
- ● Tree stump: A freshly cut or decaying stump (4–12 inches in diameter works best).
- ● Drill or auger: A ½-inch to ¾-inch bit for creating drainage holes (electric or manual).
- ○ Saw (optional): Handsaw or chainsaw to trim the stump to your desired height (if needed).
- ● Waterproof liner: A flexible plastic pond liner (10–20 sq. ft., thickness ~40 mil).
- ● Potting soil: Well-draining mix (2–5 cubic feet, depending on stump size).
- ○ Waterproof sealant (optional): Exterior-grade paint or wood sealant to protect edges.
- ● Stakes or screws: 4–6 galvanized nails or screws (2–3 inches long) to secure the liner.
- ● Gloves & safety gear: Work gloves, goggles (if drilling/sawing), and a dust mask.
- ● Mulch or decorative stones to hide the liner edges.
- ● Slow-release fertilizer for a nutrient boost.
- ● Small pebbles or gravel for extra drainage at the bottom.
- ● Paint or non-toxic stain for a polished look.
Step-by-step instructions for creating a stump planter
Transform that old stump into a charming, functional garden feature with these simple steps.
🪴 Step 1: Select and Prepare the Stump
Find a clean, dry stump that's at least 6 inches in diameter—larger stumps hold more soil and plants. If the stump is still attached to roots, use a chainsaw or handsaw to cut it 2-3 inches above ground level for a clean base. Wear gloves and safety goggles when cutting to protect yourself from splinters and debris.
Sand down any rough edges or sharp bark using 80-grit sandpaper or an electric sander. This prevents splinters and makes the planter safer for handling. I like to sand the inside of the stump as well—it creates a smoother surface for soil and roots to settle against. Wipe away dust with a damp cloth afterward.
💧 Step 2: Line the Stump for Drainage and Protection
Lay a thick layer of landscape fabric at the bottom of the stump to prevent soil from washing out and to protect the wood from moisture damage. Cut the fabric to fit snugly, then fold the edges up the sides about 1 inch to create a barrier. This step is critical—without it, soil will erode quickly when you water.
Next, add a 1-inch layer of small gravel or pebbles over the fabric. This creates drainage and prevents root rot by keeping the bottom of the planter from sitting in water. Press the gravel lightly so it stays in place but doesn’t compact too tightly. You’ll barely notice it once the soil goes in, but it makes all the difference for plant health.
🌱 Step 3: Fill With Soil and Plant Your Choices
Fill the stump about halfway with a mix of potting soil and compost (I use a 50/50 blend). This gives your plants the nutrients they need while keeping the soil light enough to drain well. Pack the soil gently with your hands—you want it firm enough to hold plants but not so tight that roots can’t spread.
For a 4-stump planter setup, choose plants that thrive in containers and complement each other. I recommend succulents, ferns, or small shrubs like dwarf boxwood or creeping thyme. Place plants near the edges of the stump so they’re visible from all sides. Water lightly after planting to settle the soil around the roots.
☀️ Step 4: Finish and Maintain Your Stump Planter
Add a 1-2 inch layer of mulch on top of the soil to retain moisture and suppress weeds. Use cedar mulch or bark chips—they look natural and resist decomposition longer than other types. Leave a 1-inch gap around the edges of the stump to allow water to drain properly and prevent rot.
Water your stump planter deeply once a week, or more often if the weather is hot and dry. You’ll know it’s time to water when the top inch of soil feels dry to the touch. Avoid letting water pool in the stump—drainage is key to keeping your plants healthy. A few times a year, add a slow-release fertilizer to give your plants a nutrient boost.
Tips & tricks for perfect stump planters
Real talk: Turning a stump into a planter is easier than you think—but these little details make all the difference between a charming garden feature and a maintenance nightmare.
Safety First: I can't stress this enough—always wear gloves and safety goggles when cutting stumps. The bark is deceptively sharp, and those splinters are no joke. I learned this the hard way after a trip to the ER. Also, if you're using power tools, make sure your workspace is clear of debris and kids/pets. The 2-3 inch cut height is perfect for stability, but take your time to avoid uneven cuts that could tip your planter later.
Drainage is Non-Negotiable: That 1-inch gravel layer in Step 2 might seem insignificant, but it's the secret to happy plants. I've seen stumps flood and rot because people skipped this step. Press the gravel lightly—just enough to keep it in place when you add soil. Pro tip: If your stump has natural drainage holes from when it was alive, line those too with gravel before adding fabric. This prevents water from pooling at the bottom and creating root rot.
Soil Science Matters: The 50/50 blend of potting soil and compost is ideal, but don't skimp on quality. Cheap potting soil can compact over time and suffocate roots. I like to add a handful of perlite to my blend for extra drainage—it's especially helpful in hot climates where soil dries out fast. When packing soil, think "firm but not packed like dirt"—you want roots to spread easily, not fight through dense soil.
Plant Placement Strategy: For that 4-stump setup, arrange plants by sunlight needs. Place sun-lovers like succulents on the south or west sides of your stumps, while shade-tolerant ferns go on the north or east sides. I also recommend planting taller plants in the center and shorter ones around the edges—this creates a natural tiered effect that looks intentional. And remember, those first few weeks are critical, so water lightly every other day until plants establish roots.
Pro Tips for Make A Stump Planter
- Real talk: Turning a stump into a planter is easier than you think—but these little details make all the difference b...
- Safety First: I can't stress this enough—always wear gloves and safety goggles when cutting stumps. The bark is decep...
- Drainage is Non-Negotiable: That 1-inch gravel layer in Step 2 might seem insignificant, but it's the secret to happy...
Frequently asked questions
Got questions about turning a stump into a planter? You’re not alone! Here are answers to the most common queries to help you DIY like a pro—without the guesswork.
What’s the best time of year to make a stump planter?
The ideal time is late winter or early spring, when the tree is dormant and easier to hollow out. Avoid doing this during active growing seasons (spring/summer) to minimize stress on nearby plants. If you’re repurposing a freshly cut stump, wait until it’s fully dry to prevent mold or rot.
Can I use a stump planter for vegetables or just flowers?
Stump planters work for both flowers and veggies, but choose shallow-rooted plants like lettuce, herbs (basil, thyme), or peppers. Avoid heavy feeders like tomatoes or corn—their roots need deeper soil. For veggies, mix in compost to boost nutrients in the limited space.
How do I keep pests out of my stump planter?
Pests love moist, enclosed spaces! To deter them:
- Drill small drainage holes in the sides to improve airflow.
- Use a mesh liner (like hardware cloth) around the base if buried.
- Avoid overwatering—keep soil slightly damp, not soggy.
- Add a layer of diatomaceous earth or wood ash to deter insects.
What if my stump rots before I can use it?
Rotting is normal over time, but you can slow it down by:
- Sealing the interior with linseed oil or food-safe sealant before planting.
- Choosing a hardwood stump (oak, maple) over softwood (pine, fir).
- Replacing the soil and mulch annually to refresh nutrients.
If rot sets in, repurpose the stump as a raised bed frame or compost it—zero waste!
Are there alternatives if I don’t have a tree stump?
No stump? No problem! Try these upcycled planter ideas:
- Cinder blocks: Stack and fill with soil for a modular herb garden.
- Old boots or buckets: Punch drainage holes and line with landscape fabric.
- Pallet wood: Build a simple raised bed frame.
- Hollowed-out logs: Similar to stumps but easier to find at nurseries.
Get creative—even a plastic milk jug can become a mini planter!
Wrapping up and next steps
You’ve just turned a simple stump into a functional, eco-friendly planter—no waste, just creativity! 🌱 Whether you’re a gardening newbie or a seasoned green thumb, this project proves that small spaces (and old stumps!) can yield big results. Now that you’ve mastered the basics, why not level up?
Try experimenting with different plants, like ferns, moss, or wildflowers, to see what thrives in your stump planter. Or, share your newfound skills with friends by gifting them their own DIY planter—because upcycled gardening is always better together! 🌿