
Tools
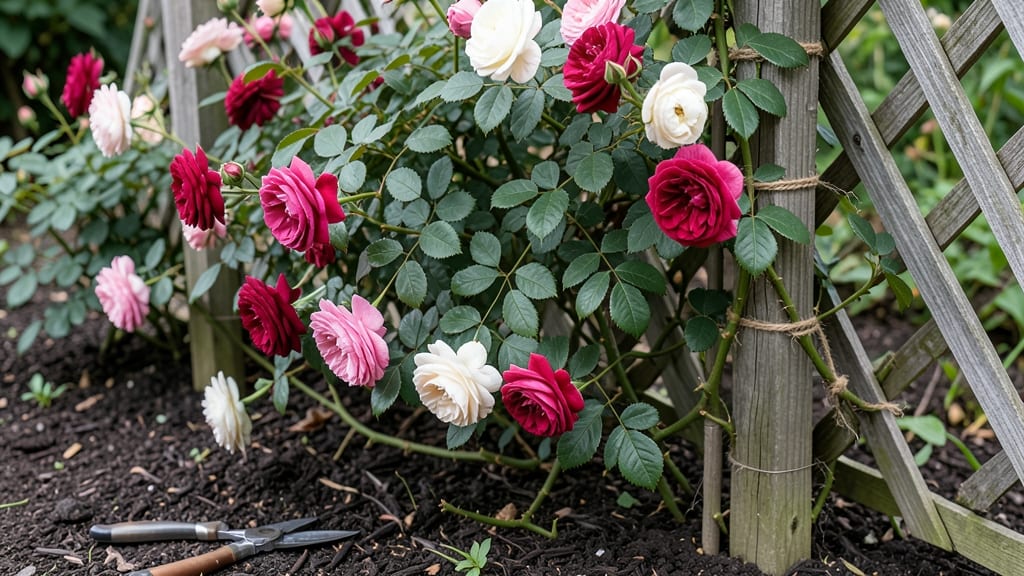
Building a rose trellis changed how my roses grow. 🌹 The right support turns floppy canes into strong, climbing powerhouses that produce more blooms and last longer each season. No fancy tools or carpentry skills needed—just basic materials and a little planning.
You’ll need 2x4 lumber or sturdy metal pipes for the frame, along with 1-inch diameter wooden dowels or trellis mesh for the climbing surface. Height matters too: aim for 6-8 feet to give roses room to thrive without overcrowding.
Place it where morning sun warms the structure but afternoon shade prevents wilting. Once built, your roses will climb with purpose, blooms will multiply, and maintenance becomes easier—no more tangled canes or hidden pests.
The trellis also adds structure to your garden beds, creating a polished look that makes every bloom stand out. Works for hybrid teas, climbers, or even ramblers. Let’s get started with a design that fits your space and style—no guesswork involved.
📚 In This Guide
- What you need
- Instructions
- Tips and common mistakes
- Wrapping up and next steps
What you need
- ● Trellis material: Wooden lattice panels (4' x 8' sheets, 1-3 depending on size) OR
- ● Metal lattice wire (1/4" galvanized steel, 100-200 ft roll)
- ● Support posts: 4x4 pressure-treated lumber (8 ft tall, 2-4 posts depending on design)
- ● Concrete mix (60 lb bag, 1-2 bags per post)
- ● Hardware: Galvanized screws or nails (2" deck screws, 1 lb box)
- ● Heavy-duty zip ties (100-count pack, for wire trellises)
- ○ Extras: Wood stain or paint (optional but recommended for longevity)
- ● Post caps (2-4, for decorative finishing)
- ● Measuring tape (25 ft)
- ● Circular saw or handsaw (for cutting wood)
- ● Drill/driver (with screw bits)
- ● Level (4 ft)
- ● Shovel (for setting posts)
- ● Work gloves & safety goggles
- ● Pliers (for wire trellises)
- ● A level garden spot (or plan to adjust for slopes).
- ● Access to water and electricity (for mixing concrete or power tools).
- ● A helper (trellises can be heavy—safety first!).
- ● Basic DIY skills (or patience to learn as you go!).
Step-by-Step instructions for building a rose trellis
Here's how I build a sturdy, attractive trellis that gives climbing roses the support they need.
🪴 Step 1: Gather Materials for a Lasting Structure
For a 4-foot tall trellis that supports climbing roses beautifully, you'll need 2×4 lumber (4 pieces, each 8 feet long), 2×2 lumber (4 pieces, each 6 feet long), wood screws (2-inch and 3-inch), a circular saw or handsaw, wood glue, and outdoor-rated wood stain or paint. I always use pressure-treated lumber for outdoor projects—it resists rot and lasts years.
Pre-cut the 2×4s into 4 vertical posts (each 4 feet tall) and 4 horizontal crossbars (each 3 feet long). The 2×2s become the decorative lattice pieces—cut them into 12 pieces (each 18 inches long). This design creates a classic diamond pattern that roses will twine through beautifully. Sand all cut edges to prevent splinters and make future maintenance easier.
☀️ Step 2: Assemble the Vertical Posts and Crossbars
Start by screwing the horizontal crossbars onto the vertical posts to form a rectangular frame. Place the first crossbar 6 inches from the top of each post, then add a second 6 inches from the bottom. Use 3-inch wood screws at each corner for maximum strength. I like to pre-drill holes to prevent the wood from splitting—this is especially important for softer woods.
Double-check that all corners are square using a 4-foot level or by measuring diagonally (both should be equal). The frame should be 3 feet wide and 4 feet tall—this gives roses plenty of room to climb without overcrowding. Apply a thin layer of wood glue to each joint before screwing for extra durability. Let the glue set for 10 minutes before handling further.
🌿 Step 3: Create the Decorative Lattice Pattern
Now for the fun part—adding the 18-inch lattice pieces. Arrange them in a diamond pattern between the horizontal crossbars, overlapping slightly at the center. Use 2-inch wood screws to attach each piece, spacing them about 4 inches apart vertically. This creates a sturdy yet open structure that roses can weave through naturally.
Step back and visualize how the roses will grow—you want even gaps for air circulation (which prevents fungal diseases) and enough support for heavy blooms. I like to leave 2-inch spaces between lattice pieces so I can easily reach in for pruning later. Once assembled, give the trellis a final sanding to smooth any rough edges.
✂️ Step 4: Finish and Install the Trellis
Apply outdoor-rated stain or paint to protect the wood from weather and pests. I prefer a semi-transparent stain—it lets the wood grain show while providing UV protection. Let the finish dry completely (usually 4-6 hours) before handling. For extra longevity, add a waterproof sealant after the stain dries.
Install the trellis in a sunny spot with well-draining soil. Drive 4-foot metal stakes into the ground at each corner and secure the trellis frame with heavy-duty zip ties or galvanized screws. If planting roses directly against the trellis, space them 12-18 inches away from the structure. Water deeply after planting to help roots establish before the first climb.
💧 Step 5: Maintain and Train Your Roses
Once your roses start growing, gently tie new canes to the lattice with soft plant ties (never wire—they can damage bark). Prune back any canes that grow too long or crowd the structure. I like to trim in late winter to encourage new growth and keep the trellis looking neat.
Check the trellis annually for loose screws or signs of rot. If you notice wobbles, tighten screws or add extra support stakes. With proper care, your trellis will last 10+ years—giving your climbing roses a beautiful, long-term home.
Tips & tricks for building a sturdy rose trellis
Here's what I've learned after building trellises for years—these small details make all the difference for a trellis that lasts and looks beautiful.
Material Selection: Pressure-treated lumber is worth the investment for outdoor projects. It resists rot and pests, which means your trellis will last 10+ years without needing replacement. For the 2×4 vertical posts and 2×2 lattice pieces, I always check for straight grain and minimal knots—these imperfections can weaken the structure over time. If you're on a budget, cedar is a great alternative that naturally resists decay without chemical treatment.
Assembly Technique: In Step 2, when attaching the horizontal crossbars, I recommend using a clamp to hold pieces in place while screwing. This ensures perfect alignment before the glue sets. The 10-minute wait time for wood glue to set is crucial—don't rush this step! I also like to countersink the screws slightly below the wood surface to prevent splintering when training roses later. This small detail makes maintenance much easier down the road.
Design Considerations: The diamond pattern in Step 3 isn't just decorative—it's functional. Those 2-inch gaps between lattice pieces create perfect air circulation, which prevents fungal diseases like black spot that can plague climbing roses. For extra stability, I add a diagonal crossbar between opposite corners of the frame (using 3-inch screws) before attaching the lattice. This creates a more rigid structure that won't wobble when heavy with blooms.
Finishing Touches: When applying your outdoor-rated stain or paint, work in thin coats to prevent drips that could attract pests. The 4-6 hour drying time is your best friend—resist the urge to handle the trellis sooner! I've learned the hard way that rushing this step leads to smudges and uneven coverage. For a more natural look, consider using a clear water-based sealant after staining—it provides UV protection while letting the wood's beauty show through.
Pro Tips for Build A Rose Trellis
- Here's what I've learned after building trellises for years—these small details make all the difference for a trellis that lasts and looks beautiful.
- Material Selection: Pressure-treated lumber is worth the investment for outdoor projects.
- Assembly Technique: In Step 2, when attaching the horizontal crossbars, I recommend using a clamp to hold pieces in place while screwing.
Frequently asked questions
Got questions about building a rose trellis? You’re not alone!
Here are answers to the most common concerns—from timing to troubleshooting—so you can create a sturdy, beautiful structure with confidence.
When is the best time to build a rose trellis?
Build your trellis in early spring (before planting roses) or late winter to give roots time to establish before climbing. If transplanting mature roses, install the trellis 2–4 weeks beforehand so they can adjust. Avoid winter construction—frozen ground makes digging difficult!
Can I use wood scraps or repurpose materials?
Untreated wood (cedar, redwood, or pressure-treated pine)
works great for durability. Repurpose old fencing, lattice panels, or even sturdy branches for a rustic look. Just ensure materials are rot-resistant and securely fastened. Skip painted or chemically treated wood—roses are sensitive to toxins!
How do I keep roses from breaking under heavy blooms?
Use flexible ties (soft garden twine or Velcro straps) to gently guide vines along the trellis. Space horizontal supports 12–18 inches apart for weight distribution. Prune overly long canes in late winter to encourage stronger growth. For heavy roses (like Rosa ‘New Dawn’), add extra diagonal braces for support.
What if pests or diseases attack my trellis?
Prevent issues by choosing disease-resistant rose varieties (e.g., Knock Out® roses) and treating wood with copper fungicide if mold appears. Keep the base of the trellis elevated and dry to deter slugs/snails. If aphids or spider mites show up, spray with neem oil or introduce ladybugs. Inspect vines monthly for early signs!
Are there alternatives if I don’t want a freestanding trellis?
Try these space-saving options:
- Arbor or pergola: Attach to a fence or wall for vertical growth.
- Obelisk: A 4–6 ft tall metal or wooden pole with horizontal arms (great for small gardens!).
- Trellis panel: Lean against a shed or garden wall for a no-dig solution.
- Living fence: Train roses along a wire mesh or bamboo fence for a natural look.
Wrapping up and next steps
Building a rose trellis is a rewarding project that transforms your garden into a stunning, fragrant haven—and it’s easier than you think! With the right materials, a little patience, and these step-by-step instructions, you’ll create a sturdy framework that lets your climbing roses shine.
Now that you’ve got the know-how, grab your tools and start building—your roses (and your neighbors!) will thank you.
Ready to take it further? Plant your roses next! Pair your new trellis with healthy climbing varieties like ‘New Dawn’ or ‘Blaze’ for a showstopping display. Happy gardening! 🌹✨