
Tools
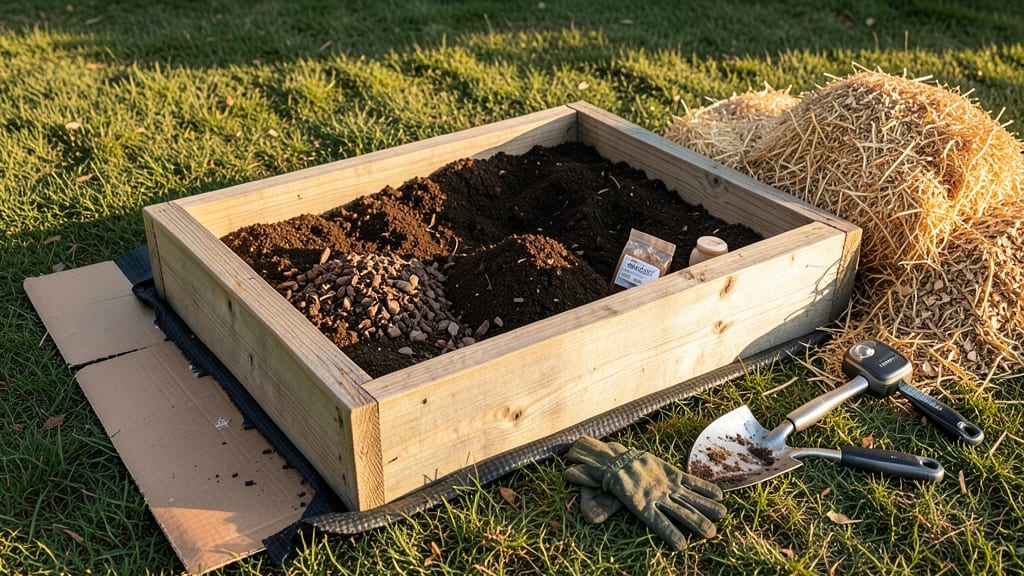
Filling a 12-inch raised garden bed isn't just dumping dirt—it's building a thriving ecosystem. 🌱 The right layers prevent compaction, improve drainage, and feed plants for years, while wrong layers lead to soggy roots and stunted growth.
I've filled dozens of beds, and this method guarantees a solid foundation that works for vegetables, herbs, or flowers.
Start with cardboard or landscape fabric at the bottom to block weeds, then add 4-6 inches of coarse material—wood chips, straw, or broken branches—this ensures water drains freely while keeping roots aerated.
Next comes 2-3 inches of compost for nutrients, followed by 6-8 inches of high-quality garden soil mixed with perlite or vermiculite for structure.
You'll end up with a bed that stays loose, fertile, and well-drained—ideal for year-round planting. Plants grow faster, roots breathe easier, and you avoid the common mistakes of overpacking soil or using cheap fill that robs nutrients. This setup works in containers too, just scale the layers proportionally.
For long-term success, top with 1-2 inches of mulch to retain moisture and suppress weeds. The key is balance: too much organic matter breaks down too fast, while too much soil can compact. Test your bed by pressing lightly—it should feel like a well-packed pillow, not concrete.
📚 In This Guide
- What you need
- Instructions
- Tips and common mistakes
- Wrapping up and next steps
What you need
- ● Raised garden bed frame: Pre-built 12-inch-tall bed (4’x8’ or custom size) with sturdy wood, composite, or metal sides.
- ● Soil & amendments (per cubic foot of bed volume): 20% Garden soil (topsoil, loamy texture)
- ● 30% Compost (well-aged, organic matter)
- ● 30% Coco coir or peat moss (for moisture retention)
- ● 20% Perlite or vermiculite (for aeration, 1-2 cups per sq ft)
- ○ Optional but helpful: Worm castings (1 cup per sq ft for nutrient boost)
- ● Slow-release fertilizer (e.g., 5-10-5, 1 tbsp per sq ft)
- ● Landscape fabric (to block weeds if bed is on grass)
- ● Tools: Garden gloves (heavy-duty, nitrile-coated)
- ● Shovel or spade (for mixing layers)
- ● Wheelbarrow or large bucket (for hauling soil)
- ● Rake (for leveling)
- ● Measuring tape (to track bed dimensions)
- ● Flat, stable ground (remove rocks/weeds; consider a weed barrier if needed).
- ● Sunlight assessment: Minimum 6+ hours of direct sun daily for most veggies.
- ● Water source nearby (hose or drip irrigation system).
- ○ Optional: Drainage layer (e.g., 1-2" of gravel or landscape fabric) if bed sits in soggy soil.
Step-by-Step instructions for building a thriving 12-Inch raised garden bed
Here's how I create the perfect layered soil foundation that keeps roots happy and plants flourishing season after season.
🪴 Step 1: Start with a Sturdy Base Layer
Begin by lining the bottom of your 12-inch raised bed with a 2-inch layer of untreated hardwood mulch or cardboard to block weeds and prevent soil erosion. I use untreated mulch because it breaks down slowly without introducing chemicals to your growing space. This layer also improves drainage at the bottom where roots might otherwise suffocate.
For extra protection against invasive grasses, add a thin layer of landscape fabric over the mulch before proceeding. Press it gently into the corners so it stays in place. The key is to keep this layer loose—roots need to breathe, not get tangled in a dense barrier.
🌱 Step 2: Build the Foundation with Coarse Materials
Next, add a 3-inch layer of coarse material to improve drainage and aeration. I use a mix of ½-inch gravel and chopped straw—the gravel creates air pockets while the straw adds organic matter as it decomposes. This layer prevents waterlogging while giving fine roots room to explore.
Spread it evenly across the bed, then lightly tamp it down with your hands or a flat board. You want it firm enough to support the layers above but not compacted like pavement. This is where I often see mistakes—people skip this step and end up with soggy soil that strangles roots.
💧 Step 3: Create the Growing Medium with Organic Layers
Now for the magic: add a 4-inch layer of composted manure or well-aged compost. This is the nutrient powerhouse that feeds your plants for years. I like to mix in a handful of bone meal for phosphorus if I'm planting heavy feeders like tomatoes or peppers. Spread this evenly and rake it lightly to break up any clumps.
Top this with a 2-inch layer of high-quality potting mix—this is where your plants will grow, so don't skimp. The potting mix provides the perfect texture for roots to establish quickly. I like to blend it with a bit of perlite to keep it light and airy. This top layer should feel like a damp sponge when squeezed.
☀️ Step 4: Finish with Mulch for Moisture and Weed Control
Complete your bed with a 1-inch layer of organic mulch like straw or shredded leaves. This protects your soil from crusting, retains moisture, and keeps weeds at bay. I always use straw because it breaks down slowly and doesn't compact like wood chips. Leave a small gap around the edges to prevent rot.
Water the entire bed thoroughly after filling, letting the water soak through to settle all layers. You'll see the soil compress slightly—that's normal and actually helps create a stable growing environment. This layered approach gives you a soil profile that mimics natural forest floors, where each layer has a specific job.
Tips & tricks for perfect raised garden bed layers
These subtle adjustments will transform your garden bed from good to exceptional—trust me, your plants will thank you.
Layer Order Matters: The sequence of layers is intentional—never reverse them! Start with the coarse drainage layer (Step 2) over your base (Step 1) to prevent water pooling. I've seen people put compost directly on cardboard, which creates a soggy mess. The gravel-straw mix in Step 2 acts like a wick, pulling moisture downward while allowing air circulation upward.
Compost Quality Check: For the 4-inch compost layer in Step 3, look for dark, crumbly material that smells earthy—not like rotten eggs. If you're using store-bought compost, check the label for "well-aged" or "double-screened." I once used fresh manure straight from the barn, and my peppers nearly died from ammonia burn. The compost should heat up slightly when you handle it—that's a good sign it's active and nutrient-rich.
Perlite Pro Tip: When blending perlite into your 2-inch potting mix layer (Step 3), use about 1 part perlite to 4 parts potting mix. This creates tiny air pockets that prevent compaction. I keep a small bag of perlite on hand specifically for this purpose—it's worth the investment for container gardening. The result is a soil that feels light yet holds moisture like a sponge, perfect for root development.
Mulch Placement Precision: That final 1-inch mulch layer in Step 4 should sit directly on top of your potting mix, not buried beneath it. The mulch's job is to protect the soil surface from temperature swings and evaporation. I've noticed that when people bury mulch, it creates a barrier that actually prevents water from penetrating—exactly what you don't want in a raised bed where every drop counts.
Pro Tips for Fill A 12 Inch Raised Garden Bed
- These subtle adjustments will transform your garden bed from good to exceptional—trust me, your plants will thank you.
- Layer Order Matters: The sequence of layers is intentional—never reverse them! Start with the coarse drainage layer (...
- Compost Quality Check: For the 4-inch compost layer in Step 3, look for dark, crumbly material that smells earthy—not...
Frequently asked questions
Got questions about filling your 12-inch raised garden bed?
You’re not alone! Here are answers to the most common concerns—so you can get planting with confidence.
What’s the best soil mix for a 12-inch raised bed?
A balanced blend of topsoil (50%), compost (30%), and perlite or coarse sand (20%) works best. This combo improves drainage, retains moisture, and feeds roots. Avoid pure garden soil—it compacts easily and lacks nutrients. For heavy clay soil, add more perlite to prevent soggy roots.
Can I fill the bed all at once, or should I layer it?
Layering is key! Start with cardboard or landscape fabric to block weeds, then add a 4-inch base layer of coarse material (gravel, wood chips, or broken bricks) for drainage. Top with your soil mix. Layering prevents compaction and mimics natural soil structure for healthier plants.
What’s a budget-friendly way to fill a 12-inch raised bed?
Skip pricey bags of soil! Use a mix of:
- Free yard waste compost (check local municipal programs)
- Topsoil from a farm supply store (buy in bulk)
- Leaves or grass clippings (shredded and aged for 3–6 months)
For perlite/sand, repurpose clean construction sand or ask hardware stores for scrap bags.
How do I avoid weeds in my raised bed?
Weeds thrive in disturbed soil. Solarize first: Cover the bed with clear plastic for 4–6 weeks before filling to kill weed seeds. Use cardboard or newspaper as a barrier between the ground and your fill. Mulch with straw or wood chips after planting to suppress new growth.
Can I fill the bed in fall for spring planting?
Yes! Fill the bed in late fall or early winter (after the first frost). The soil will settle naturally over winter. If using fresh compost, wait until spring to add it—too much organic matter in cold weather can deplete nitrogen. Test soil in spring and top up if needed.
My plants aren’t thriving—could my soil mix be the issue?
Check these fixes:
Drainage problems? Add more perlite or coarse sand to the mix.
Too much clay? Amend with compost and peat moss to loosen soil.
Nutrient deficiency? Mix in a balanced fertilizer or top-dress with worm castings.
pH issues? Test your soil (ideal range: 6.0–7.0 for most veggies). Adjust with lime (to raise pH) or sulfur (to lower it).
If problems persist, consider a soil test kit from your local extension office.
Wrapping up and next steps
Filling your 12-inch raised garden bed with the right soil layers is your first step toward a thriving, productive garden! By blending compost, topsoil, and organic matter, you’re giving your plants the perfect foundation for strong roots and bountiful harvests.
Whether you’re growing veggies, herbs, or flowers, this layered approach ensures nutrients stay accessible and drainage stays optimal—year after year.
Now that you’ve mastered the soil science, it’s time to plant with confidence! Start by choosing plants that thrive in your climate, then dive into seasonal planting guides or companion planting tips to maximize your garden’s potential. Happy gardening—your future harvests are waiting! 🌱✨