
Pruning
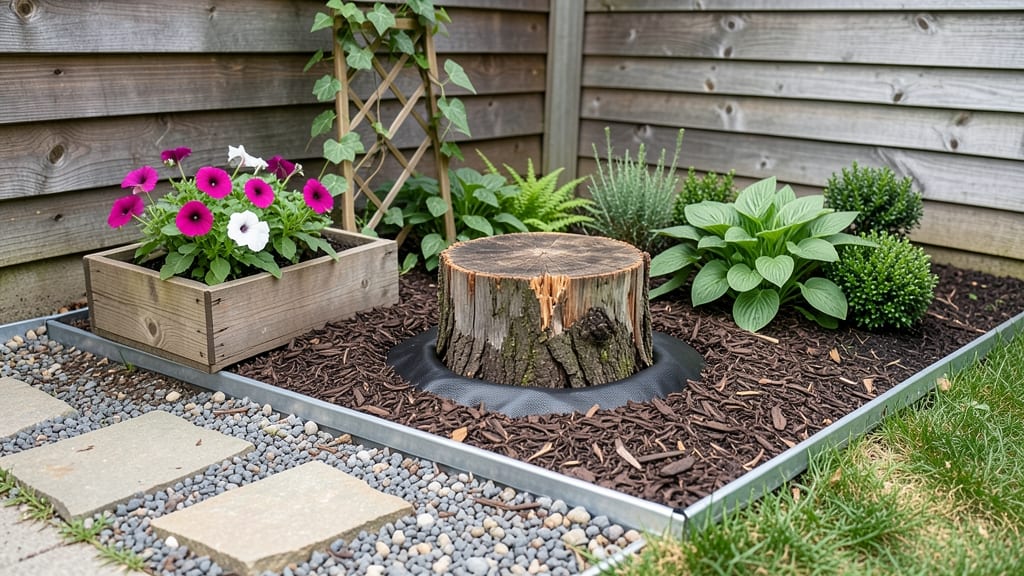
How to hide a tree stump in your front yard doesn’t require it to become an eyesore—it can become a hidden garden gem. 🌿 I’ve turned several stumps into focal points that actually enhance my landscape, not detract from it. The key is choosing the right disguise that matches your yard’s style and your willingness to maintain it.
You don’t need fancy tools or a big budget—just a few basic supplies like mulch, plants, or decorative covers. My favorite low-maintenance trick is layering mulch and ground cover to blend the stump into the surroundings naturally.
For something bolder, a simple stone border or painted design can transform it instantly.
By the end, your stump will look intentional, not like an afterthought. The best part? These methods work for any yard size, from tight urban spaces to sprawling suburban lots. Let’s make that stump work for you instead of against you.
Whether you go for a lush garden bed, a cozy seating nook, or a whimsical sculpture, the right approach will make your yard feel more cohesive and inviting. Here’s how to pick the perfect disguise for your space.
📚 In This Guide
- What you need
- Instructions
- Tips and common mistakes
- Wrapping up and next steps
What you need
- ● Safety gear: Work gloves (1 pair)
- ● Safety goggles (1 pair)
- ● Dust mask or respirator (1)
- ● Removal tools (if grinding down): Stump grinder (rental or purchase) or chainsaw + handsaw
- ● Shovel (1, for digging)
- ● Filling materials (pick one): Fast-setting concrete mix (20-30 lbs, depending on stump size)
- ● Wood chips or mulch (2-3 bags, 2 cubic feet each)
- ● Compost or topsoil (1-2 bags, 2 cubic feet each)
- ● Landscaping supplies: Landscape fabric (1 roll, 4-ft width)
- ● Gravel or decorative rocks (1-2 bags, 1 cubic foot each)
- ● Mulch (1-2 bags, 2 cubic feet each)
- ● Planting supplies (if adding greenery): Small shrubs, perennials, or ornamental grasses (2-4 plants, depending on stump size)
- ● Potting soil (1-2 bags, 2 cubic feet each)
- ● Mulch or bark chips (1 bag, 2 cubic feet)
- ○ Decorative options (optional but fun!): Terracotta pots (1-2, for plants)
- ● Solar-powered landscape lights (1-2)
- ● Garden stakes or trellis (1-2, for climbing plants)
- ● Paint or stain (for a faux "tree" look)
- ● Wooden planter box (to frame the stump)
- ● Water feature (small fountain or birdbath)
- ● Stepping stones (to create a pathway around the stump)
- ● DIY seating (like a stump-turned-bench with cushions!)
Step-by-Step instructions for transforming a tree stump into a garden feature
Turn that eyesore into an intentional focal point with these creative landscaping techniques.
🪴 Step 1: Assess the Stump and Choose Your Design Approach
First, examine your stump's size, shape, and condition. A small, intact stump (under 12 inches in diameter) works best for intricate designs, while larger ones need bold solutions. If the top is still attached, you can carve or paint it directly. For rotting stumps, you'll need to stabilize the base before decorating.
Decide whether you want a natural, rustic look or a more structured garden feature. Natural approaches include planting directly around the stump, while structured options might involve building a planter box or seating area. Sketch a rough design to visualize how elements will interact—this prevents costly mistakes later.
🌿 Step 2: Prepare the Base for Planting or Construction
Clear all debris and level the ground around the stump within a 2-foot radius. Use a shovel to remove weeds and loosen compacted soil. If the stump is unstable, reinforce it by filling any hollow sections with concrete or compacted soil. For a seating area, lay down landscape fabric to prevent weeds from sprouting through.
If you're creating a planter, build a wooden frame around the stump using 2x4 lumber, leaving space for soil and drainage. Line the inside with landscape fabric before adding your chosen planting mix. For a natural look, simply amend the existing soil with compost to improve drainage and fertility.
✂️ Step 3: Select and Plant Stump-Friendly Ground Cover or Perennials
Choose plants that thrive in shallow soil and can tolerate the stump's microclimate. Hostas, ferns, and ivy are excellent for shade, while sedum and ornamental grasses work well in sunny spots. For a bold statement, plant a single specimen like a small tree or large shrub directly beside the stump to draw attention away from it.
Dig holes twice as wide as the root ball but only 6-8 inches deep—shallow roots are key for stump planting. Space plants 12-18 inches apart to allow airflow and prevent competition. Water deeply after planting to settle the soil and encourage root contact.
🎨 Step 4: Add Finishing Touches for a Polished Look
For a natural camouflage, mulch heavily with 3-4 inches of wood chips or bark, extending slightly onto the stump itself. This softens the edges and blends the stump into the landscape. If you prefer a more structured look, paint the stump with outdoor-safe paint in a color that complements your garden palette.
Add decorative elements like solar-powered landscape lights, a small birdbath, or a bench to draw attention to the area. For a whimsical touch, carve simple designs into the stump's surface or wrap it with climbing plants like clematis. Always step back and evaluate the space—your goal is to create harmony, not another focal point.
⏰ Step 5: Maintain and Refresh the Design Seasonally
Check the area every 4-6 weeks to ensure plants are thriving and weeds aren't encroaching. Trim back overgrown foliage to maintain the design's integrity. If your stump is painted, touch up any chipped areas annually with outdoor paint. For planted designs, refresh mulch in early spring to maintain a neat appearance.
Adjust your design as needed—if a plant struggles, replace it with a more suitable species. Over time, the stump will blend seamlessly into the landscape, becoming a natural part of your garden rather than an eyesore. With seasonal care, your transformed stump will remain a striking feature for years to come.
Tips & tricks for transforming a tree stump into a garden feature
Real talk: That stump isn't just an eyesore—it's a blank canvas for creativity. Here's how to turn it into something that actually enhances your landscape.
Stump Condition Check: Before you start, assess whether your stump is stable or rotting. If it's hollow or crumbling, reinforce the base with concrete or compacted soil (as mentioned in Step 2) to prevent collapse during planting or construction. I learned this the hard way after watching a newly planted design topple during a rainstorm—now I always check for structural integrity first.
Plant Selection Strategy: The shallow soil around stumps creates unique growing conditions. In Step 3, when choosing plants, prioritize varieties that thrive in limited soil depth and can tolerate the stump's microclimate. Hostas and ferns are my go-to shade plants, while sedum and ornamental grasses excel in sunny spots. For a dramatic effect, consider planting a single specimen like a small tree or large shrub directly beside the stump to draw attention away from it.
Mulching Mastery: The 3-4 inches of mulch specified in Step 4 isn't just decorative—it's essential for moisture retention and weed suppression. Extend the mulch slightly onto the stump itself to create a seamless transition. Pro tip: Use a mix of wood chips and bark for the best aesthetic and functional results. This technique creates that "natural camouflage" that makes the stump disappear into the landscape.
Seasonal Maintenance Plan: The 4-6 week maintenance check in Step 5 is non-negotiable. Set a calendar reminder to inspect your design during spring, summer, and fall. Look for signs of plant stress, weed encroachment, or paint chipping. I've found that addressing issues early prevents them from becoming major problems later. Think of it as preventative landscaping—like giving your garden a checkup.
Pro Tips for Hide A Tree Stump In Front Yard
- Real talk: That stump isn't just an eyesore—it's a blank canvas for creativity. Here's how to turn it into something ...
- Stump Condition Check: Before you start, assess whether your stump is stable or rotting. If it's hollow or crumbling,...
- Plant Selection Strategy: The shallow soil around stumps creates unique growing conditions. In Step 3, when choosing ...
Frequently asked questions
Got questions about hiding that unsightly tree stump? You’re not alone! Here are some of the most common concerns—and straightforward answers—to help you tackle the project with confidence.
How soon after removing a tree can I hide the stump?
The best time to disguise a stump is immediately after removal—before it starts to rot or sprout new shoots. If it’s already been a few weeks, you can still hide it, but you may need to clean up any regrowth or decay first. Plan your garden feature while the stump is fresh for a seamless look!
What’s the cheapest way to hide a tree stump in my front yard?
For budget-friendly options, try mulching (covering it with wood chips or bark), planting fast-growing ground cover (like clover or creeping thyme), or even a simple raised garden bed filled with annuals. Avoid expensive hardscape solutions unless you’re ready to invest—nature does the trick for less!
Will hiding a stump attract pests or mold?
If the stump is left untreated, it can absolutely attract termites, fungi, or even rodents. To prevent this, seal the cut surface with wood sealant or paint before covering it, and choose breathable materials (like gravel or plants) to avoid moisture buildup. A well-maintained stump disguise stays pest-free!
Can I turn a stump into a planter without it rotting?
Yes! Line the hollowed-out stump with a plastic liner or waterproof membrane to prevent rot, then fill it with soil and your favorite plants. For extra durability, use a stump grinder first to reduce its size, making it easier to work with. Just avoid heavy, waterlogged plants like ferns—they’ll speed up decay.
What if my DIY stump disguise fails? How do I fix it?
No worries! If your mulch washes away or plants struggle, replenish the soil and add fresh mulch. For structural issues (like a wobbly stump planter), reinforce it with concrete footings or landscape fabric. If mold or pests appear, treat the stump with vinegar or fungicide before covering it again. Most fixes are quick and easy!
Wrapping up and next steps
Hiding a tree stump in your front yard doesn’t have to be a chore—it’s your chance to transform an eyesore into an eye-catching garden feature! Whether you choose a cozy seating nook, a whimsical fairy garden, or a sleek planter, the key is creativity and patience.
With the right materials and a little elbow grease, you’ll create a space that feels intentional and inviting.
Ready to take the next step? Pick your favorite design and start gathering supplies today! 🌱✨ Your front yard (and your neighbors) will thank you.